> ## Documentation Index
> Fetch the complete documentation index at: https://fillout.com/help/llms.txt
> Use this file to discover all available pages before exploring further.
# Sync file uploads to Dropbox with a form
> Upload file submissions automatically to a Dropbox folder with your Fillout form. Optionally set a dynamic file path to categorize submissions into nested folders.
## What is Dropbox?
[Dropbox](https://www.dropbox.com/) allows users to store documents, photos, videos, and more in your personal cloud storage space, eliminating the need for physical storage devices.
## Video tutorial
## How it works
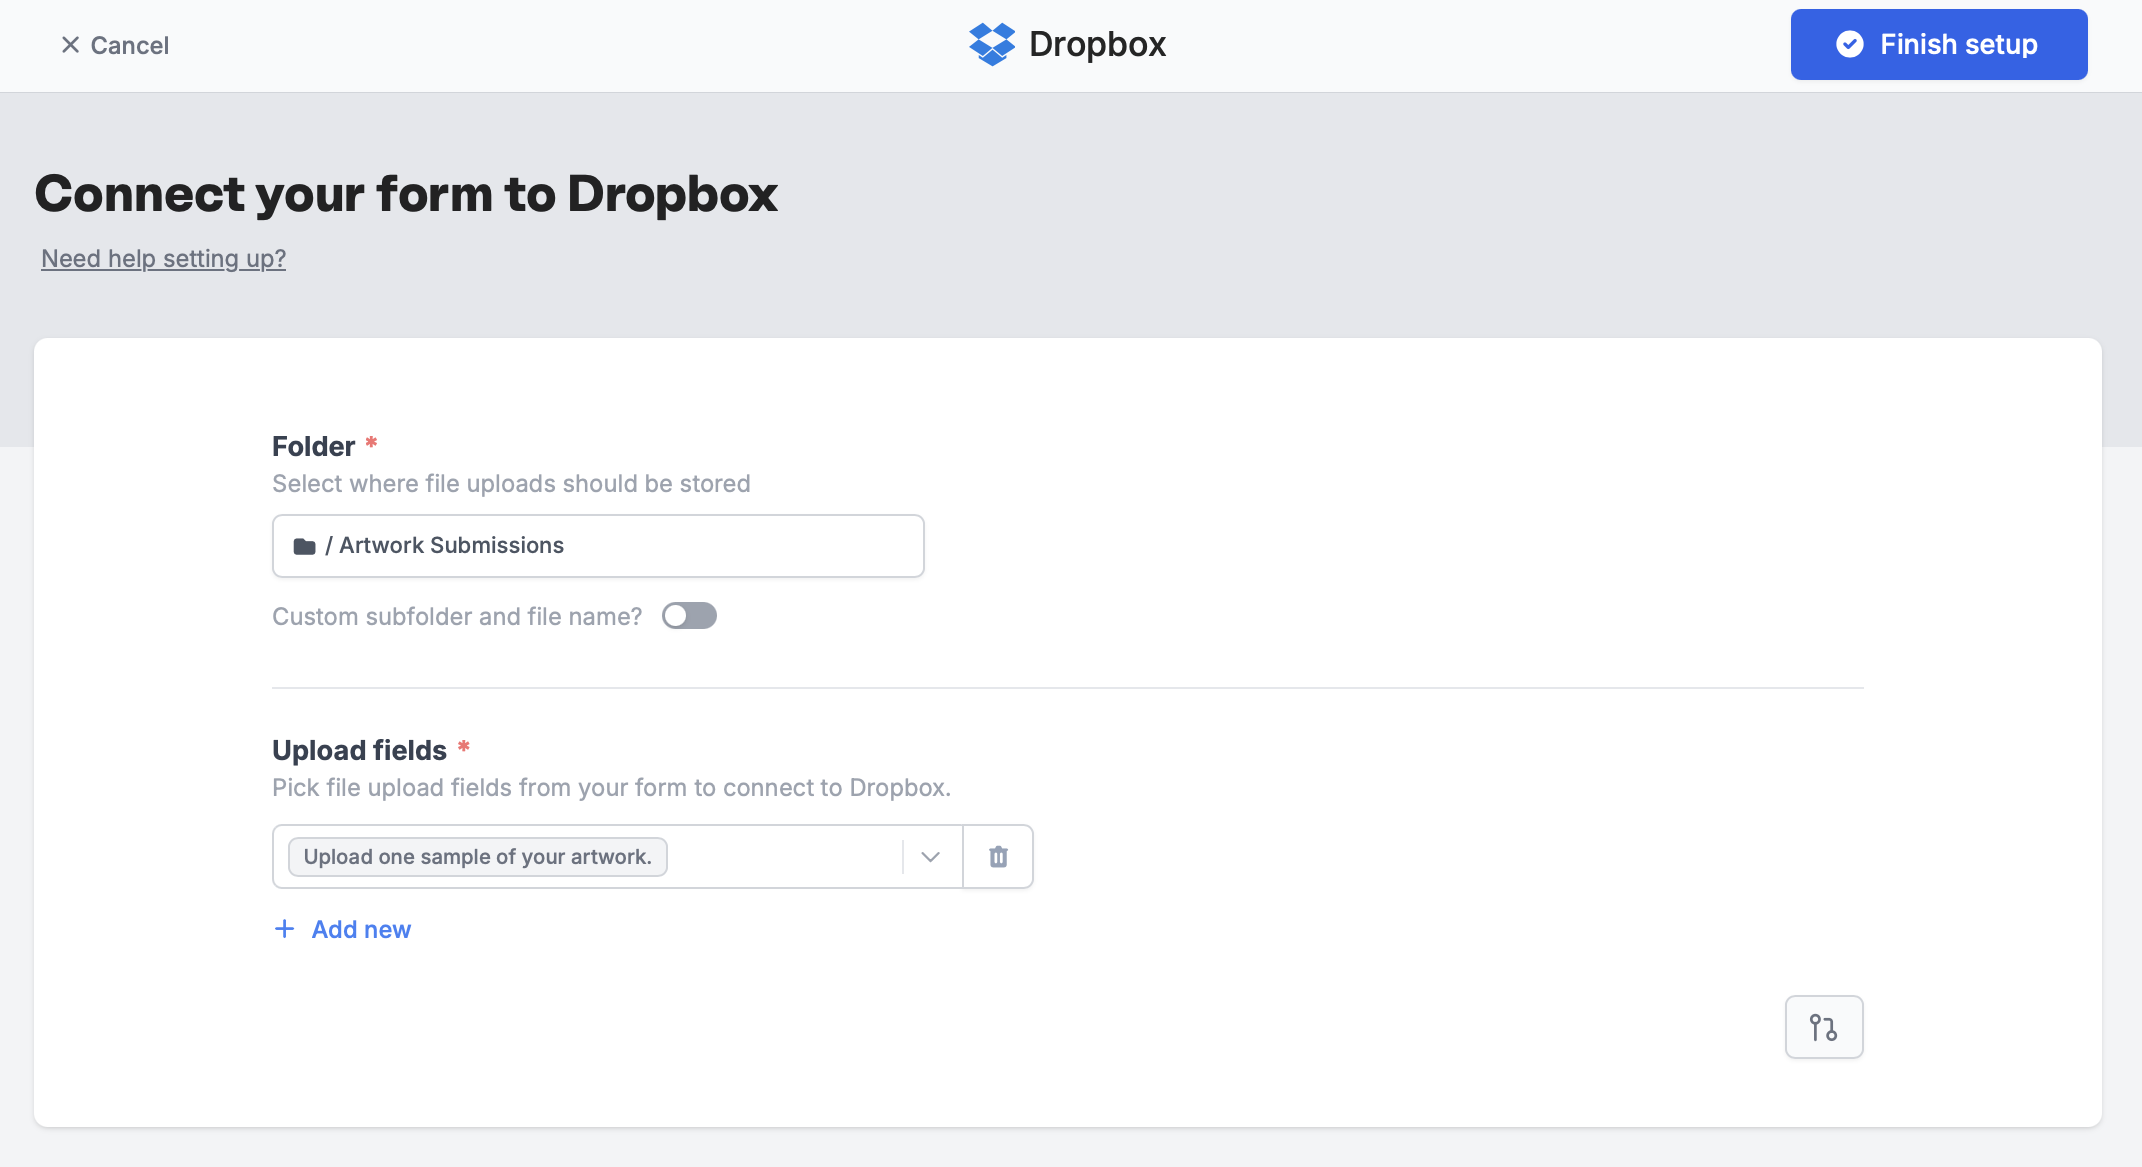
Go to `Integrate` from the top menu and click `Dropbox`.
This integration is only applicable to **file uploads**. When creating your form, make sure you have at least one file upload field.
Add a name for your connection, then `Connect to Dropbox`.
Choose which **Folder** you would like to store the files in. Under **upload fields**, `+ Add new` and select a **file upload field** from your form.
Once everything is set, click `Finish setup` on the upper right corner. That's it! Your form's good to go. `Publish` to reflect changes and share the link.
## Add a dynamic file path
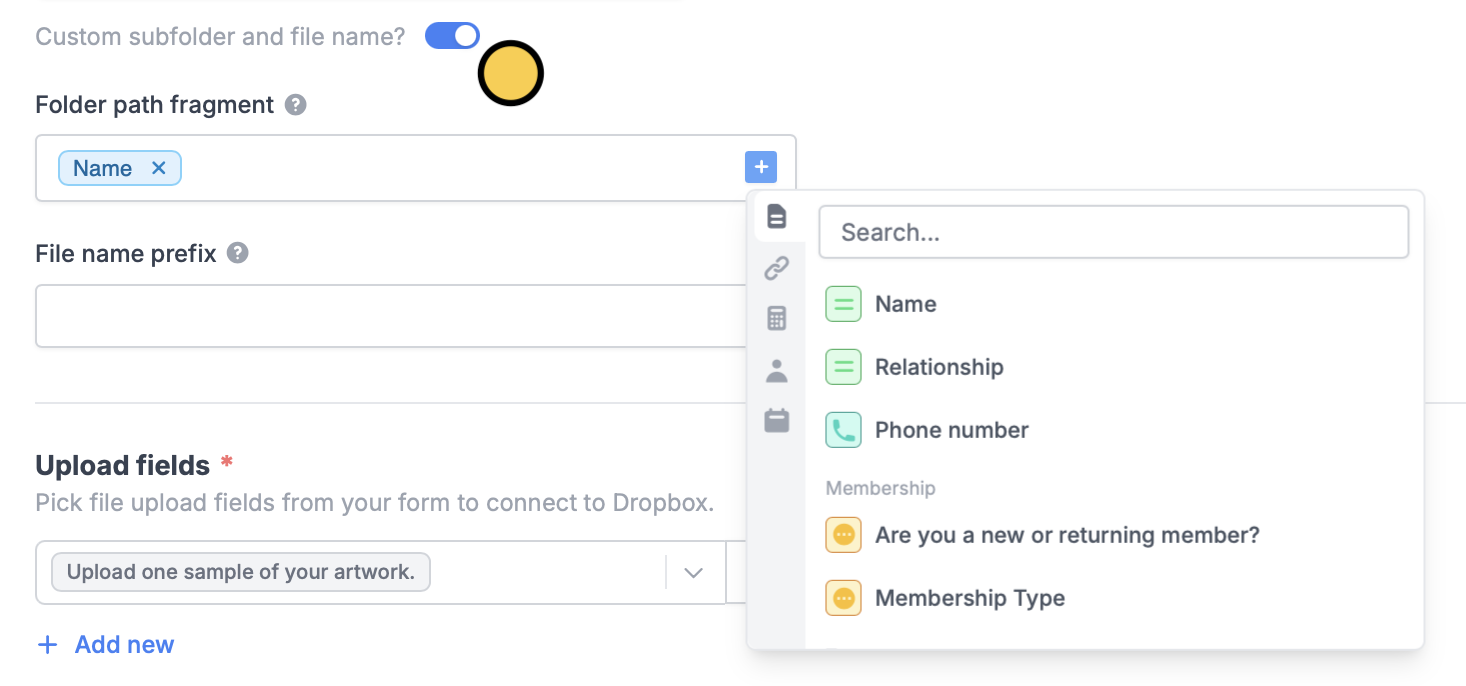
Categorize file uploads into folders based on respondent input. Toggle the `Custom subfolder and file name?` switch, then select a **Folder path fragment**. Enter text or click to [map a field](https://www.fillout.com/help/additional-integration-mappings#how-to-map-fields-manually) in your form. Let's choose "Name" for this example.
Now, when a respondent submits a form, their file upload will be stored in a folder under their Name. This means every respondent will have their own folder.
## Add subfolders
You can add a subfolder by typing **/** followed by a name of your choice.
## Personalized filename prefix
Similar to the steps above, enter text or click to [reference a form field](https://www.fillout.com/help/additional-integration-mappings#how-to-map-fields-manually).
## Related articles
Automatically upload files with a form.
Automatically upload files with a form.
Use a form to create leads and more.

 Now, when a respondent submits a form, their file upload will be stored in a folder under their Name. This means every respondent will have their own folder.
## Add subfolders
You can add a subfolder by typing **/** followed by a name of your choice.
Now, when a respondent submits a form, their file upload will be stored in a folder under their Name. This means every respondent will have their own folder.
## Add subfolders
You can add a subfolder by typing **/** followed by a name of your choice.
 ## Personalized filename prefix
Similar to the steps above, enter text or click
## Personalized filename prefix
Similar to the steps above, enter text or click 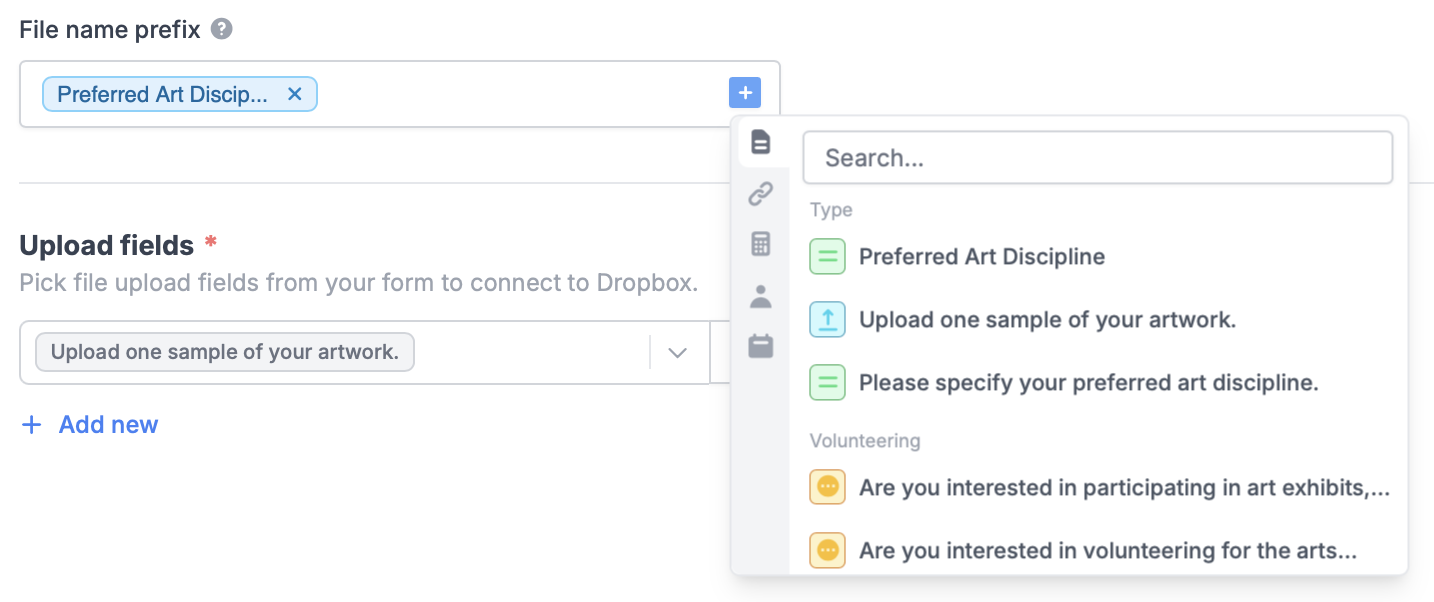 ## Related articles