> ## Documentation Index
> Fetch the complete documentation index at: https://fillout.com/help/llms.txt
> Use this file to discover all available pages before exploring further.
# Create a dynamic payment page on your form
> Make a checkout page where the product selection and price automatically update for each customer based on their order.
export const SupportBanner = () => {
const titleId = React.useId();
return ;
};
## How to make your payment page dynamic
First, click `Logic` on the bottom right corner to add your **Calculations**. Check out this [quick guide](https://www.fillout.com/help/calculations#add-a-calculation).
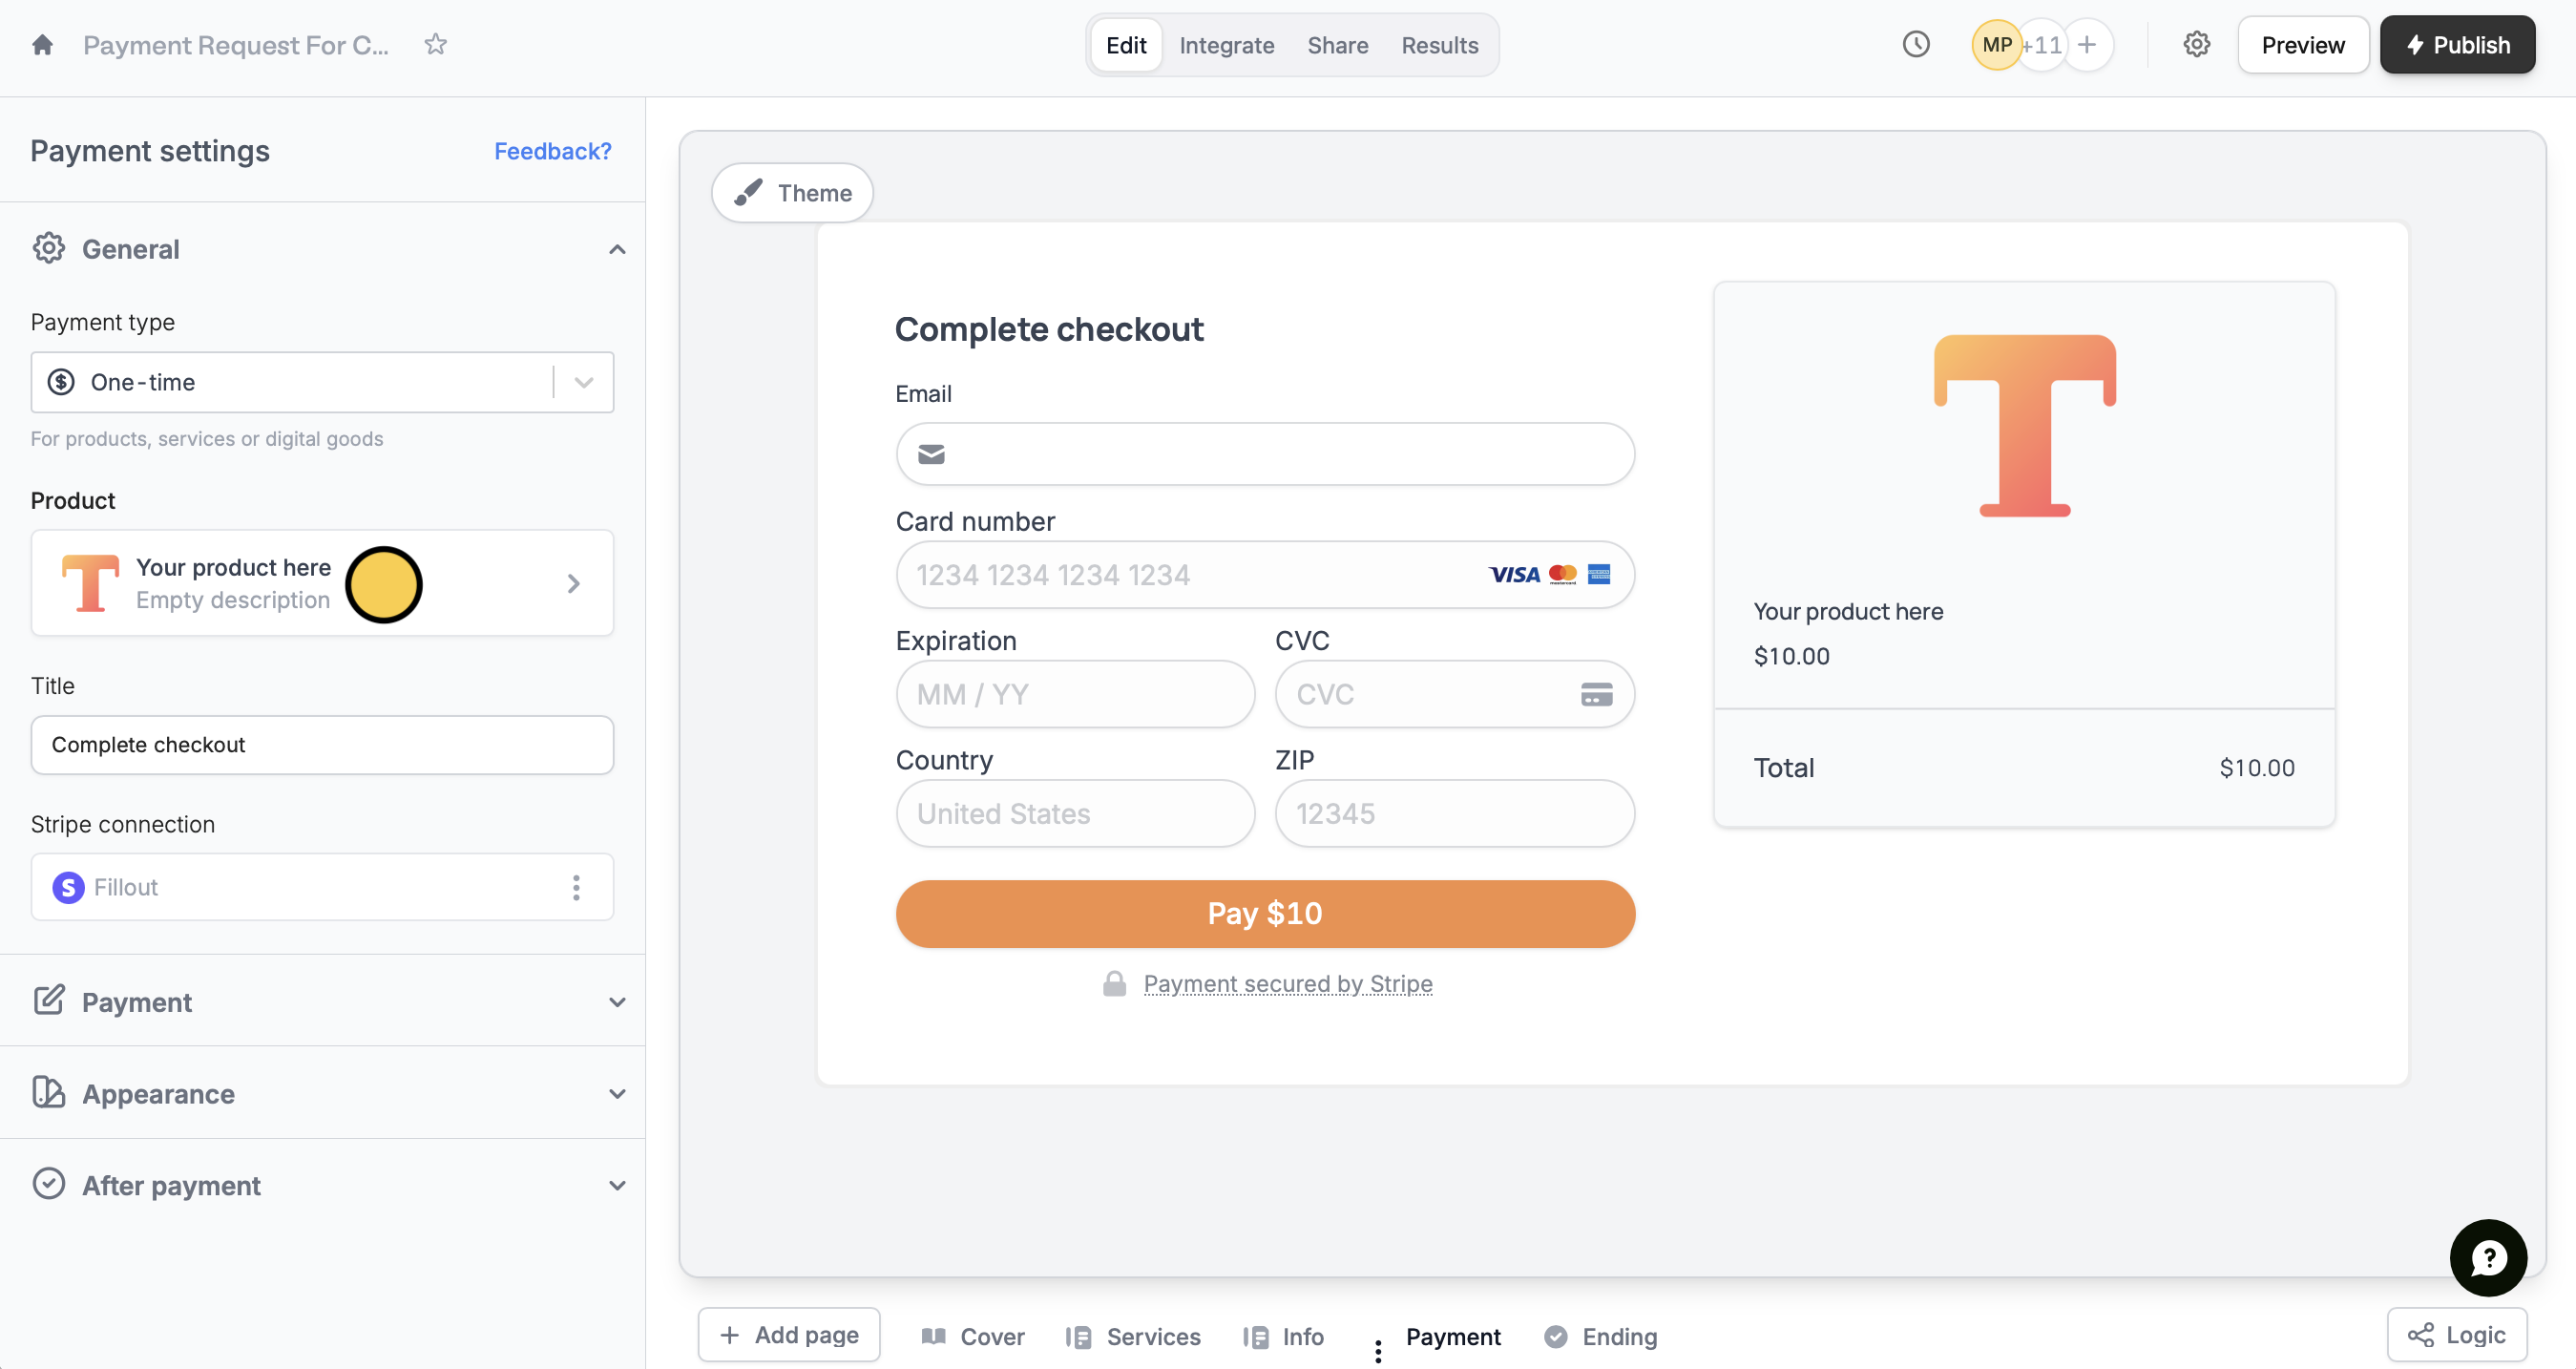
Go to your form’s [**Payment**](/help/payment-page) [page](/help/payment-page) or make one if you haven’t yet. Add `Your product here` and its description if you prefer.
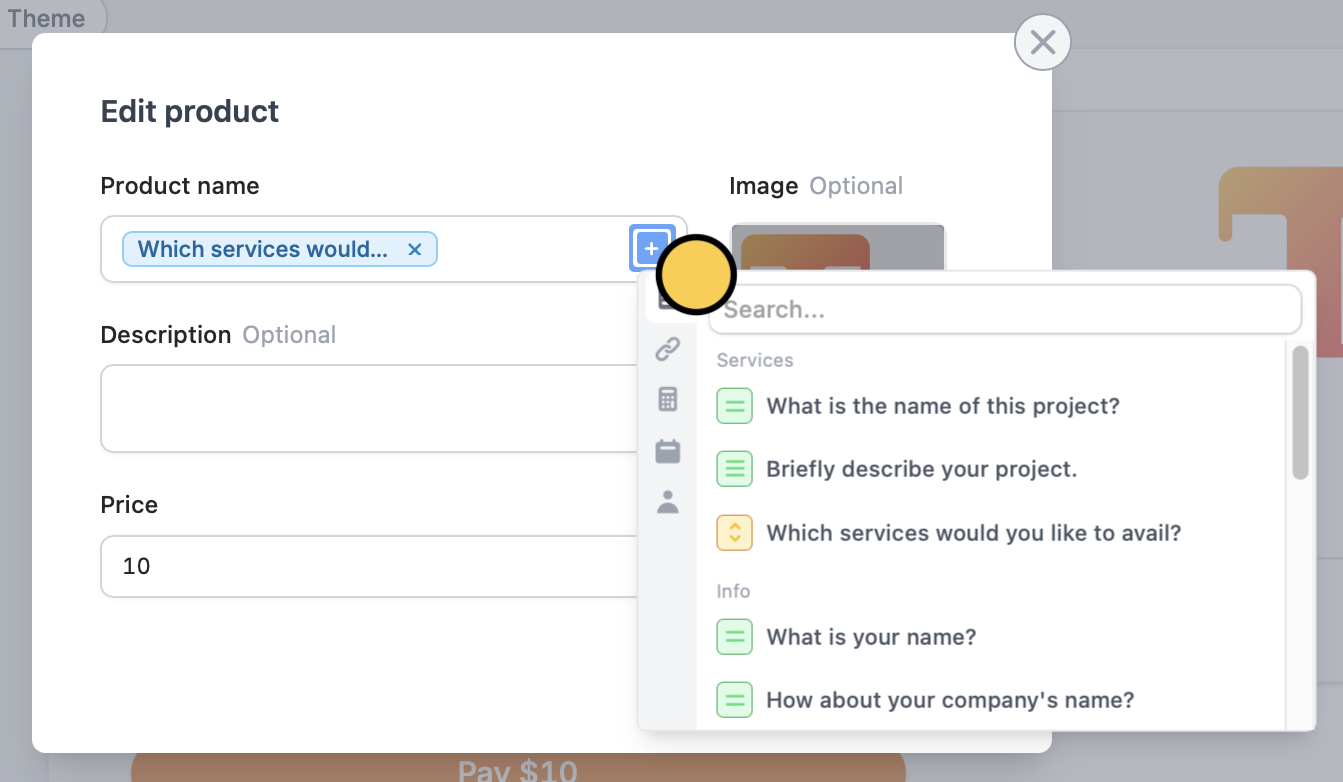
 Under **Product name**, type **@** or click , then select the question or field where you ask customers to choose products or services.
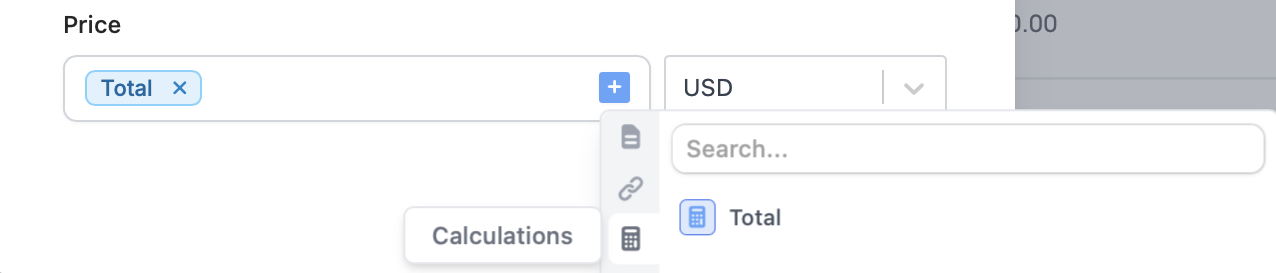
 Do the same for the **Price**, but this time, click to select the appropriate field.
 `Preview` your form through the upper right corner to test it, then `Publish` and share the link or embed on your website.
That’s it! Now, every time someone places an order, the **Product name** and **Price** will change depending on their choices.
You can test your live form without getting charged. Create a 100% off coupon in Stripe, then enable the "[Discount Codes](https://www.fillout.com/help/payment-page#add-discount-codes)" option to apply it during checkout. Once testing is done, just toggle the discount codes back off.
## Related articles
Collect payments via card, US bank account, Affirm, and Stripe.
Calculate prices, compute scores, and more.
`Preview` your form through the upper right corner to test it, then `Publish` and share the link or embed on your website.
That’s it! Now, every time someone places an order, the **Product name** and **Price** will change depending on their choices.
You can test your live form without getting charged. Create a 100% off coupon in Stripe, then enable the "[Discount Codes](https://www.fillout.com/help/payment-page#add-discount-codes)" option to apply it during checkout. Once testing is done, just toggle the discount codes back off.
## Related articles
Collect payments via card, US bank account, Affirm, and Stripe.
Calculate prices, compute scores, and more.