> ## Documentation Index
> Fetch the complete documentation index at: https://fillout.com/help/llms.txt
> Use this file to discover all available pages before exploring further.

# Use URL parameters in form embeds

> Pass URL parameters (hidden fields) to your embedded Fillout forms to personalize text, track UTM campaigns, or track unique submissions for different respondents.

## Overview

Passing data to your embedded Fillout form can be used to:

* Personalize text on your form [via answer piping](/answer-piping)
* Track UTM campaigns
* [Update user information based on an ID](/update-forms)
* Much more!

## Pass dynamic URL parameters

<Steps>
  <Step title="Register URL parameters (if you haven’t yet)">
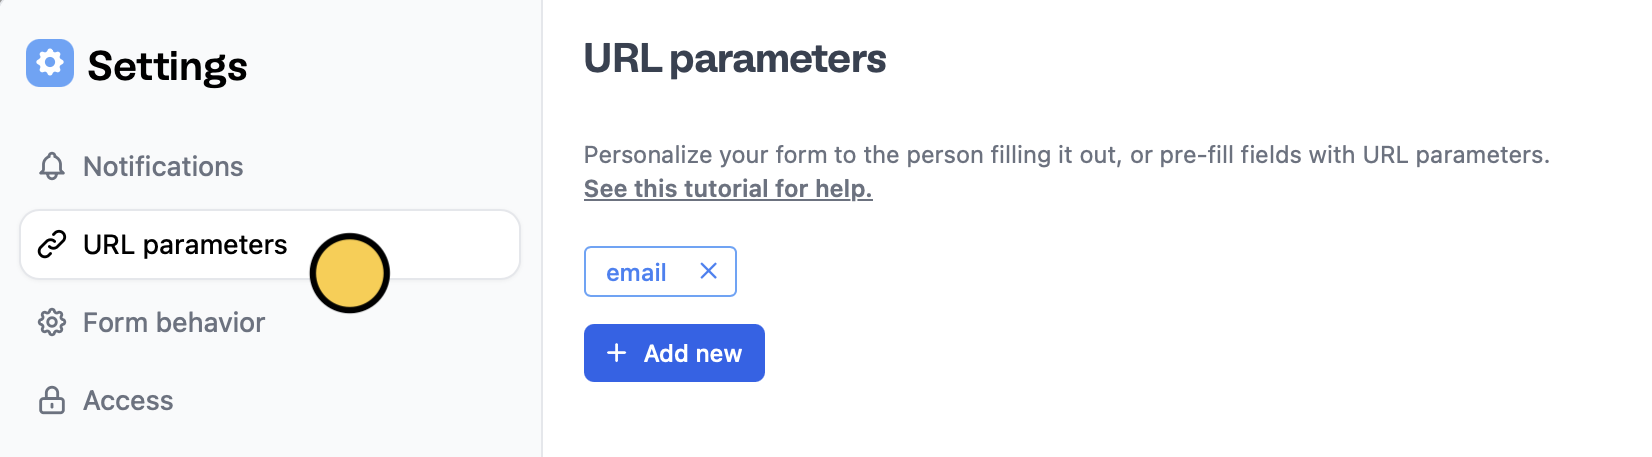
    Add your parameter in the `Settings` page of your form. More information [here](/url-parameters).

    <img src="https://mintcdn.com/fillout-005a867b/-FxY044VaxOfLQSj/images/Screenshot2025-12-01at6.03.03PM.png?fit=max&auto=format&n=-FxY044VaxOfLQSj&q=85&s=9cd6c2ba0e90b8f9c5286a7b8be263e0" alt="Screenshot 2025-12-01 at 6.03.03 PM.png" title="Screenshot 2025-12-01 at 6.03.03 PM.png" style={{ width:"62%" }} width="1652" height="457" data-path="images/Screenshot2025-12-01at6.03.03PM.png" />
  </Step>

  <Step title="Paste the code">
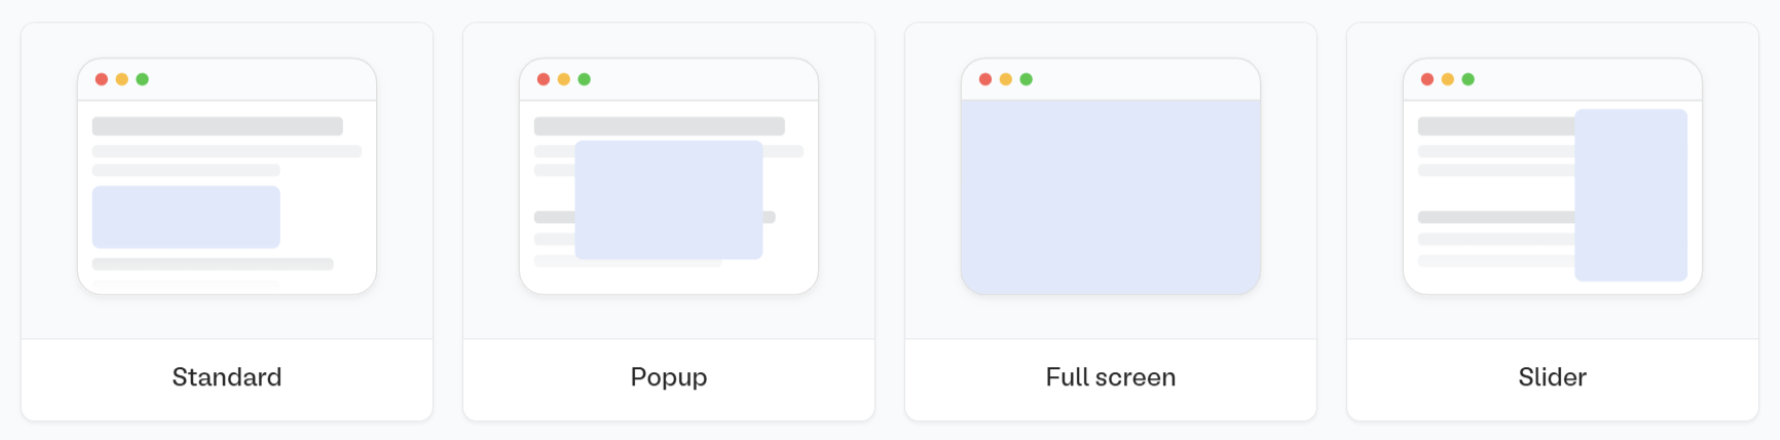
    Click `Share` on top and select one of the **Embed options** followed by `Get the code` in the popup. Then paste into your website builder or HTML.

    <img src="https://mintcdn.com/fillout-005a867b/8xPSE_gltIWkl-pC/images/image.png?fit=max&auto=format&n=8xPSE_gltIWkl-pC&q=85&s=7dbcd6fa7b9a41bd1cbd1163d7f11065" alt="image.png" title="image.png" style={{ width:"84%" }} width="1780" height="440" data-path="images/image.png" />

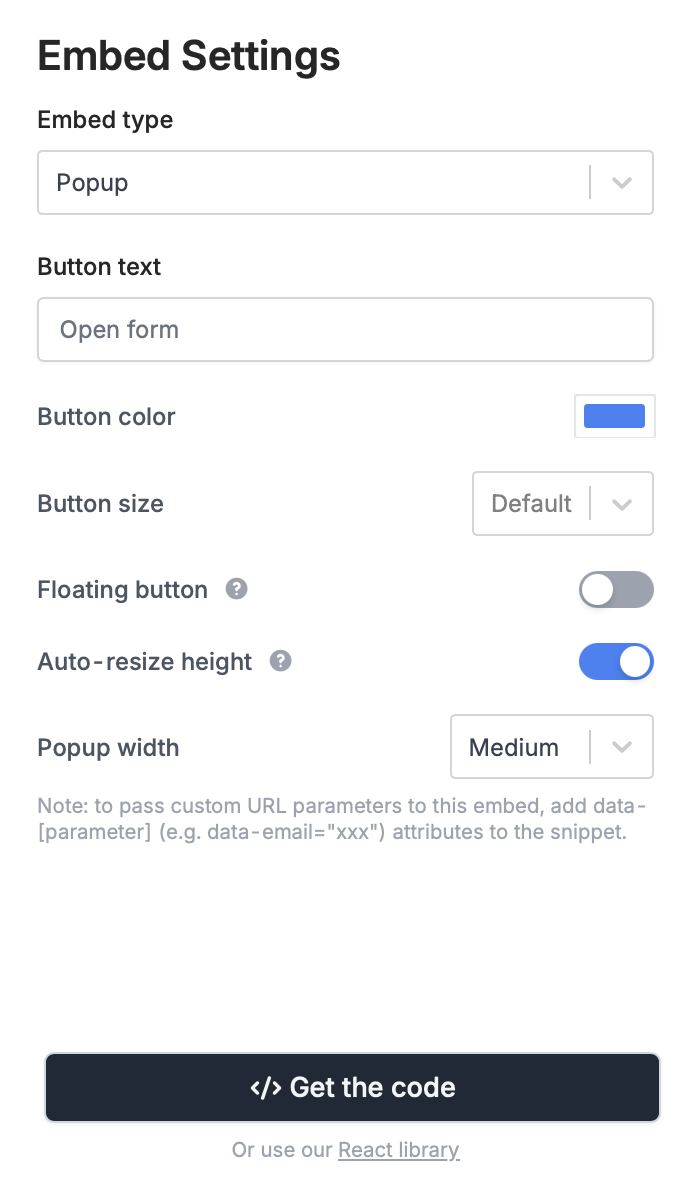
    You can optionally customize how the embed and button will look.

    <img src="https://mintcdn.com/fillout-005a867b/-FxY044VaxOfLQSj/images/Screenshot2025-12-01at6.06.43PM.png?fit=max&auto=format&n=-FxY044VaxOfLQSj&q=85&s=c0fc755021a6f40fdc2c6dd713ed9fd8" alt="Screenshot 2025-12-01 at 6.06.43 PM.png" title="Screenshot 2025-12-01 at 6.06.43 PM.png" style={{ width:"52%" }} width="700" height="1188" data-path="images/Screenshot2025-12-01at6.06.43PM.png" />
  </Step>

  <Step title="Add data attributes">
    In the Embed code, add data attributes for each URL parameter. For example, if you’re embedding this form on your site which is a Facebook-related campaign, and you have a URL parameter of `ref`, you can use `data-ref="Facebook"`. Your embedding code will look something like this:

    ```html theme={null}
    <div data-fillout-id="cwb3NdqFmJus" data-fillout-embed-type="standard" style="width:100%;height:500px;" data-fillout-inherit-parameters data-fillout-dynamic-resize data-ref="Facebook"></div><script src="https://server.fillout.com/embed/v1/"></script>
    ```

    <Note>
      Embeds will automatically inherit URL parameters from the parent page that they’re on, so if your main site already has these, you simply need to register the parameter in your form to use it.
    </Note>
  </Step>

  <Step title="Publish">
    Once everything is set, click `Publish` in the upper right corner.
  </Step>
</Steps>

## Related articles

<CardGroup cols={3}>
  <Card color="#FFC738" icon="brackets-curly" iconType="regular" href="/url-parameters" title="URL Parameters">
    Pass URL parameters to your embeds to track data.
  </Card>

  <Card color="#FFC738" icon="arrow-rotate-right" iconType="regular" href="/airtable-update-form" title="Update existing Airtable records">
    Edit existing records and pre-fill fields.
  </Card>

  <Card color="#FFC738" icon="arrow-rotate-right" iconType="regular" href="/notion-update-form" title="Update existing Notion pages">
    Edit existing pages and pre-fill fields.
  </Card>
</CardGroup>