> ## Documentation Index
> Fetch the complete documentation index at: https://fillout.com/help/llms.txt
> Use this file to discover all available pages before exploring further.
# Ending Page
> Show users a thank you page, redirect them to another site or form, or allow them to fill out the form again.
export const SupportBanner = () => {
const titleId = React.useId();
return ;
};
## How to add an ending page
An **Ending** page is added by default when you create a new form. You can add more ending pages by clicking `+ Add page` followed by **Ending**.
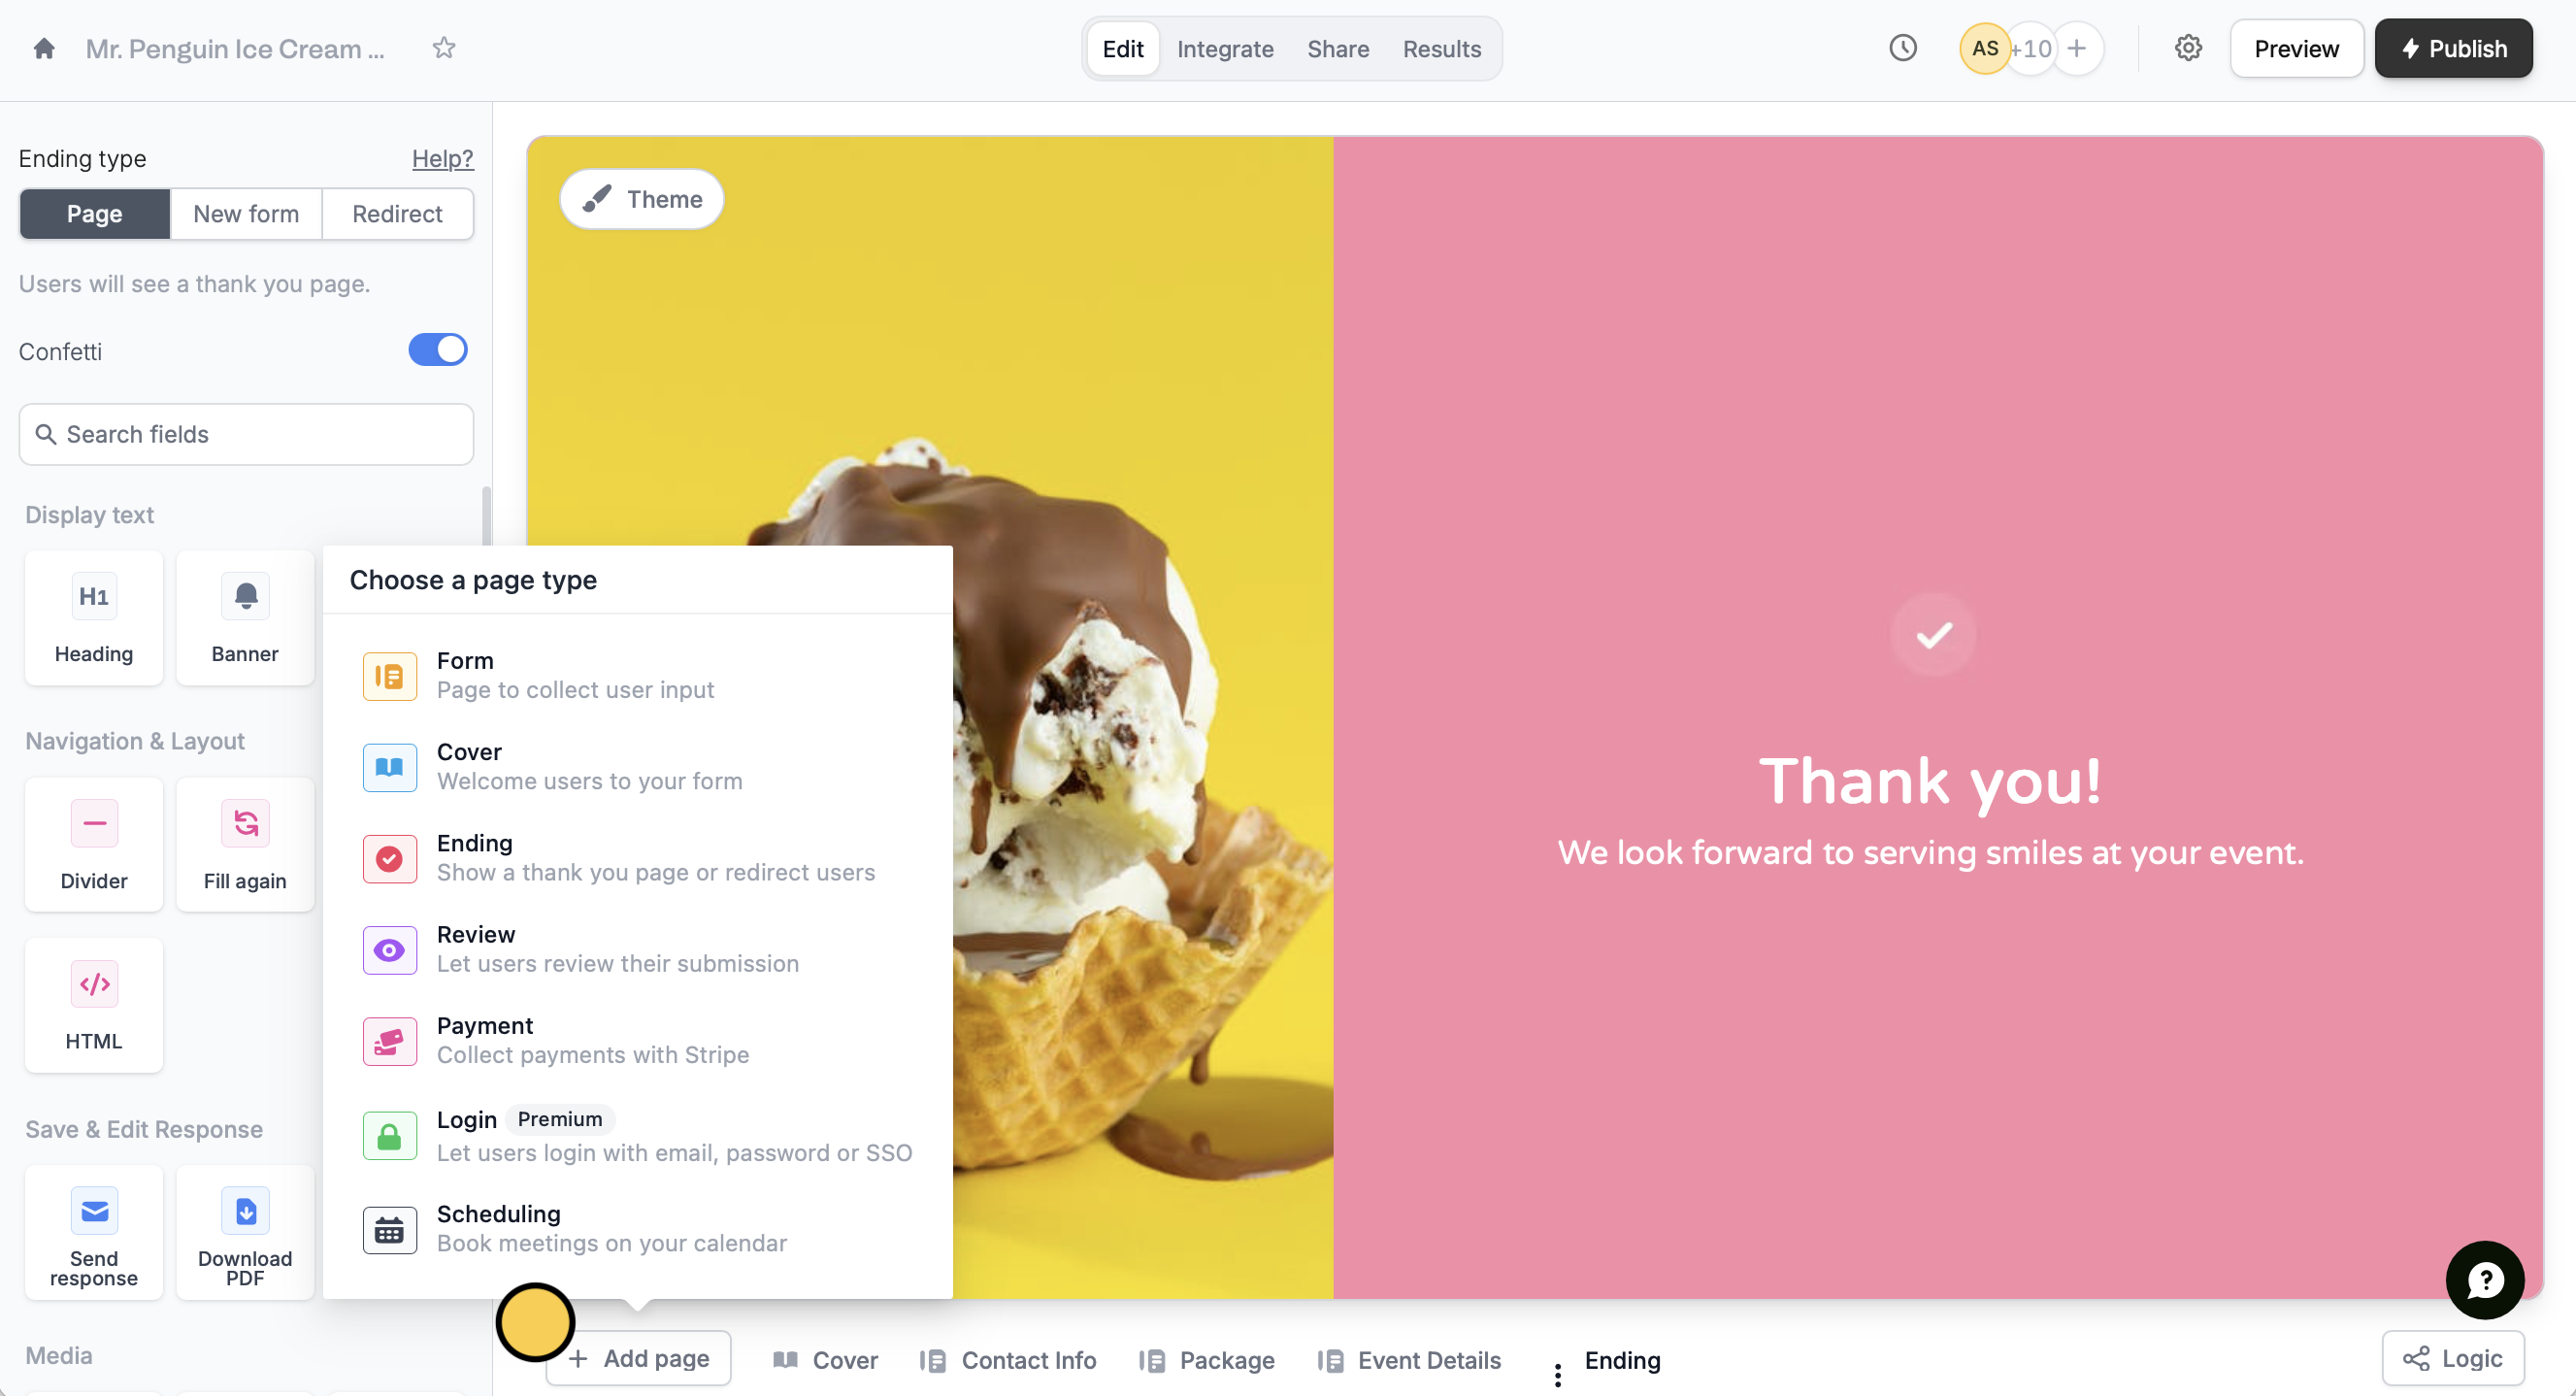 Use [page logic](/help/page-logic) to send different users to different ending pages.
## **Ending page types**
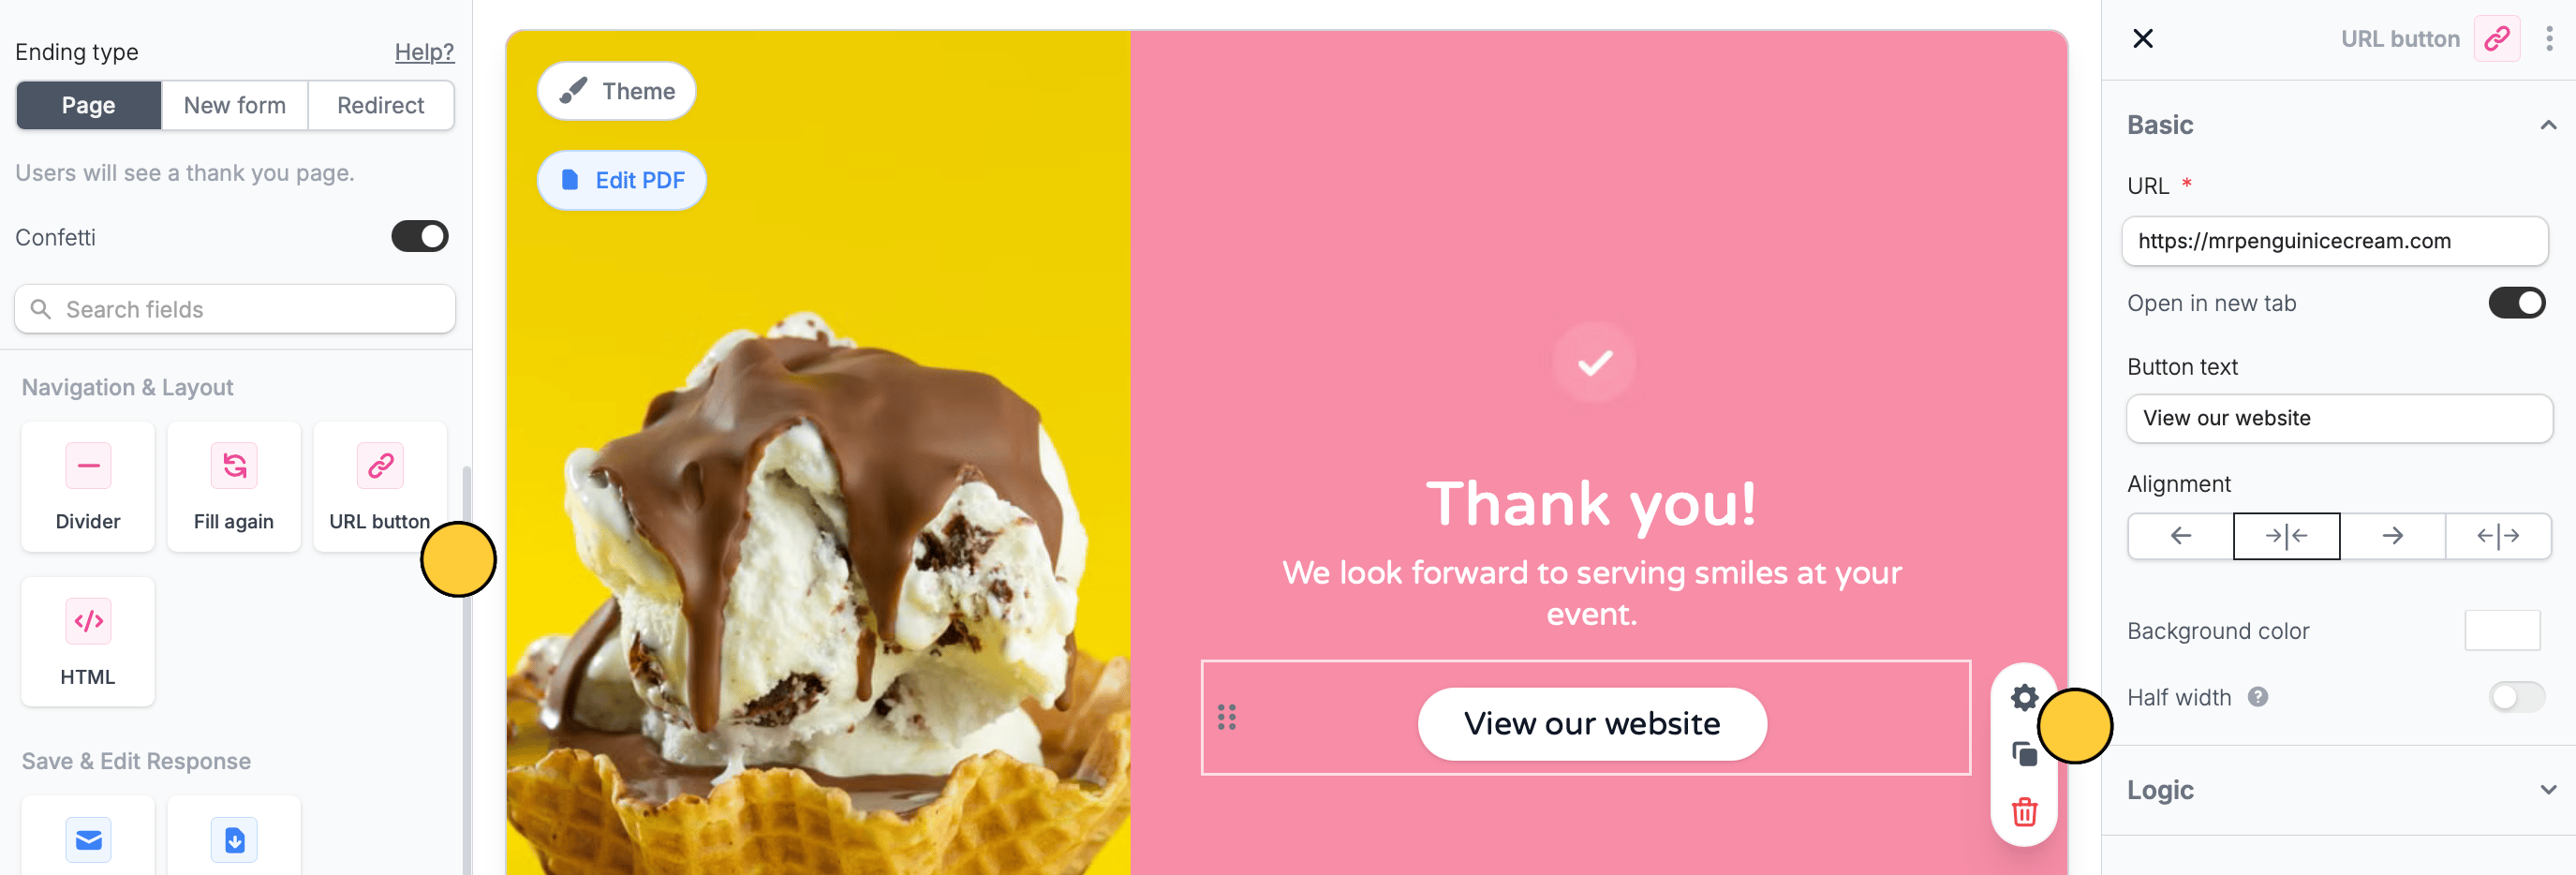
In the left-hand panel, there are three types of ending pages you can choose from: **Page**, **New form** and **Redirect**.
### **Page (default)**
The default ending page thanks respondents for submitting a form. Users can customize the thank-you text, add images, banners, and other fields to display upon submission via the left-hand panel or by highlighting text.
### **New form**
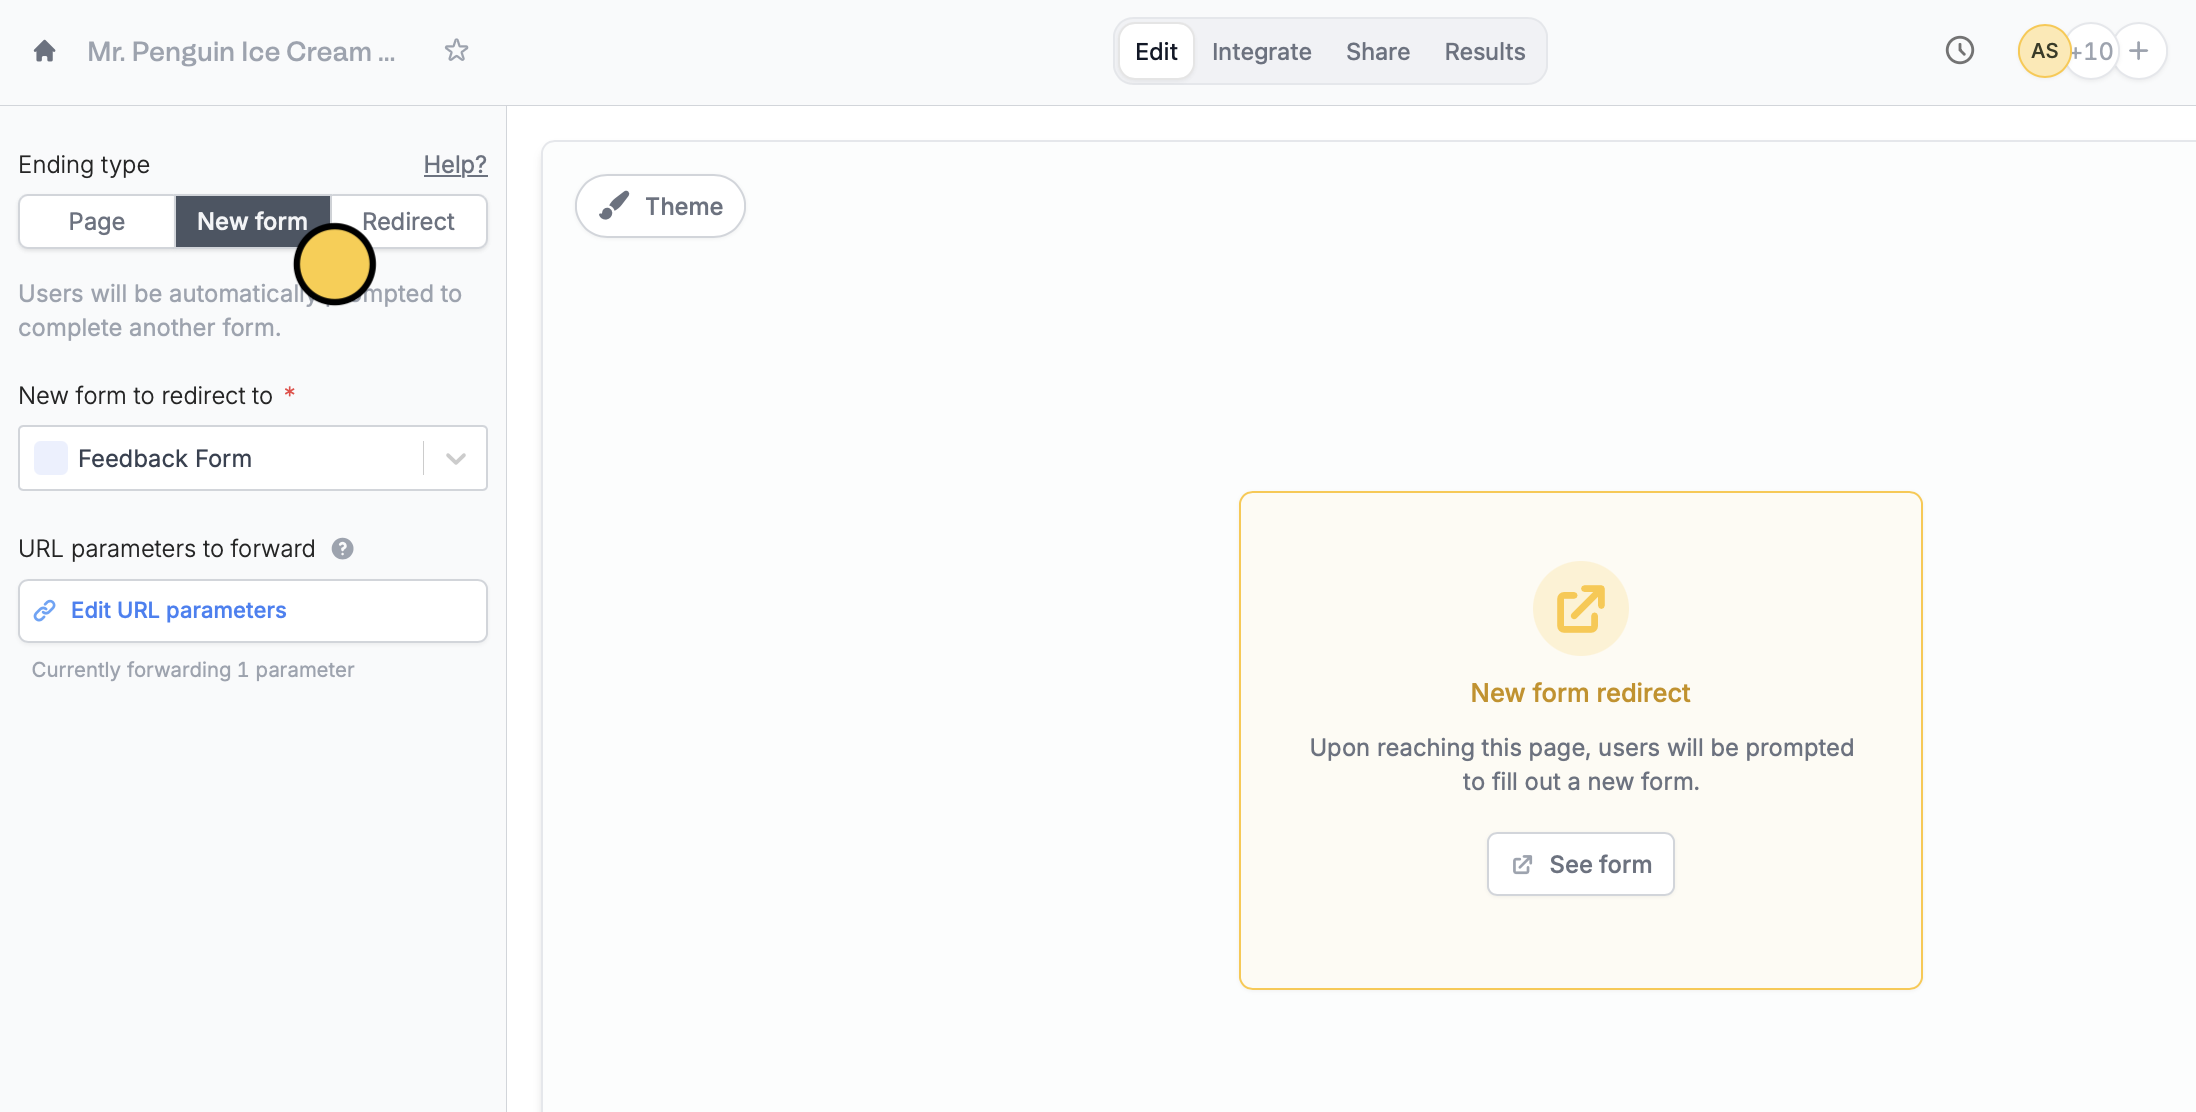
This ending type lets users redirect respondents to another form and optionally pass URL parameters, such as carrying over the respondent's name or email to the next form. See [here](/help/combine-and-repeat-forms) for more information.
Use [page logic](/help/page-logic) to send different users to different ending pages.
## **Ending page types**
In the left-hand panel, there are three types of ending pages you can choose from: **Page**, **New form** and **Redirect**.
### **Page (default)**
The default ending page thanks respondents for submitting a form. Users can customize the thank-you text, add images, banners, and other fields to display upon submission via the left-hand panel or by highlighting text.
### **New form**
This ending type lets users redirect respondents to another form and optionally pass URL parameters, such as carrying over the respondent's name or email to the next form. See [here](/help/combine-and-repeat-forms) for more information.
 ### **Redirect**
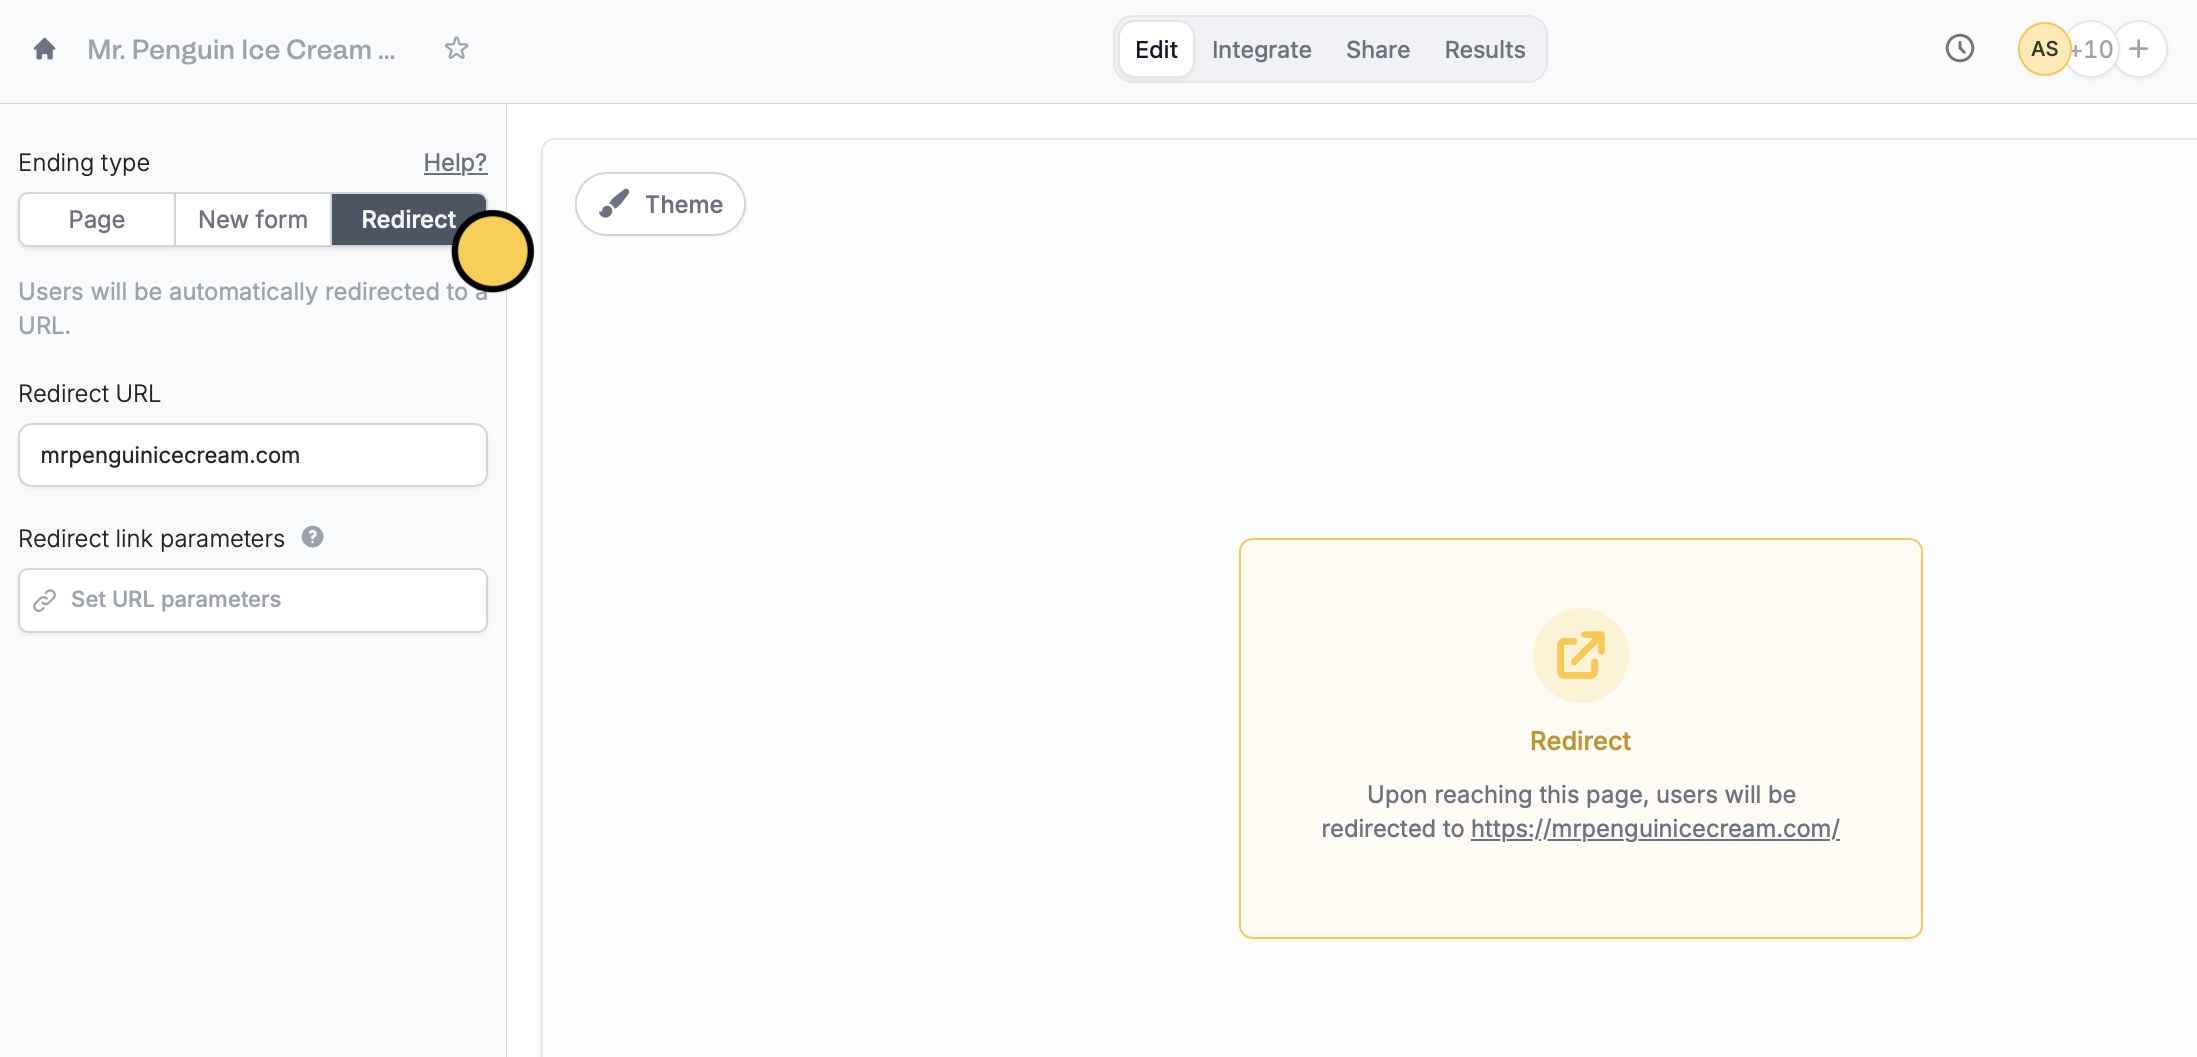
This redirects users to another link like your homepage or portal after form submission, skipping the default Fillout ending page.
### **Redirect**
This redirects users to another link like your homepage or portal after form submission, skipping the default Fillout ending page.
 This feature is available on **Starter**, **Pro**, **Business**, and **Enterprise** plans. Learn more about our pricing plans and advanced features [**here**](https://www.fillout.com/pricing).
## Let respondents fill out your form again
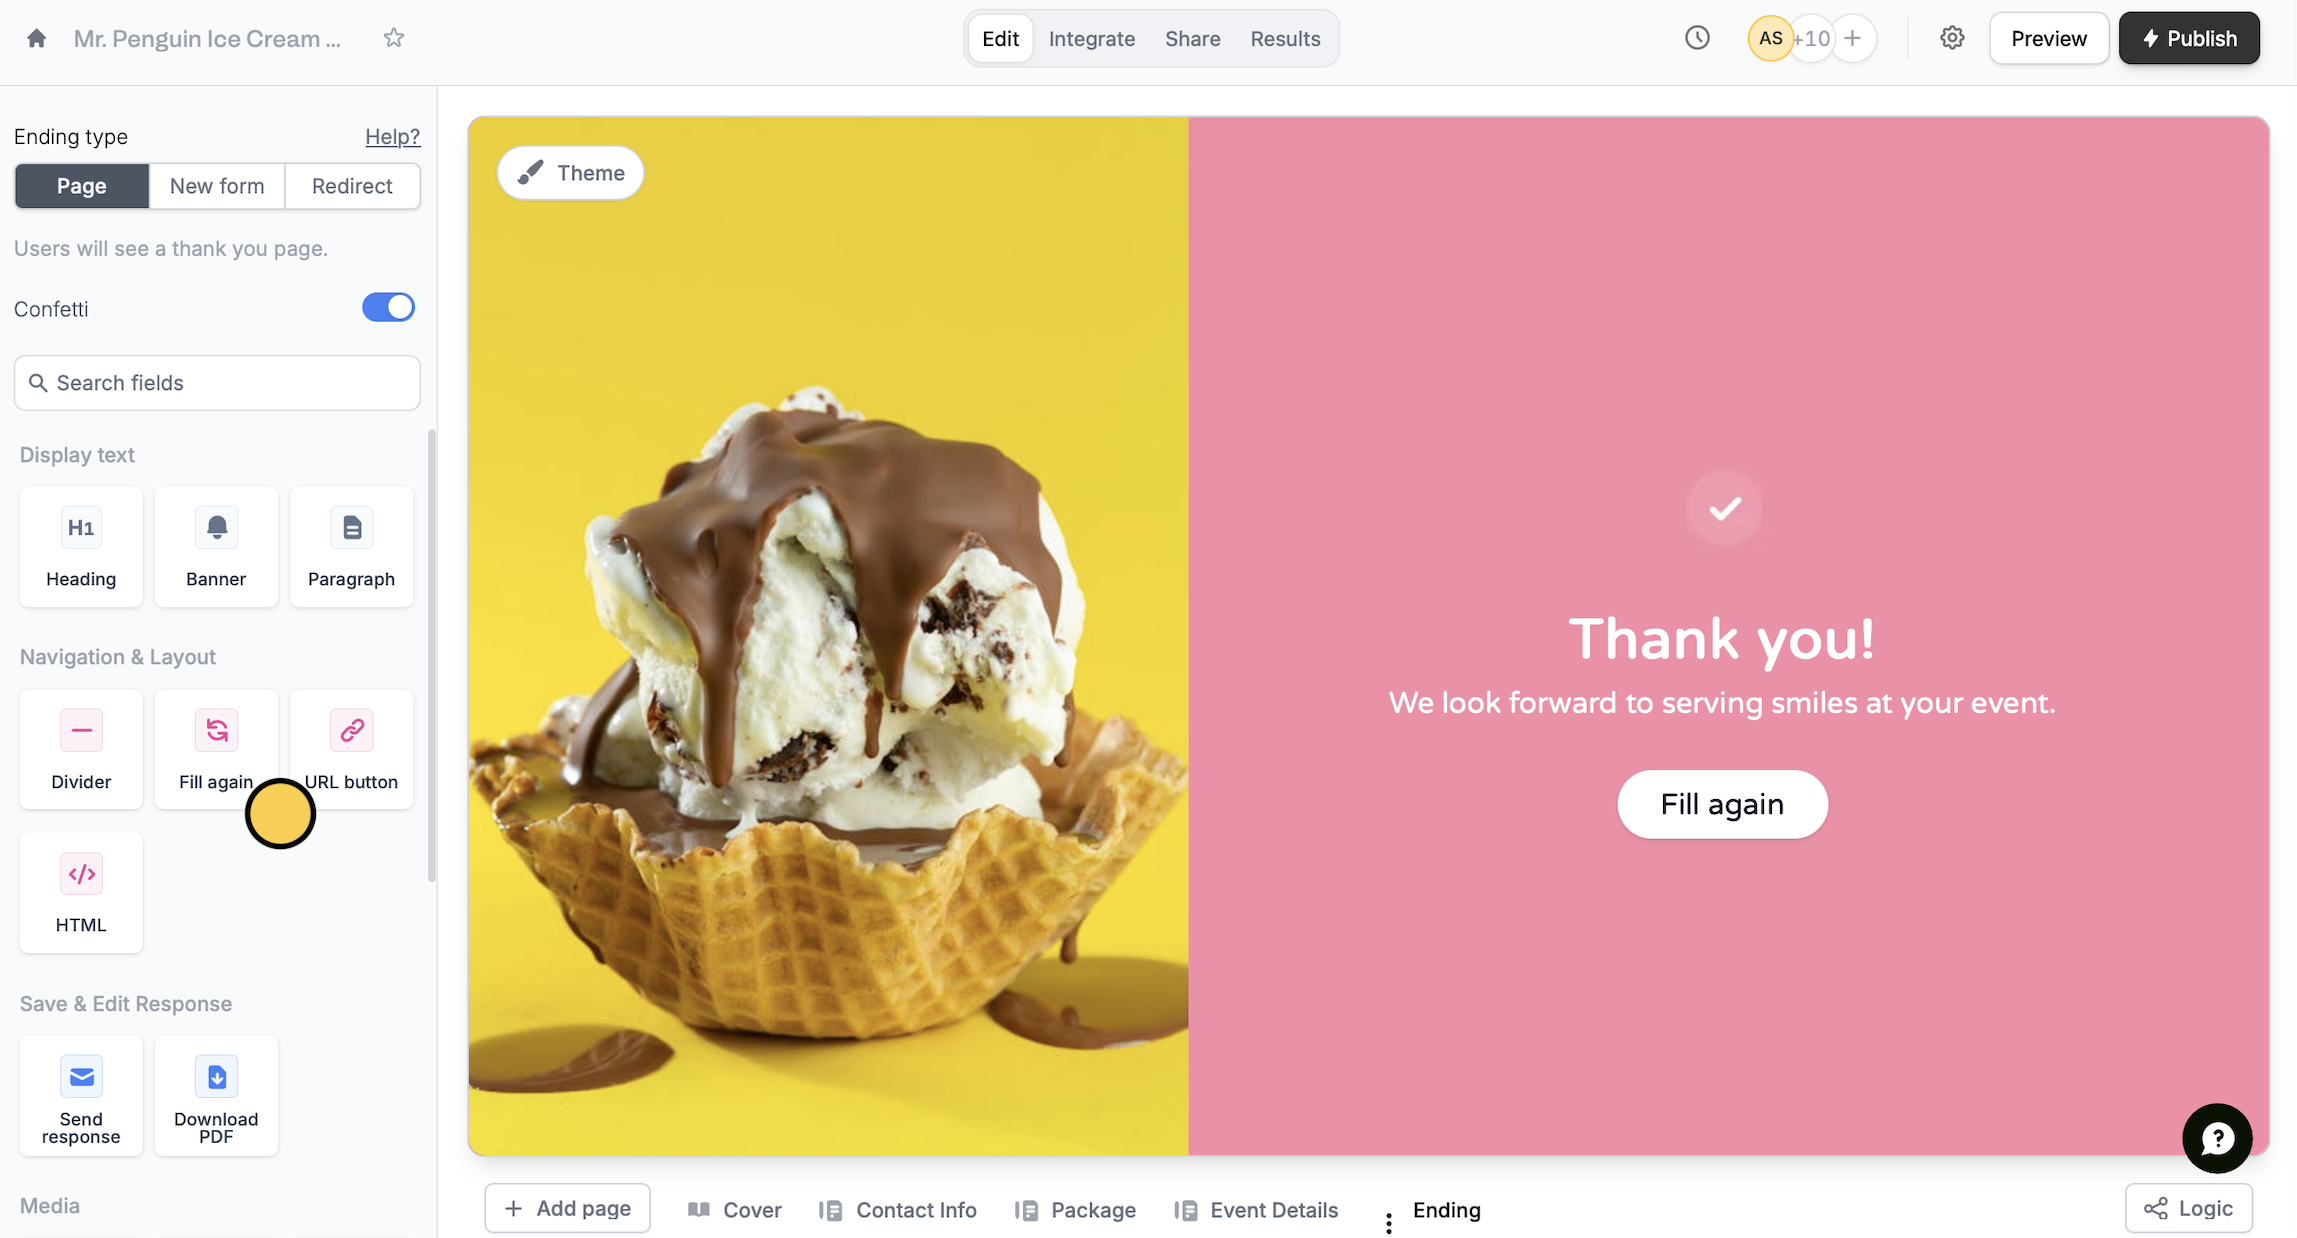
Respondents can fill out your form multiple times. Simply add a `Fill again` button from the left-hand panel. More details [here](/help/fill-again-button).
This feature is available on **Starter**, **Pro**, **Business**, and **Enterprise** plans. Learn more about our pricing plans and advanced features [**here**](https://www.fillout.com/pricing).
## Let respondents fill out your form again
Respondents can fill out your form multiple times. Simply add a `Fill again` button from the left-hand panel. More details [here](/help/fill-again-button).
 ## Add a link
Click the `URL button` in the left-hand panel followed by its `settings icon` to open the right-hand panel, enter a link, and customize it as you see fit.
## Add a link
Click the `URL button` in the left-hand panel followed by its `settings icon` to open the right-hand panel, enter a link, and customize it as you see fit.
 ## Let users save their responses
You can give respondents an option to save their responses.
## Let users save their responses
You can give respondents an option to save their responses.
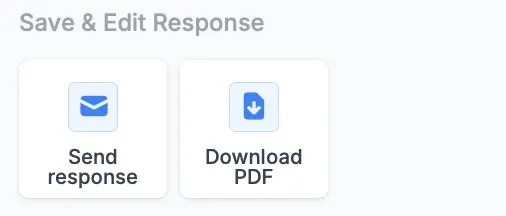 Add a `Send response` field to let them receive their submission via email.
 You can also let them edit their response by toggling `Include edit link` in the right-hand panel.
Use the `Download PDF` field to let respondents download a PDF of their submission. To set this up, you must first upload a PDF by following the steps [here](https://www.fillout.com/help/pdfs#how-it-works).
You can also let them edit their response by toggling `Include edit link` in the right-hand panel.
Use the `Download PDF` field to let respondents download a PDF of their submission. To set this up, you must first upload a PDF by following the steps [here](https://www.fillout.com/help/pdfs#how-it-works).
 After uploading a PDF, click the button's `settings icon` to open the right-hand panel where you can select the PDF.
## Related articles
Remove the confetti on the ending page.
Hide or show pages or custom endings based on respondent input.
Link forms or allow re-submission.
After uploading a PDF, click the button's `settings icon` to open the right-hand panel where you can select the PDF.
## Related articles
Remove the confetti on the ending page.
Hide or show pages or custom endings based on respondent input.
Link forms or allow re-submission.