> ## Documentation Index
> Fetch the complete documentation index at: https://fillout.com/help/llms.txt
> Use this file to discover all available pages before exploring further.

# Add custom emails to Fillout Scheduling

> Customize the message Fillout sends to attendees when they book a meeting.

export const SupportBanner = () => {
  const titleId = React.useId();
  return <div className="support-banner" role="region" aria-labelledby={titleId}>
      <span className="support-banner__ring support-banner__ring--outer" aria-hidden="true" />
      <span className="support-banner__ring support-banner__ring--middle" aria-hidden="true" />
      <span className="support-banner__ring support-banner__ring--inner" aria-hidden="true" />
      <span className="support-banner__ring support-banner__ring--center" aria-hidden="true" />

      <div className="support-banner__content">
        <div className="support-banner__title" id={titleId} role="heading" aria-level="2">Still have questions?</div>

        <div className="support-banner__copy">
          <span className="support-banner__line">Our team is happy to help. Start a live chat using the</span>
          <span className="support-banner__line">
            chat bubble <span className="support-banner__chat-icon" aria-hidden="true" /> in the bottom right, or email us at
          </span>
          <span className="support-banner__line">
            <a href="mailto:support@fillout.com">support{'@'}fillout.com</a>
          </span>
        </div>

        <a className="support-banner__cta" href="mailto:support@fillout.com">Contact us</a>
      </div>
    </div>;
};

## How it works

By default, Fillout emails the form creator when a meeting is booked, and Google or Outlook Calendar sends the respondent a meeting invite with details. If you’d like to also personally email your respondent, you can add a [custom followup email](/help/custom-emails).

<Steps>
  <Step title="Create a custom followup email">
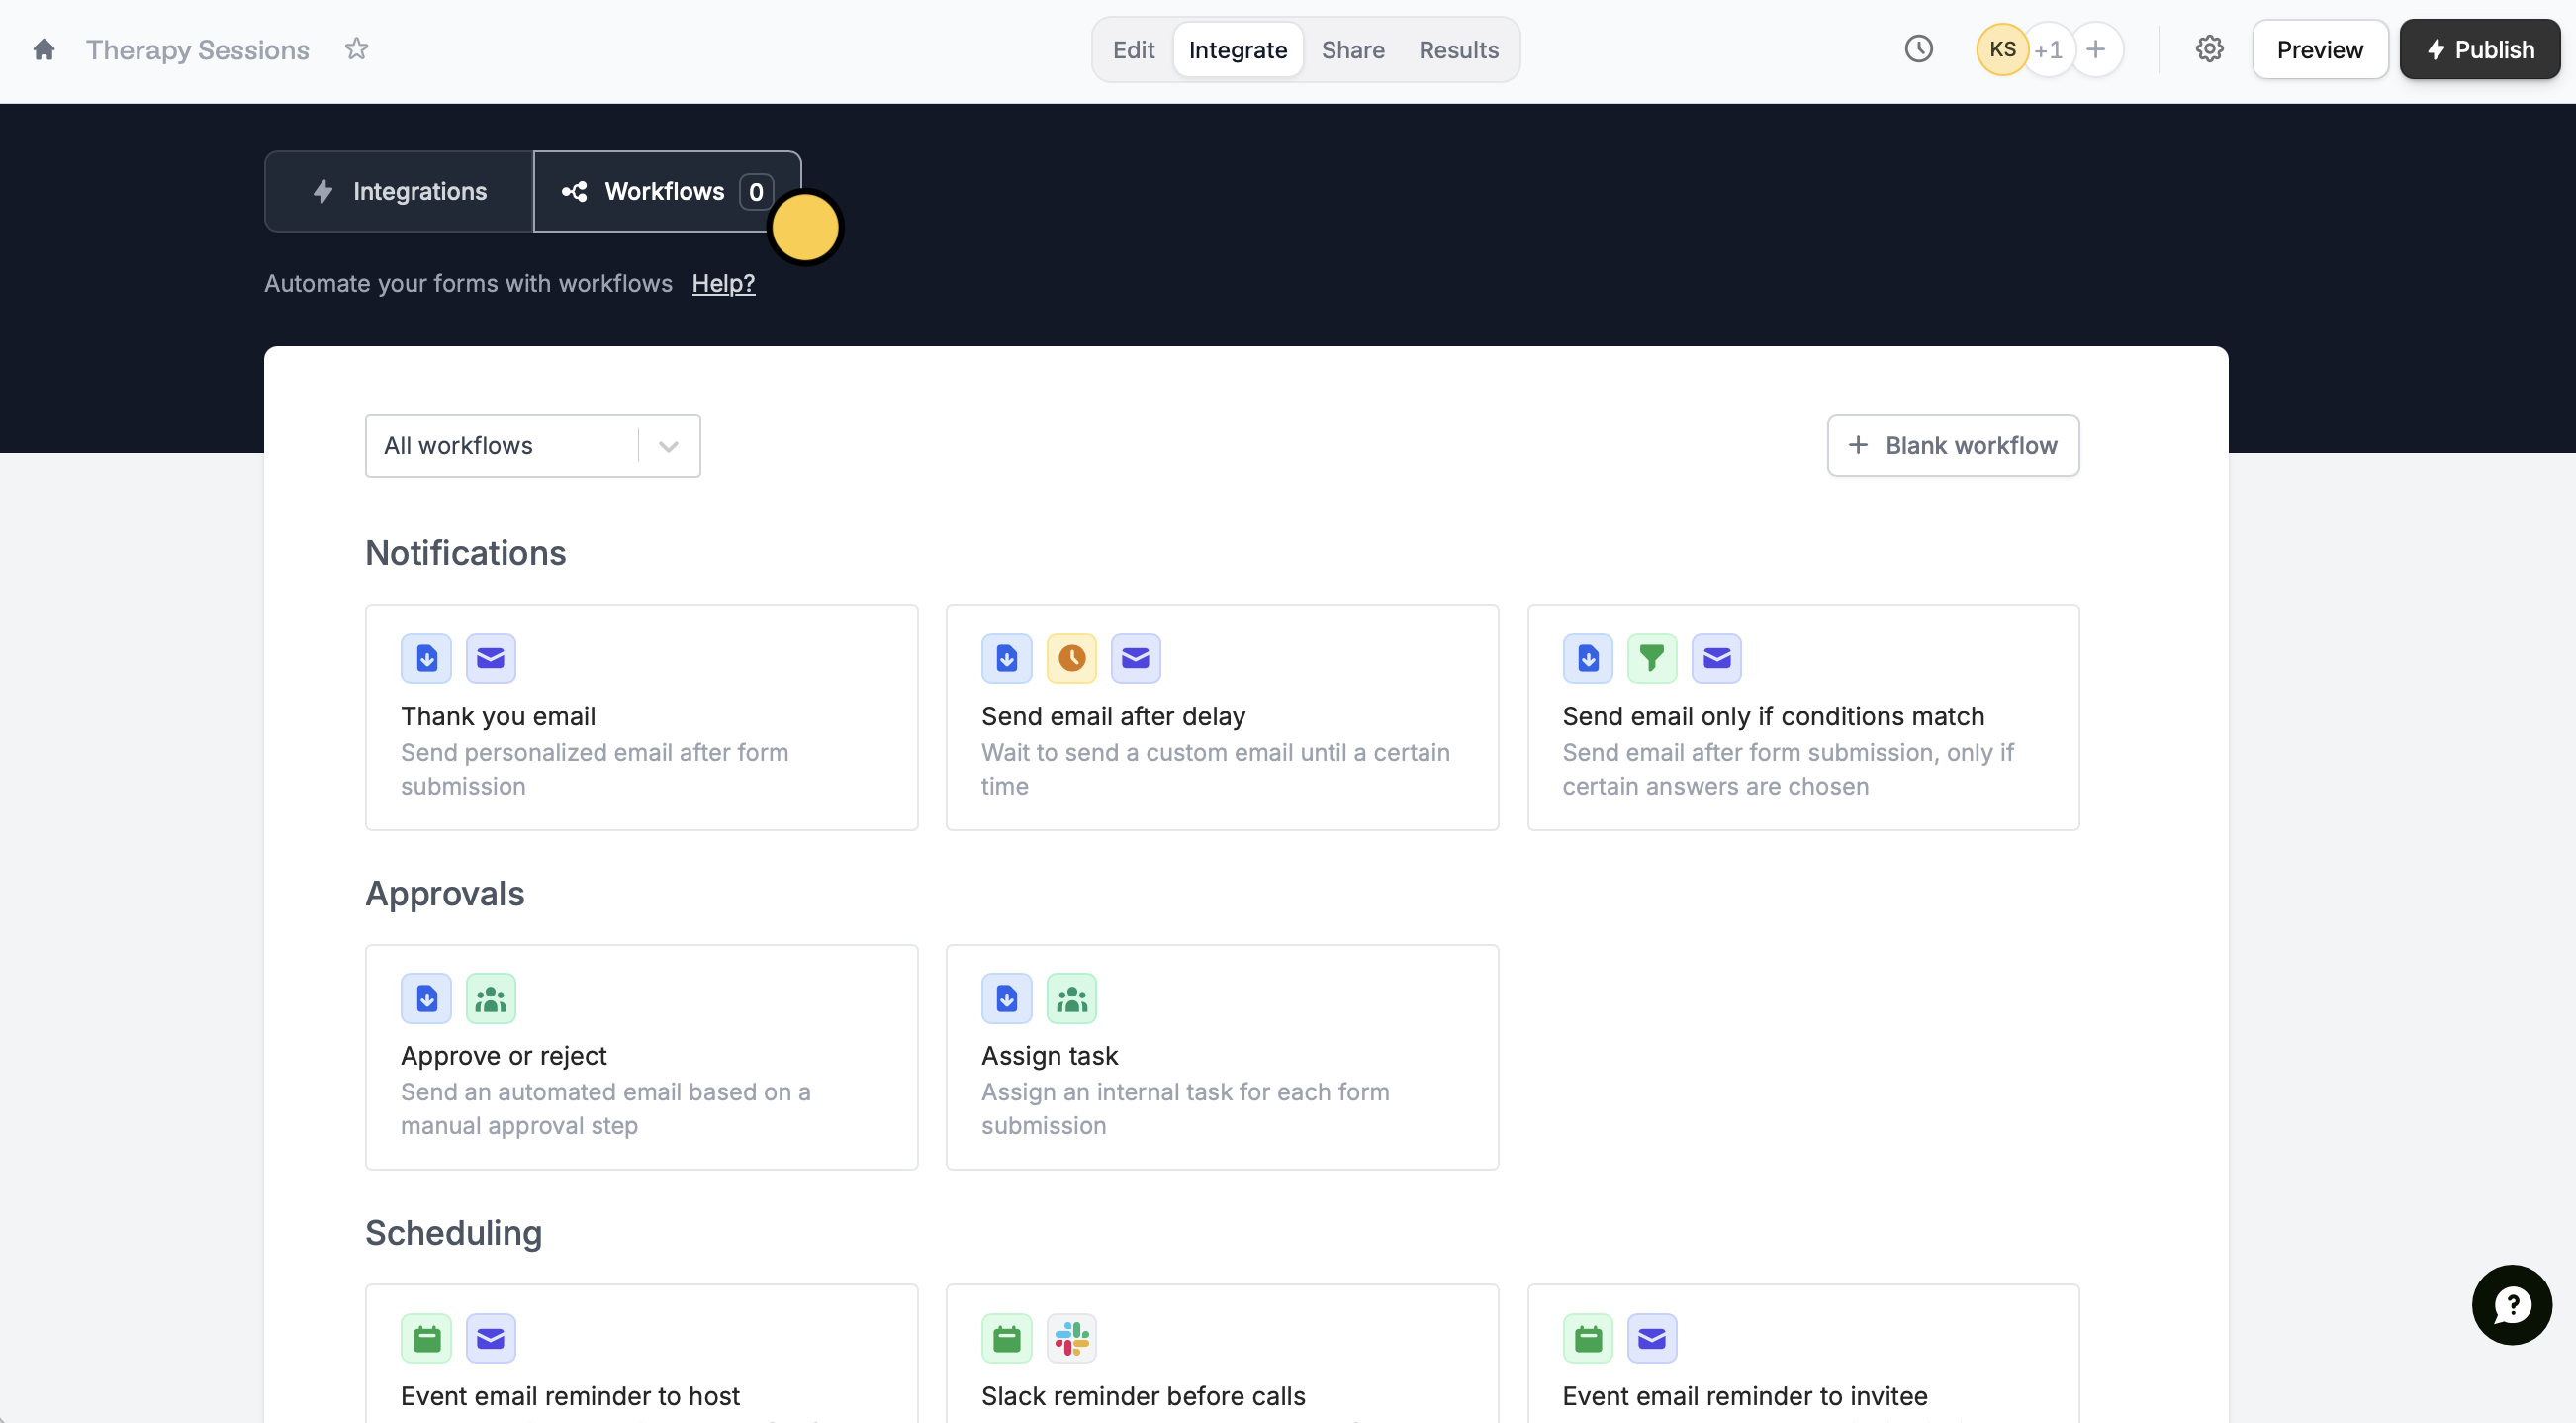
    On the `Integrate` page of your form, navigate to `Workflows`. Choose your preferred template. In this example, we'll select **Thank you email**.
    <img src="https://mintcdn.com/fillout-005a867b/pmex91Orq-CE4lFh/images/Screenshot2025-10-23at4.31.19PM.png?fit=max&auto=format&n=pmex91Orq-CE4lFh&q=85&s=10ecefd047015aec71a138314eee1c11" alt="Screenshot 2025-10-23 at 4.31.19 PM.png" width="2604" height="1438" data-path="images/Screenshot2025-10-23at4.31.19PM.png" />

    \
    Alternatively, you can click <Icon icon="gear-complex" /> on the upper right corner.
  </Step>

  <Step title="Edit your message">
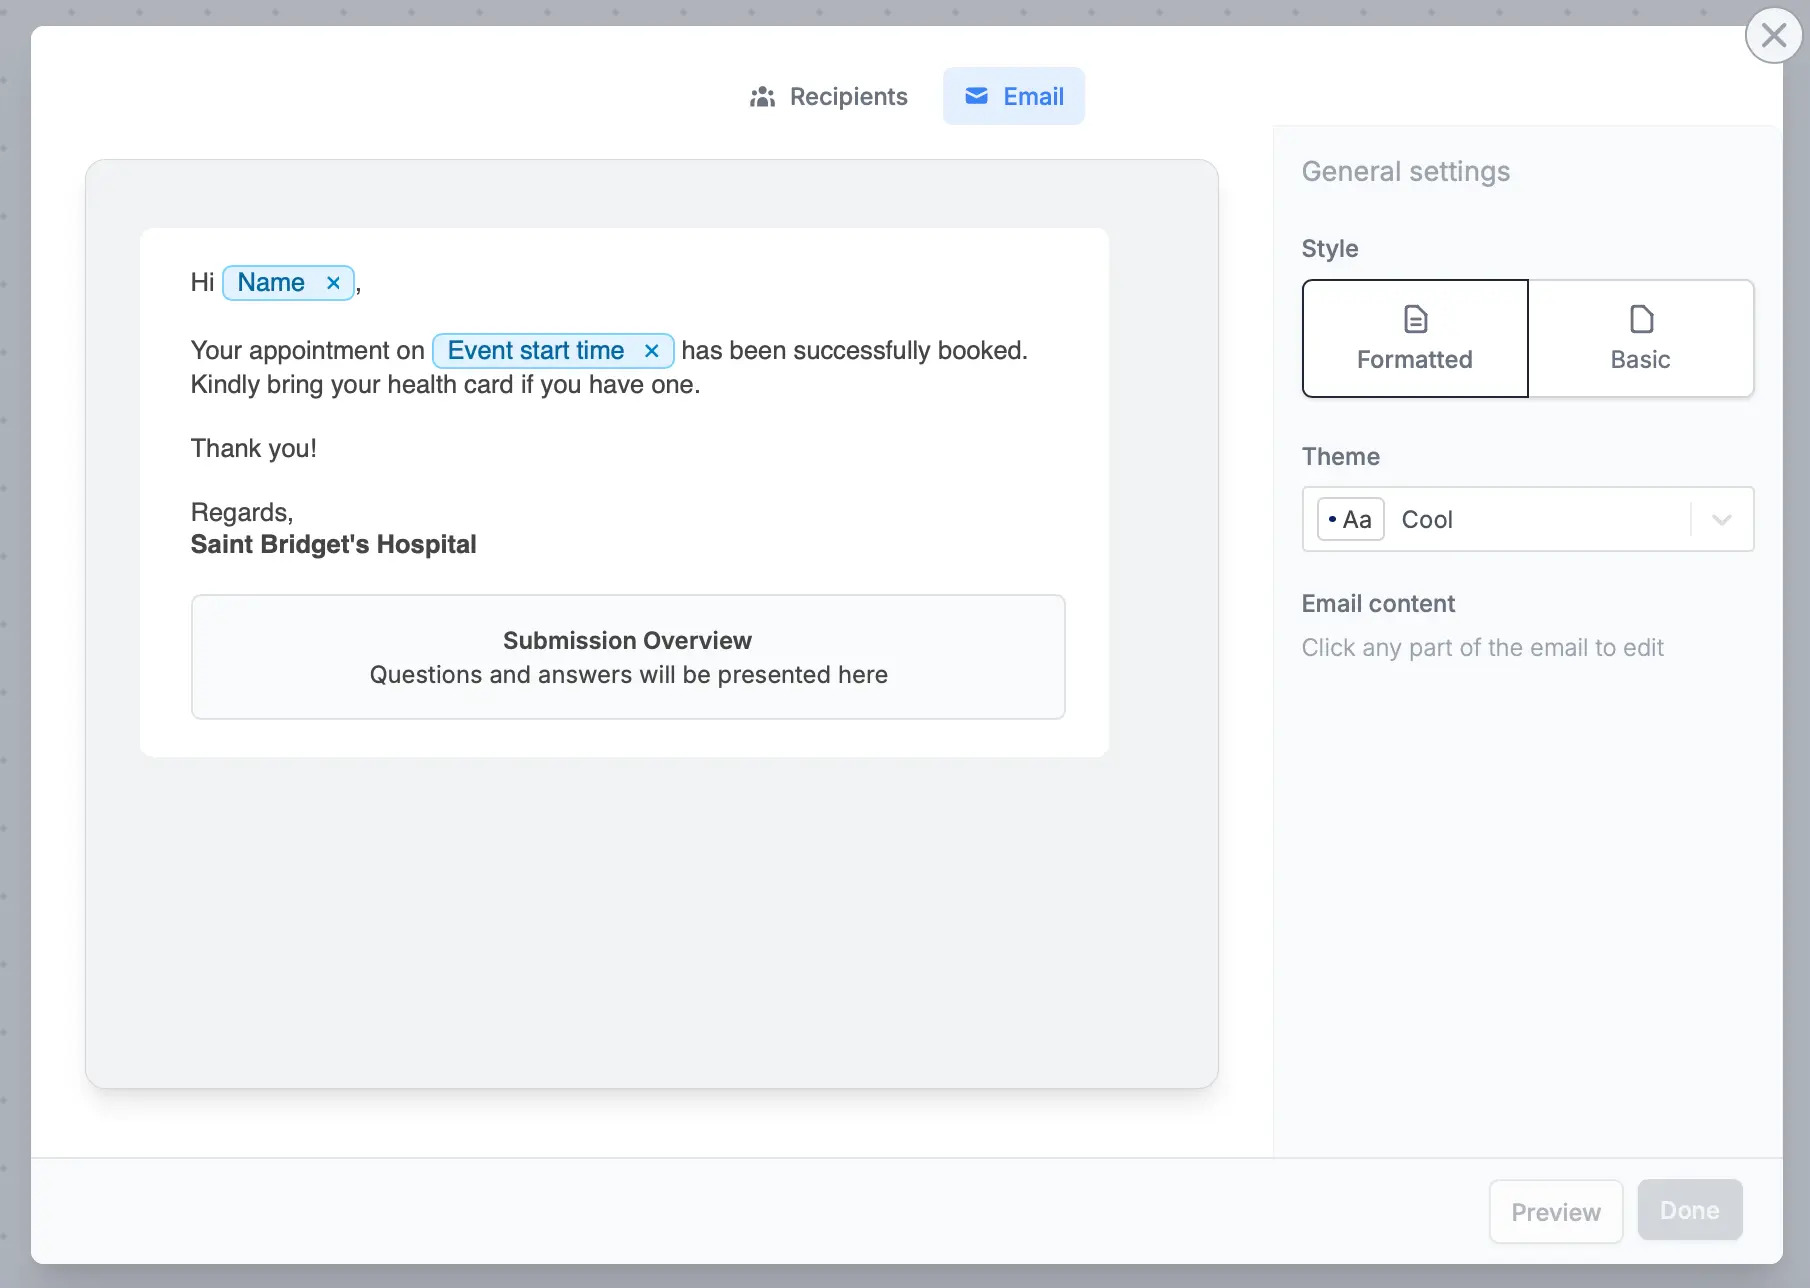
    `Edit` the contents of your email. More details [here](/help/custom-emails).
    <img src="https://mintcdn.com/fillout-005a867b/FqvyS0NEDuPdNc27/images/scheduling/image-6.png?fit=max&auto=format&n=FqvyS0NEDuPdNc27&q=85&s=aecc106f2ce7f0ddef36f8ed4c20577b" alt="Screenshot of the Scheduling page of a form" width="1810" height="1288" data-path="images/scheduling/image-6.png" />

    Click `Preview` to send a sample email to your inbox.
  </Step>

  <Step title="Publish your form">
    On your form editor, click `Publish` on the upper right corner to make the changes reflect.
  </Step>
</Steps>

## Related articles

<CardGroup cols={3}>
  <Card title="Custom emails" icon="envelope-open-text" iconType="regular" color="#FFC738" href="/help/custom-emails">
    Automate sending, pipe previous answers, and style your email.
  </Card>

  <Card title="Scheduling actions" icon="circle-calendar" iconType="regular" color="#FFC738" href="/help/scheduling-workflows">
    Send reminders to yourself and other hosts.
  </Card>

  <Card title="Email reminders" icon="alarm-clock" iconType="regular" color="#FFC738" href="/help/email-reminder">
    Automate reminders to your meeting guests via email.
  </Card>
</CardGroup>

<SupportBanner />
