> ## Documentation Index
> Fetch the complete documentation index at: https://fillout.com/help/llms.txt
> Use this file to discover all available pages before exploring further.
# Working with form submission IDs
> Link submissions back to Fillout by referencing its Submission ID. Search for a particular submission on the results page.
## What is a submission ID?
A unique **Submission ID** is generated whenever someone begins to complete your form. Submission ID's are randomly generated, like 6bcedd3a-fe26-4bcb-9ce9-d3850e38d42c.
Once the submission is complete, you can reference the Submission ID in workflows such as confirmation or thank-you emails. However, you can't reference it within the form it originates from. For example, you can't display it on the Ending Page because the Ending Page is shown before the submission is finalized, so the Submission ID isn't available yet.
## Send the submission ID to your integration
First, navigate to `Integrate` tab located on the top menu, and choose the app or service you would like to use.
Under **Mappings**, `+ Add new`. On the left, choose the field from your app where you want to save data, and on the right, click `Submission ID` from your Fillout form.
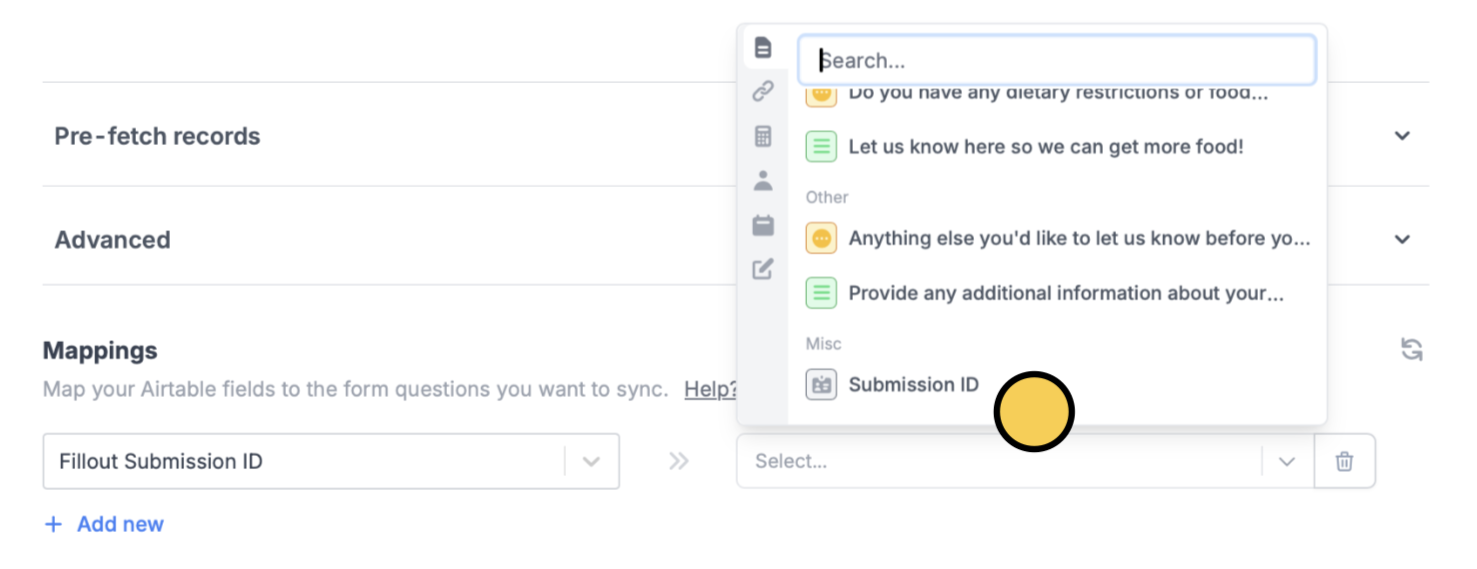 In this example, we'll save our form's Submission ID to a column in our Airtable base with the same name.
If you're using Zapier or Make, you'll also see the option to reference the Submission ID.
Click `Finish setup` in the upper right corner. That's it! The Submission ID will now be saved to your integration. Remember to `Publish` your form to reflect the changes.
## Search for a Submission ID in the results
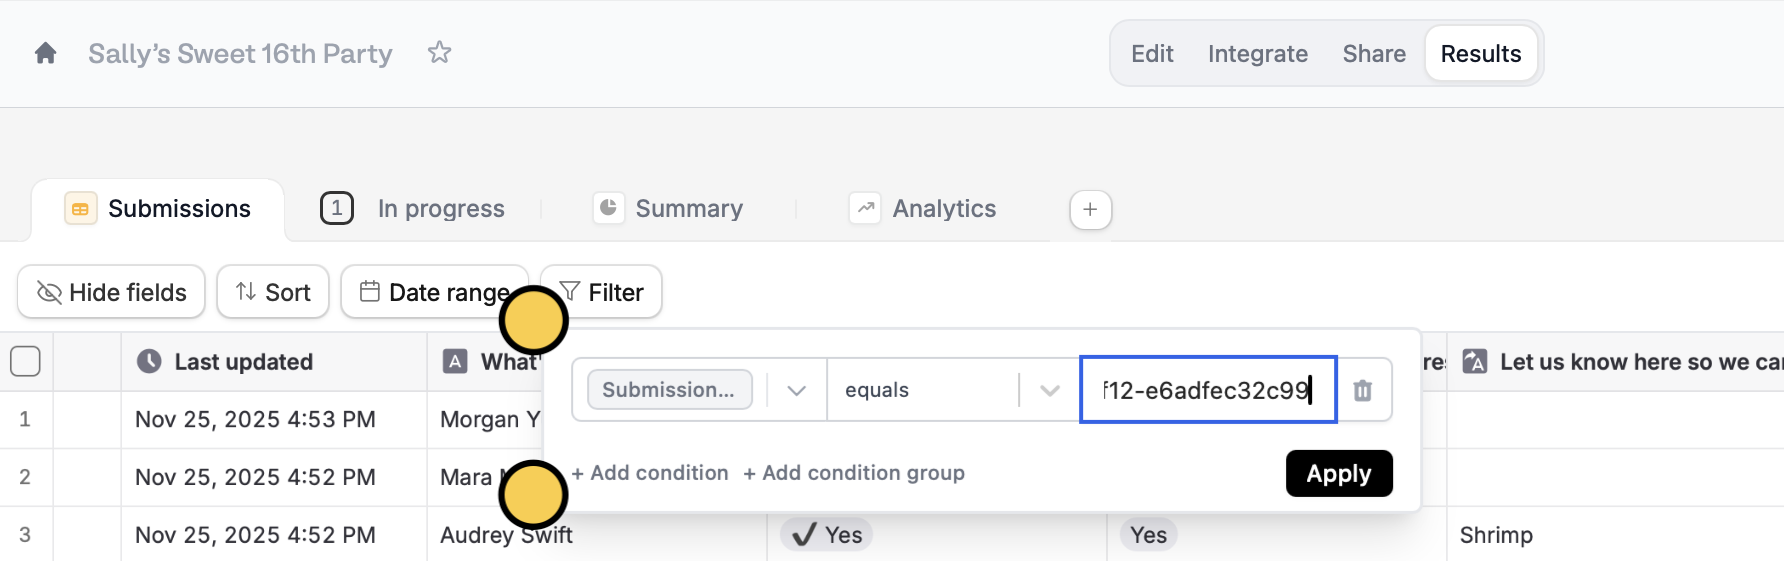
Go to `Results` from the top menu. Click `Filter` followed by `+ Add condition`. Then, choose`Submission ID` in the dropdown and enter the ID number.
In this example, we'll save our form's Submission ID to a column in our Airtable base with the same name.
If you're using Zapier or Make, you'll also see the option to reference the Submission ID.
Click `Finish setup` in the upper right corner. That's it! The Submission ID will now be saved to your integration. Remember to `Publish` your form to reflect the changes.
## Search for a Submission ID in the results
Go to `Results` from the top menu. Click `Filter` followed by `+ Add condition`. Then, choose`Submission ID` in the dropdown and enter the ID number.
 ## Find the Submission ID for a particular result
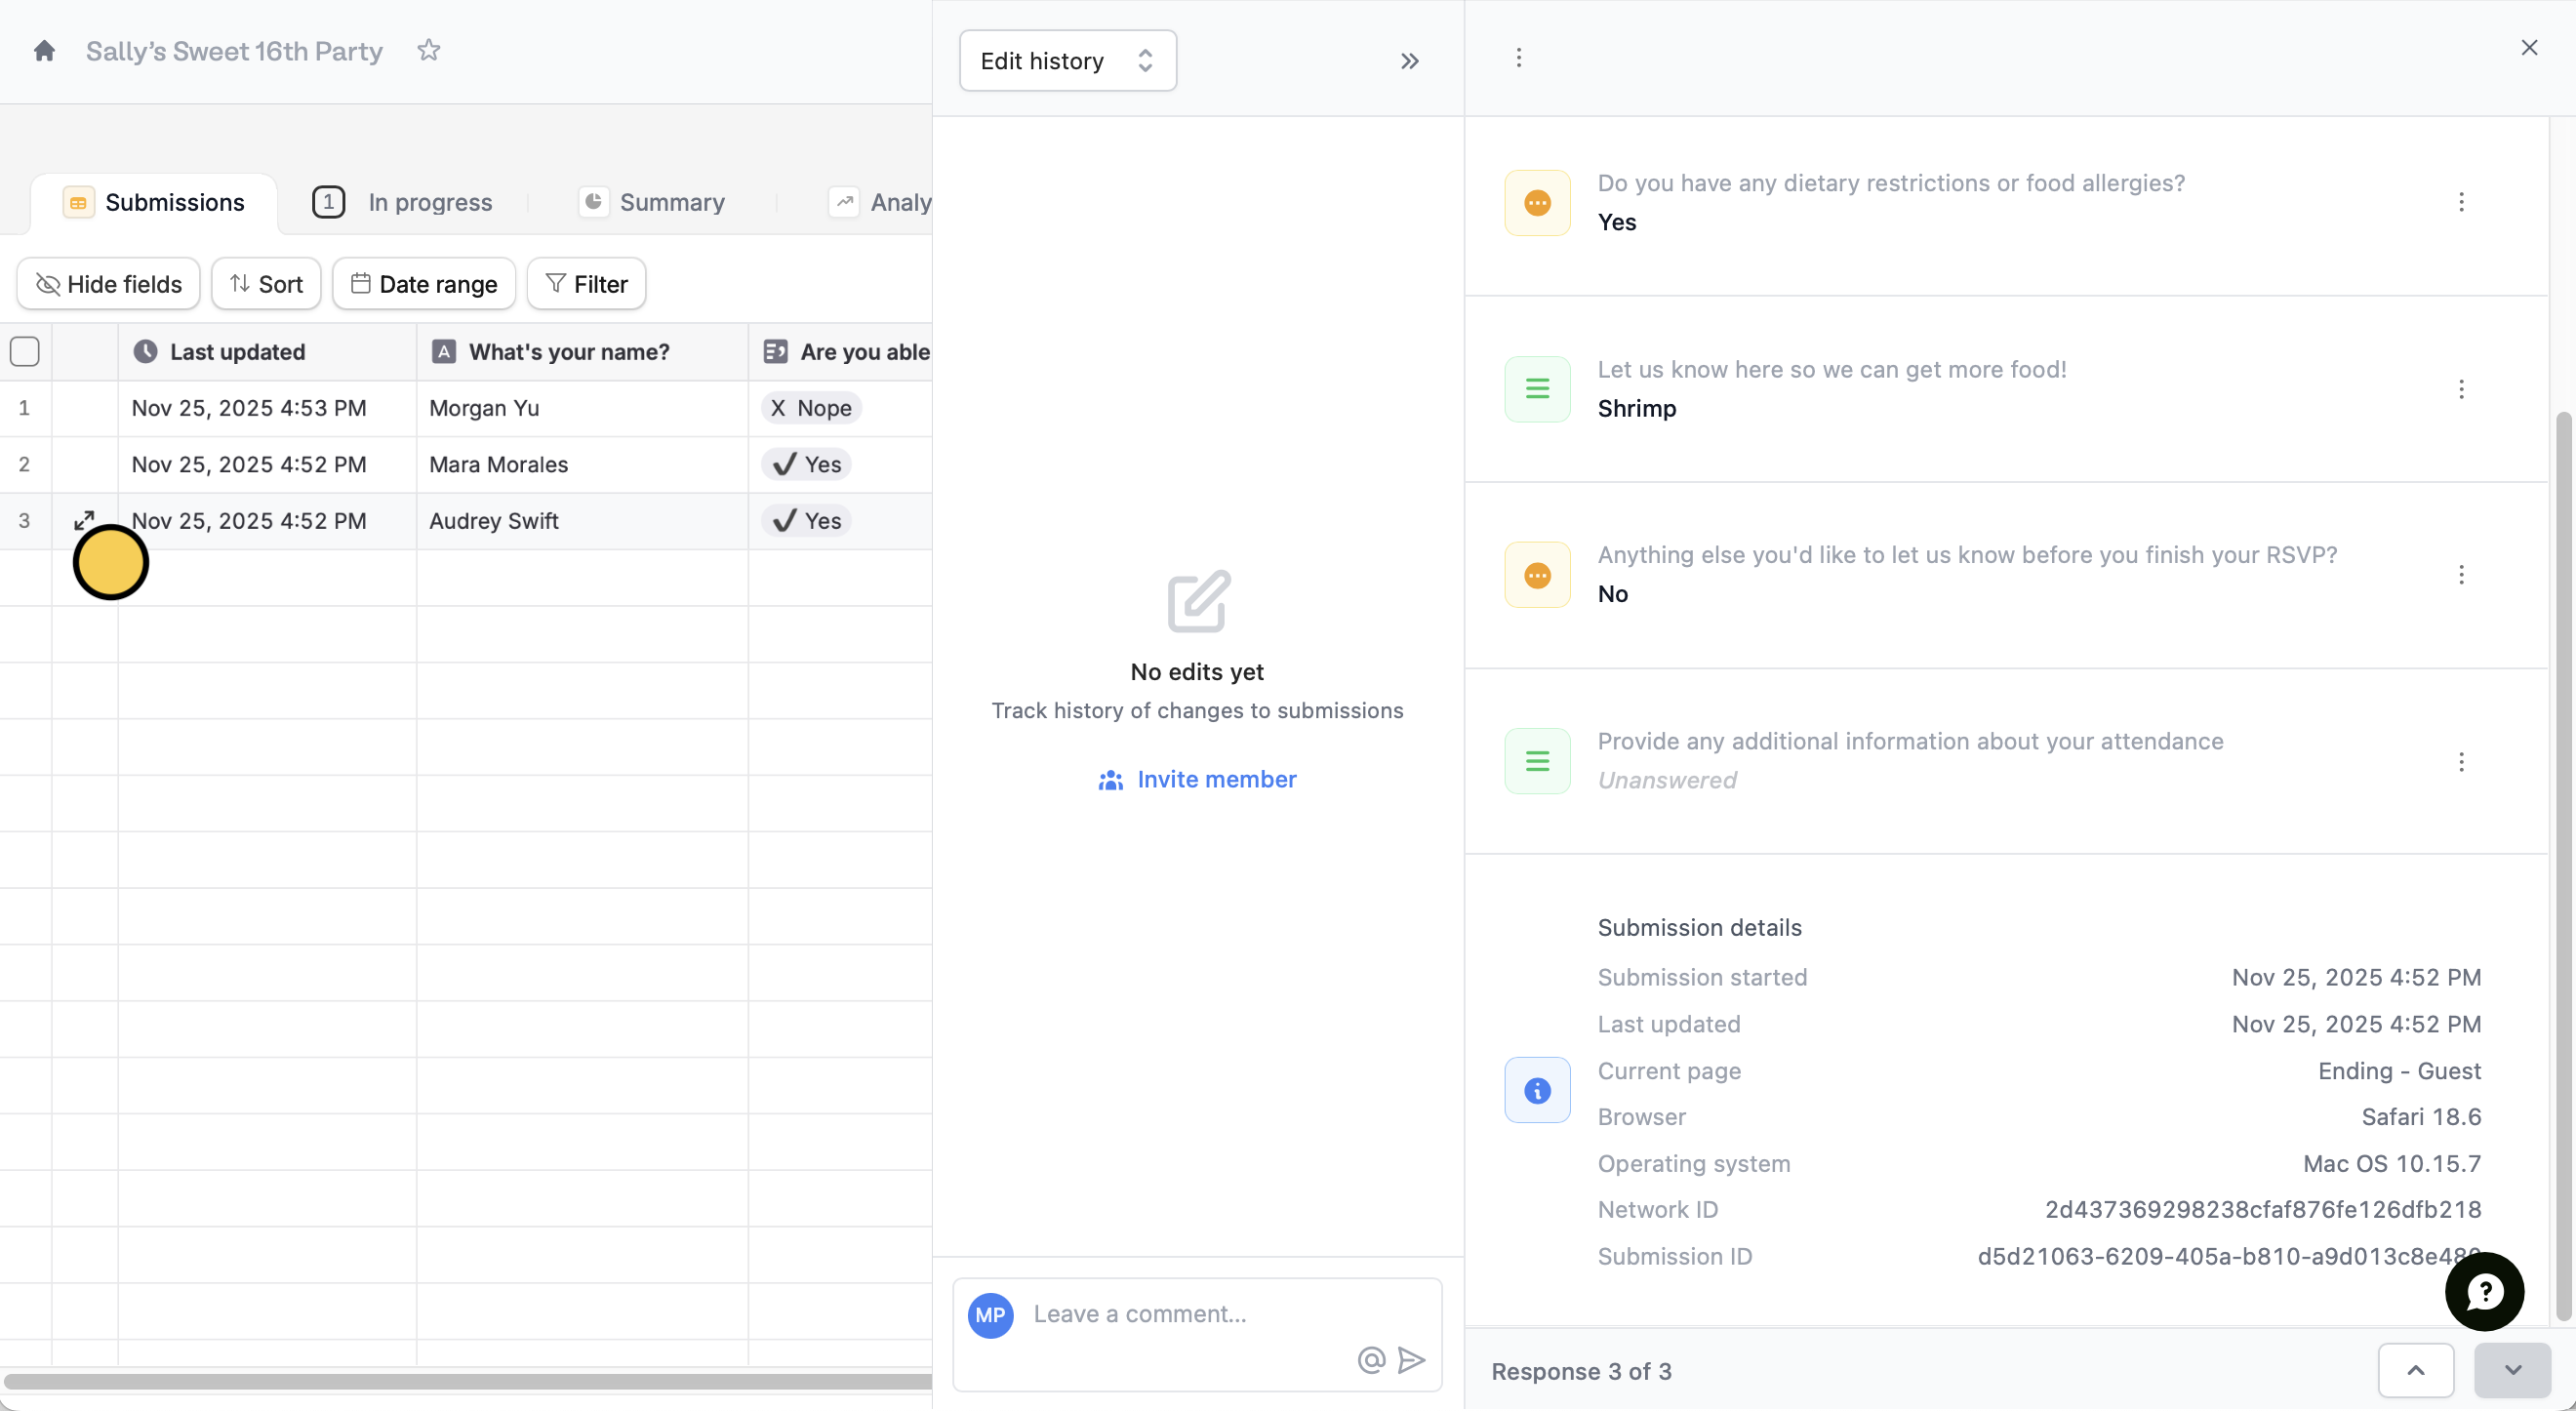
Hover and click on the result you are interested in. You'll see the **Submission ID** at the bottom of the window in the right side.
## Find the Submission ID for a particular result
Hover and click on the result you are interested in. You'll see the **Submission ID** at the bottom of the window in the right side.
 ## Related articles
Use a form to create or update Airtable bases.
Use a form to create or update Notion databases.
View all submissions to your form. Filter, sort, or export to CSV.
## Related articles
Use a form to create or update Airtable bases.
Use a form to create or update Notion databases.
View all submissions to your form. Filter, sort, or export to CSV.