> ## Documentation Index
> Fetch the complete documentation index at: https://fillout.com/help/llms.txt
> Use this file to discover all available pages before exploring further.
# Track data with Google Tag Manager
> Track activity and monitor data across your web pages with Google Tag Manager and Fillout forms. Check conversions and ROI through form responses in your website.
## What is Tag Manager?
[Google Tag Manager](https://tagmanager.google.com/?ref=fillout-forms-help-article) is a free tool that allows you to manage and deploy marketing tags on your website without editing the code. It simplifies tracking and analytics for better insights and optimization.
Tag Manager works using two main components:
* **Tags** – the data you want to send (for example, an event sent to Google Analytics).
* **Triggers** – the actions that cause the tag to fire (such as a form submission).
To detect these actions, Tag Manager uses built-in **variables** like Clicks and Forms, which allow it to recognize interactions such as button clicks or form submissions.
## How it works
First, open your Fillout form or create a new one. Then, navigate to `Integrate` from the top menu and look for `Tag Manager`.
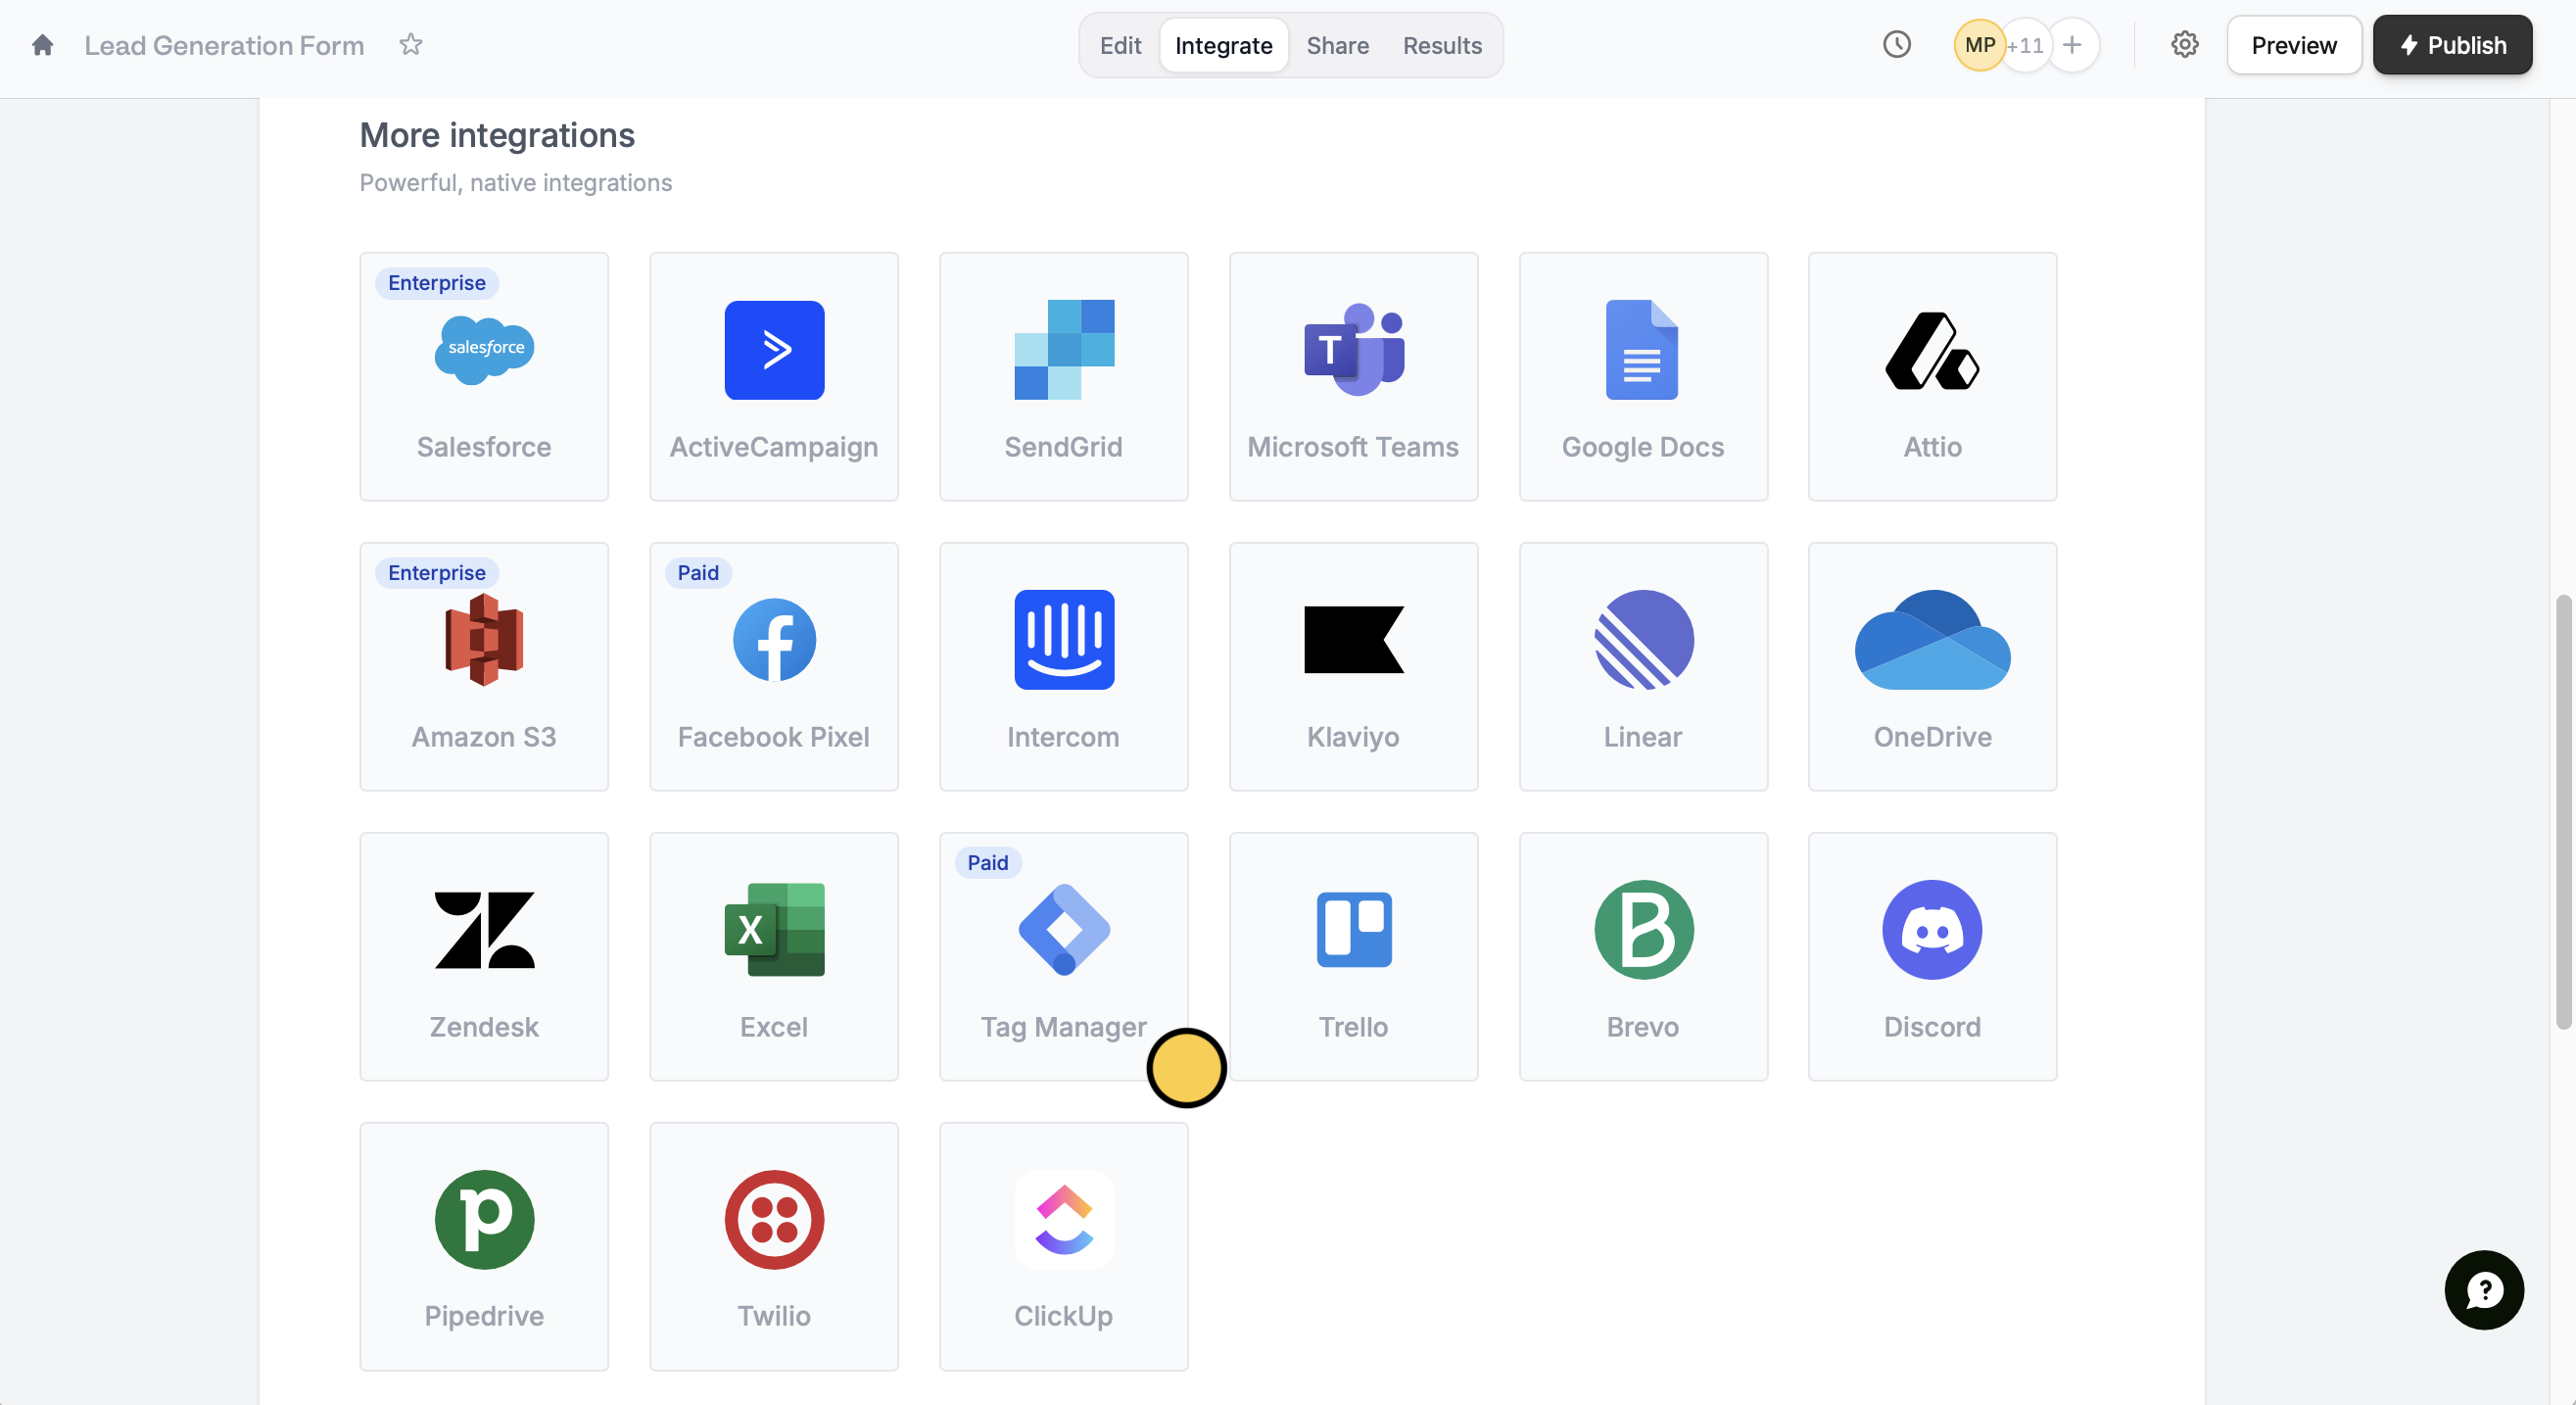 `Connect a custom domain` to get started. Follow the quick instructions in the next screen to enter your **Google Tag Manager container ID**.
Only [admins](https://www.fillout.com/help/granular-permissions#admin-vs-non-admins) will be able to add a [custom domain](https://www.fillout.com/help/custom-domains). Unlike other integrations, Tag Manager doesn't come with OAuth.
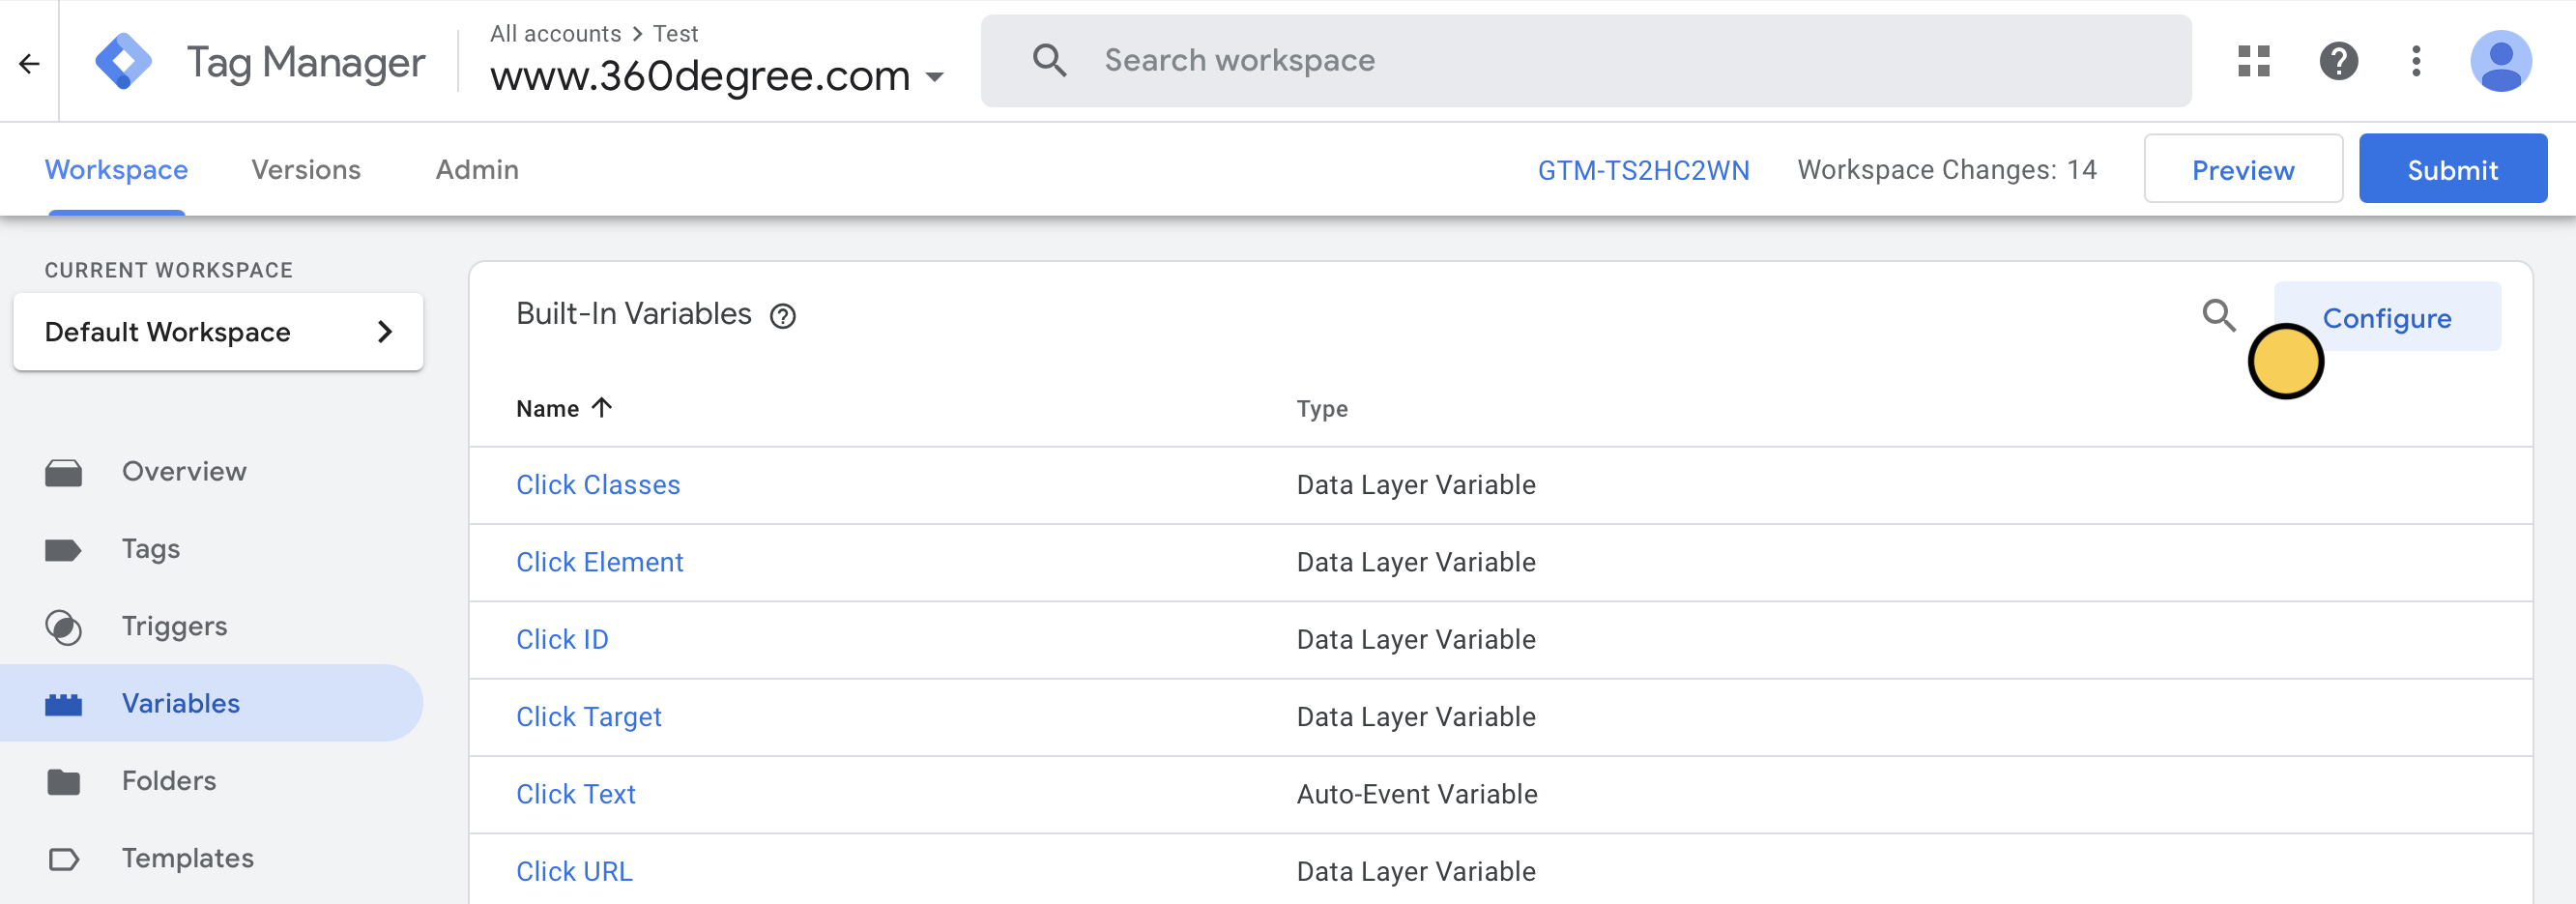
In your Tag Manager **Workspace**, head over to `Variables` from the left panel and click `Configure`.
`Connect a custom domain` to get started. Follow the quick instructions in the next screen to enter your **Google Tag Manager container ID**.
Only [admins](https://www.fillout.com/help/granular-permissions#admin-vs-non-admins) will be able to add a [custom domain](https://www.fillout.com/help/custom-domains). Unlike other integrations, Tag Manager doesn't come with OAuth.
In your Tag Manager **Workspace**, head over to `Variables` from the left panel and click `Configure`.
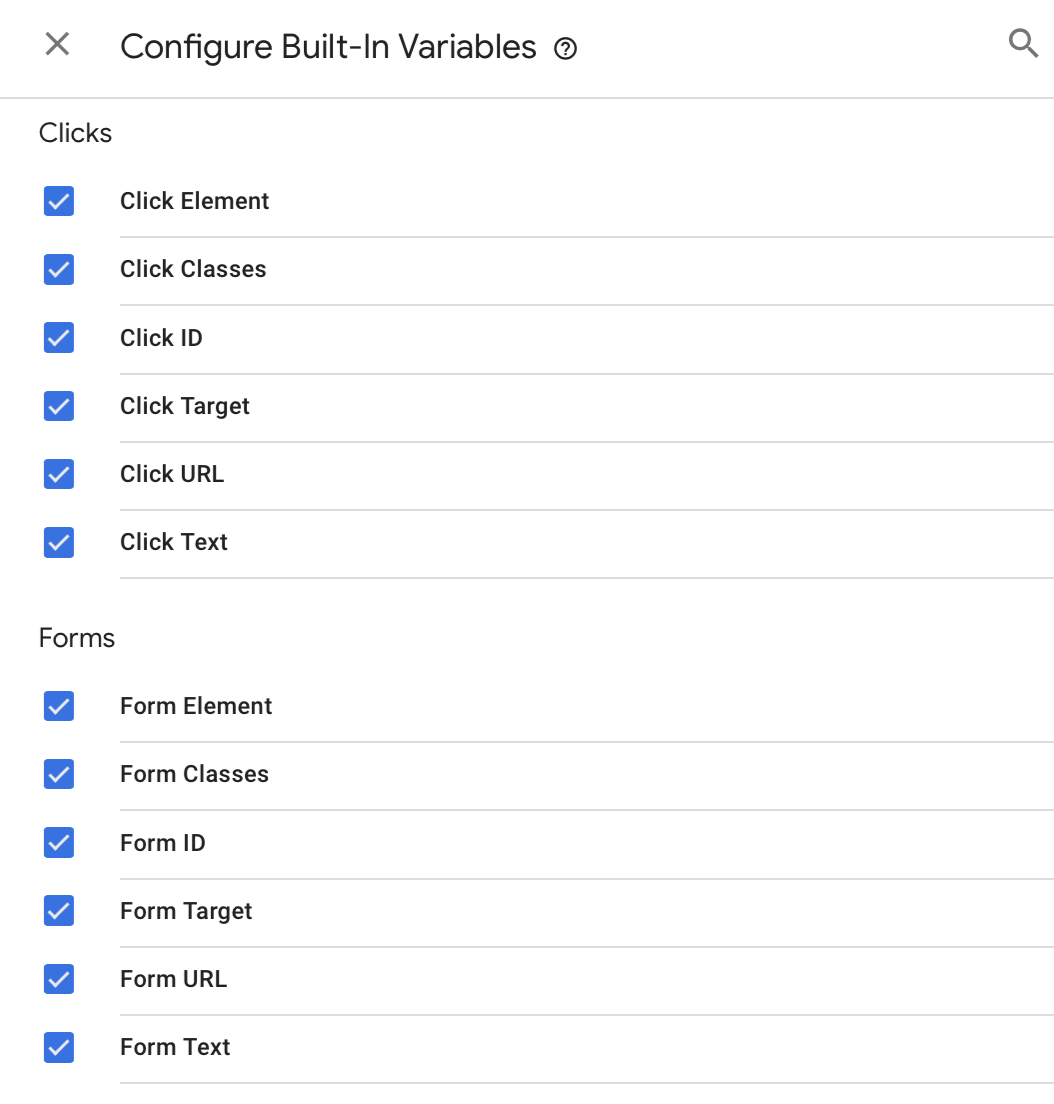
 Scroll down and **tick** all variables under **Clicks** and **Forms**.
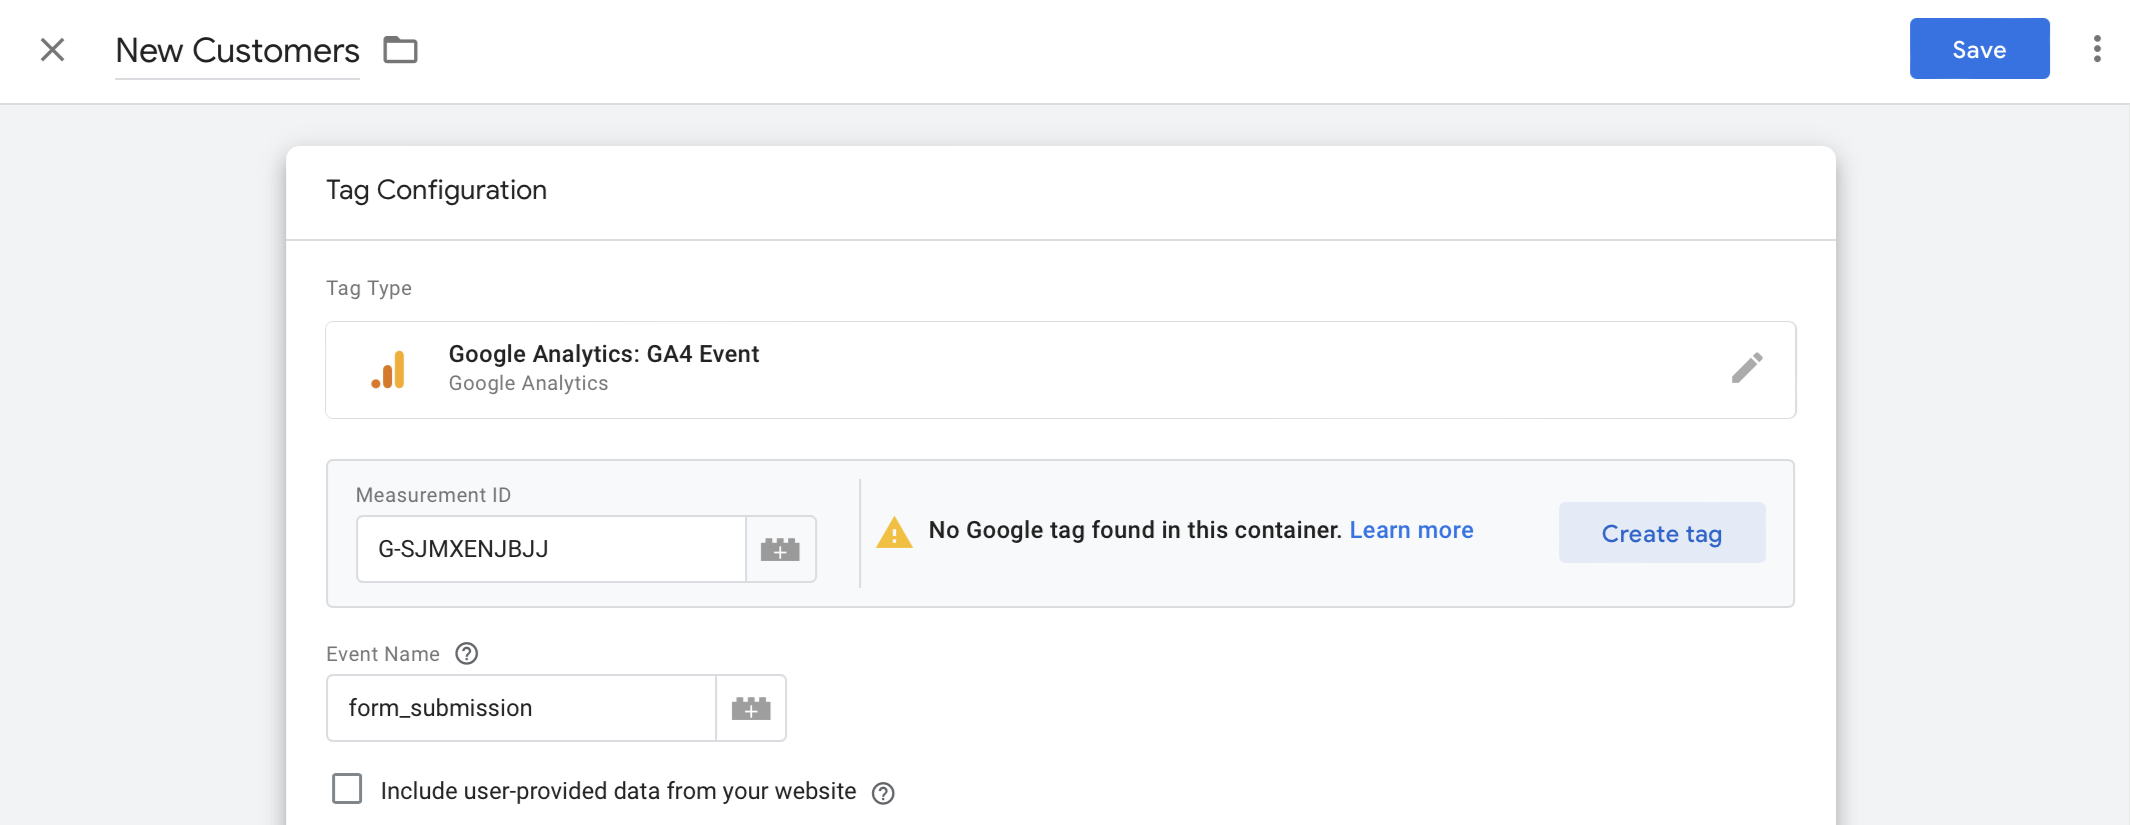
 Then, go back to your **Workspace**. Click `Tags` in the left panel followed by `New`.
In **Tag Configuration**, we’ll choose `Google Analytics`. Copy and paste the [**Measurement ID**](https://support.google.com/analytics/answer/12270356?hl=en) and enter an **Event Name**.
Then, go back to your **Workspace**. Click `Tags` in the left panel followed by `New`.
In **Tag Configuration**, we’ll choose `Google Analytics`. Copy and paste the [**Measurement ID**](https://support.google.com/analytics/answer/12270356?hl=en) and enter an **Event Name**.
 Click `Save` in the upper right corner.
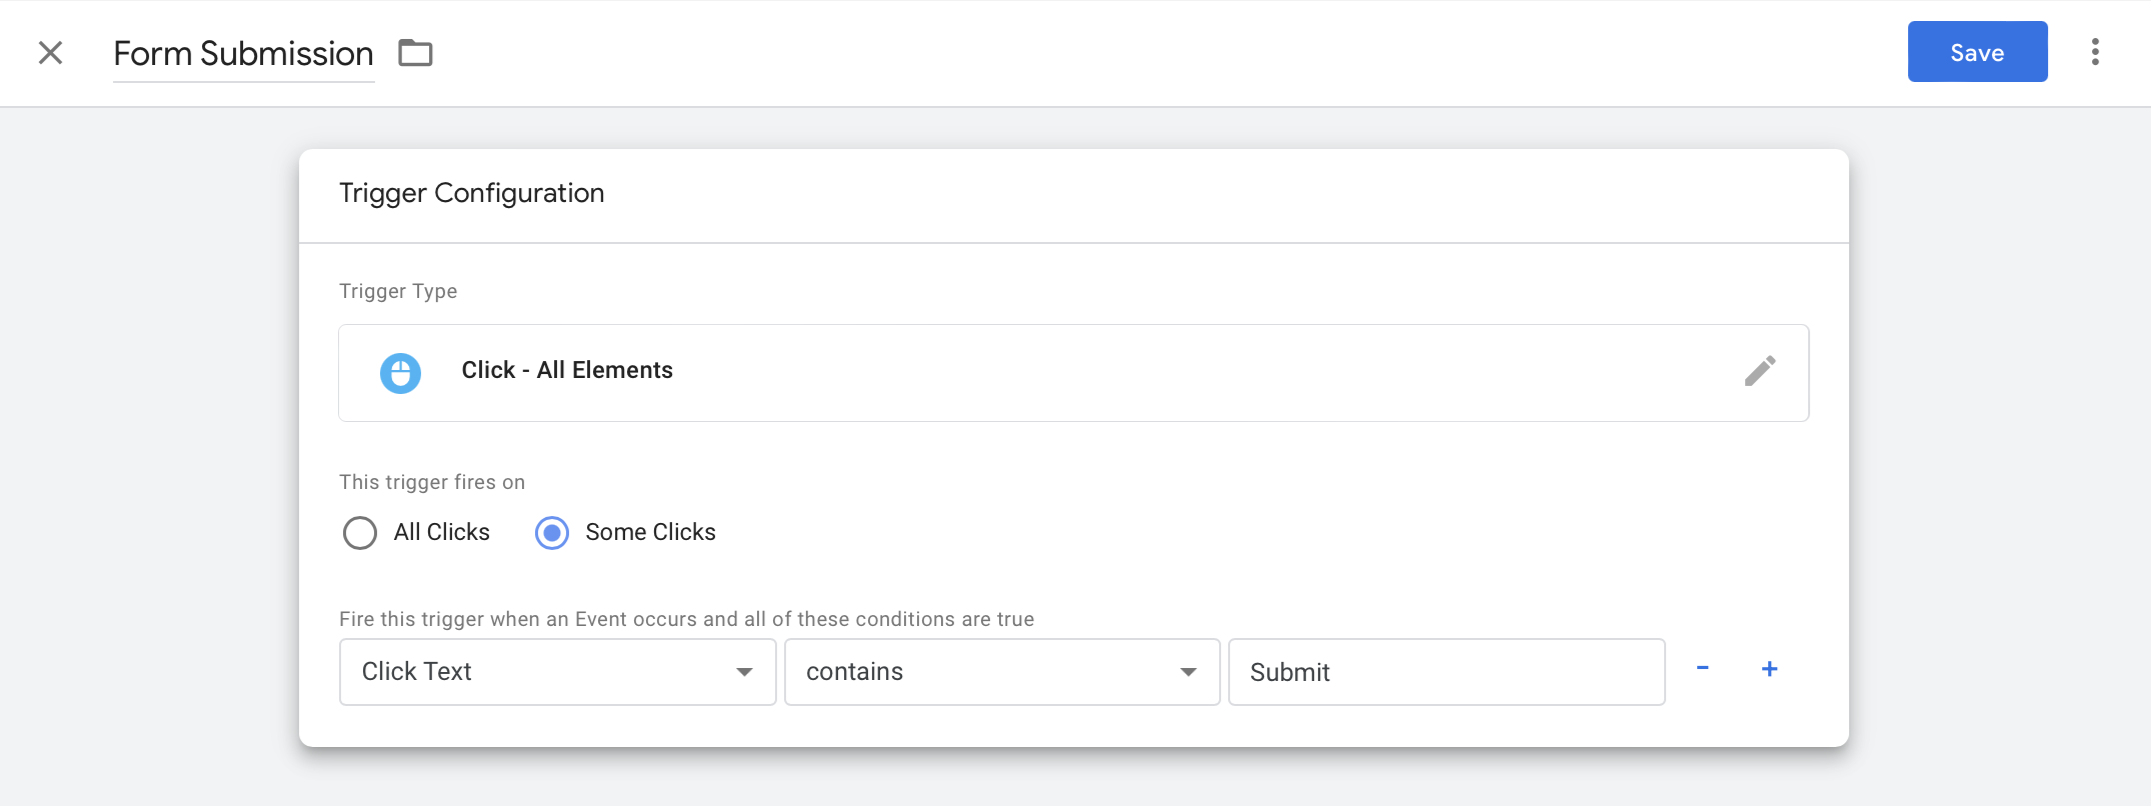
Click `Add Trigger` followed by **+** on the right corner and set your preferences. In our example, we’ll fire the trigger when respondents click the submit button in the Fillout form.
Click `Save` in the upper right corner.
Click `Add Trigger` followed by **+** on the right corner and set your preferences. In our example, we’ll fire the trigger when respondents click the submit button in the Fillout form.
 `Preview` the setup on Google Tag Manager. Once everything’s good, click `Submit`.
Go back to your Fillout form to `Finish setup` and `Publish`.
## Advanced (Optional)
**Send submission data to Google Tag Manager**
To send submission data using `dataLayer.push`, add a **Custom Code** or **HTML block** to your form. You can place your tracking script there and reference form field values or submission data in the `dataLayer.push`.
**Track events between form pages**
For multi-page forms, you can add an HTML block to add a script to the pages you want to track. This lets you track different events for each page as the respondent navigates through the form.
## Related article
Use email, GCLID, address, and more.
`Preview` the setup on Google Tag Manager. Once everything’s good, click `Submit`.
Go back to your Fillout form to `Finish setup` and `Publish`.
## Advanced (Optional)
**Send submission data to Google Tag Manager**
To send submission data using `dataLayer.push`, add a **Custom Code** or **HTML block** to your form. You can place your tracking script there and reference form field values or submission data in the `dataLayer.push`.
**Track events between form pages**
For multi-page forms, you can add an HTML block to add a script to the pages you want to track. This lets you track different events for each page as the respondent navigates through the form.
## Related article
Use email, GCLID, address, and more.