> ## Documentation Index
> Fetch the complete documentation index at: https://fillout.com/help/llms.txt
> Use this file to discover all available pages before exploring further.
# HTML and CSS form fields
> Display testimonials, banners, or any static object. Customize design beyond standard themes with custom code.
export const SupportBanner = () => {
const titleId = React.useId();
return ;
};
Looking to customize your form’s theme with CSS? Use Custom CSS instead.
## How to use the HTML field
The HTML field lets you add a custom HTML block to any part of your form, including custom CSS and custom Javascript code.
This feature is available on the **Business** and **Enterprise** plans. Learn more about our pricing plans and advanced features [**here**](https://www.fillout.com/pricing).
Scroll down on the left-hand panel of your form and click the `HTML` field. Then, click its to `Edit HTML` and `Edit CSS` in the right-hand panel.
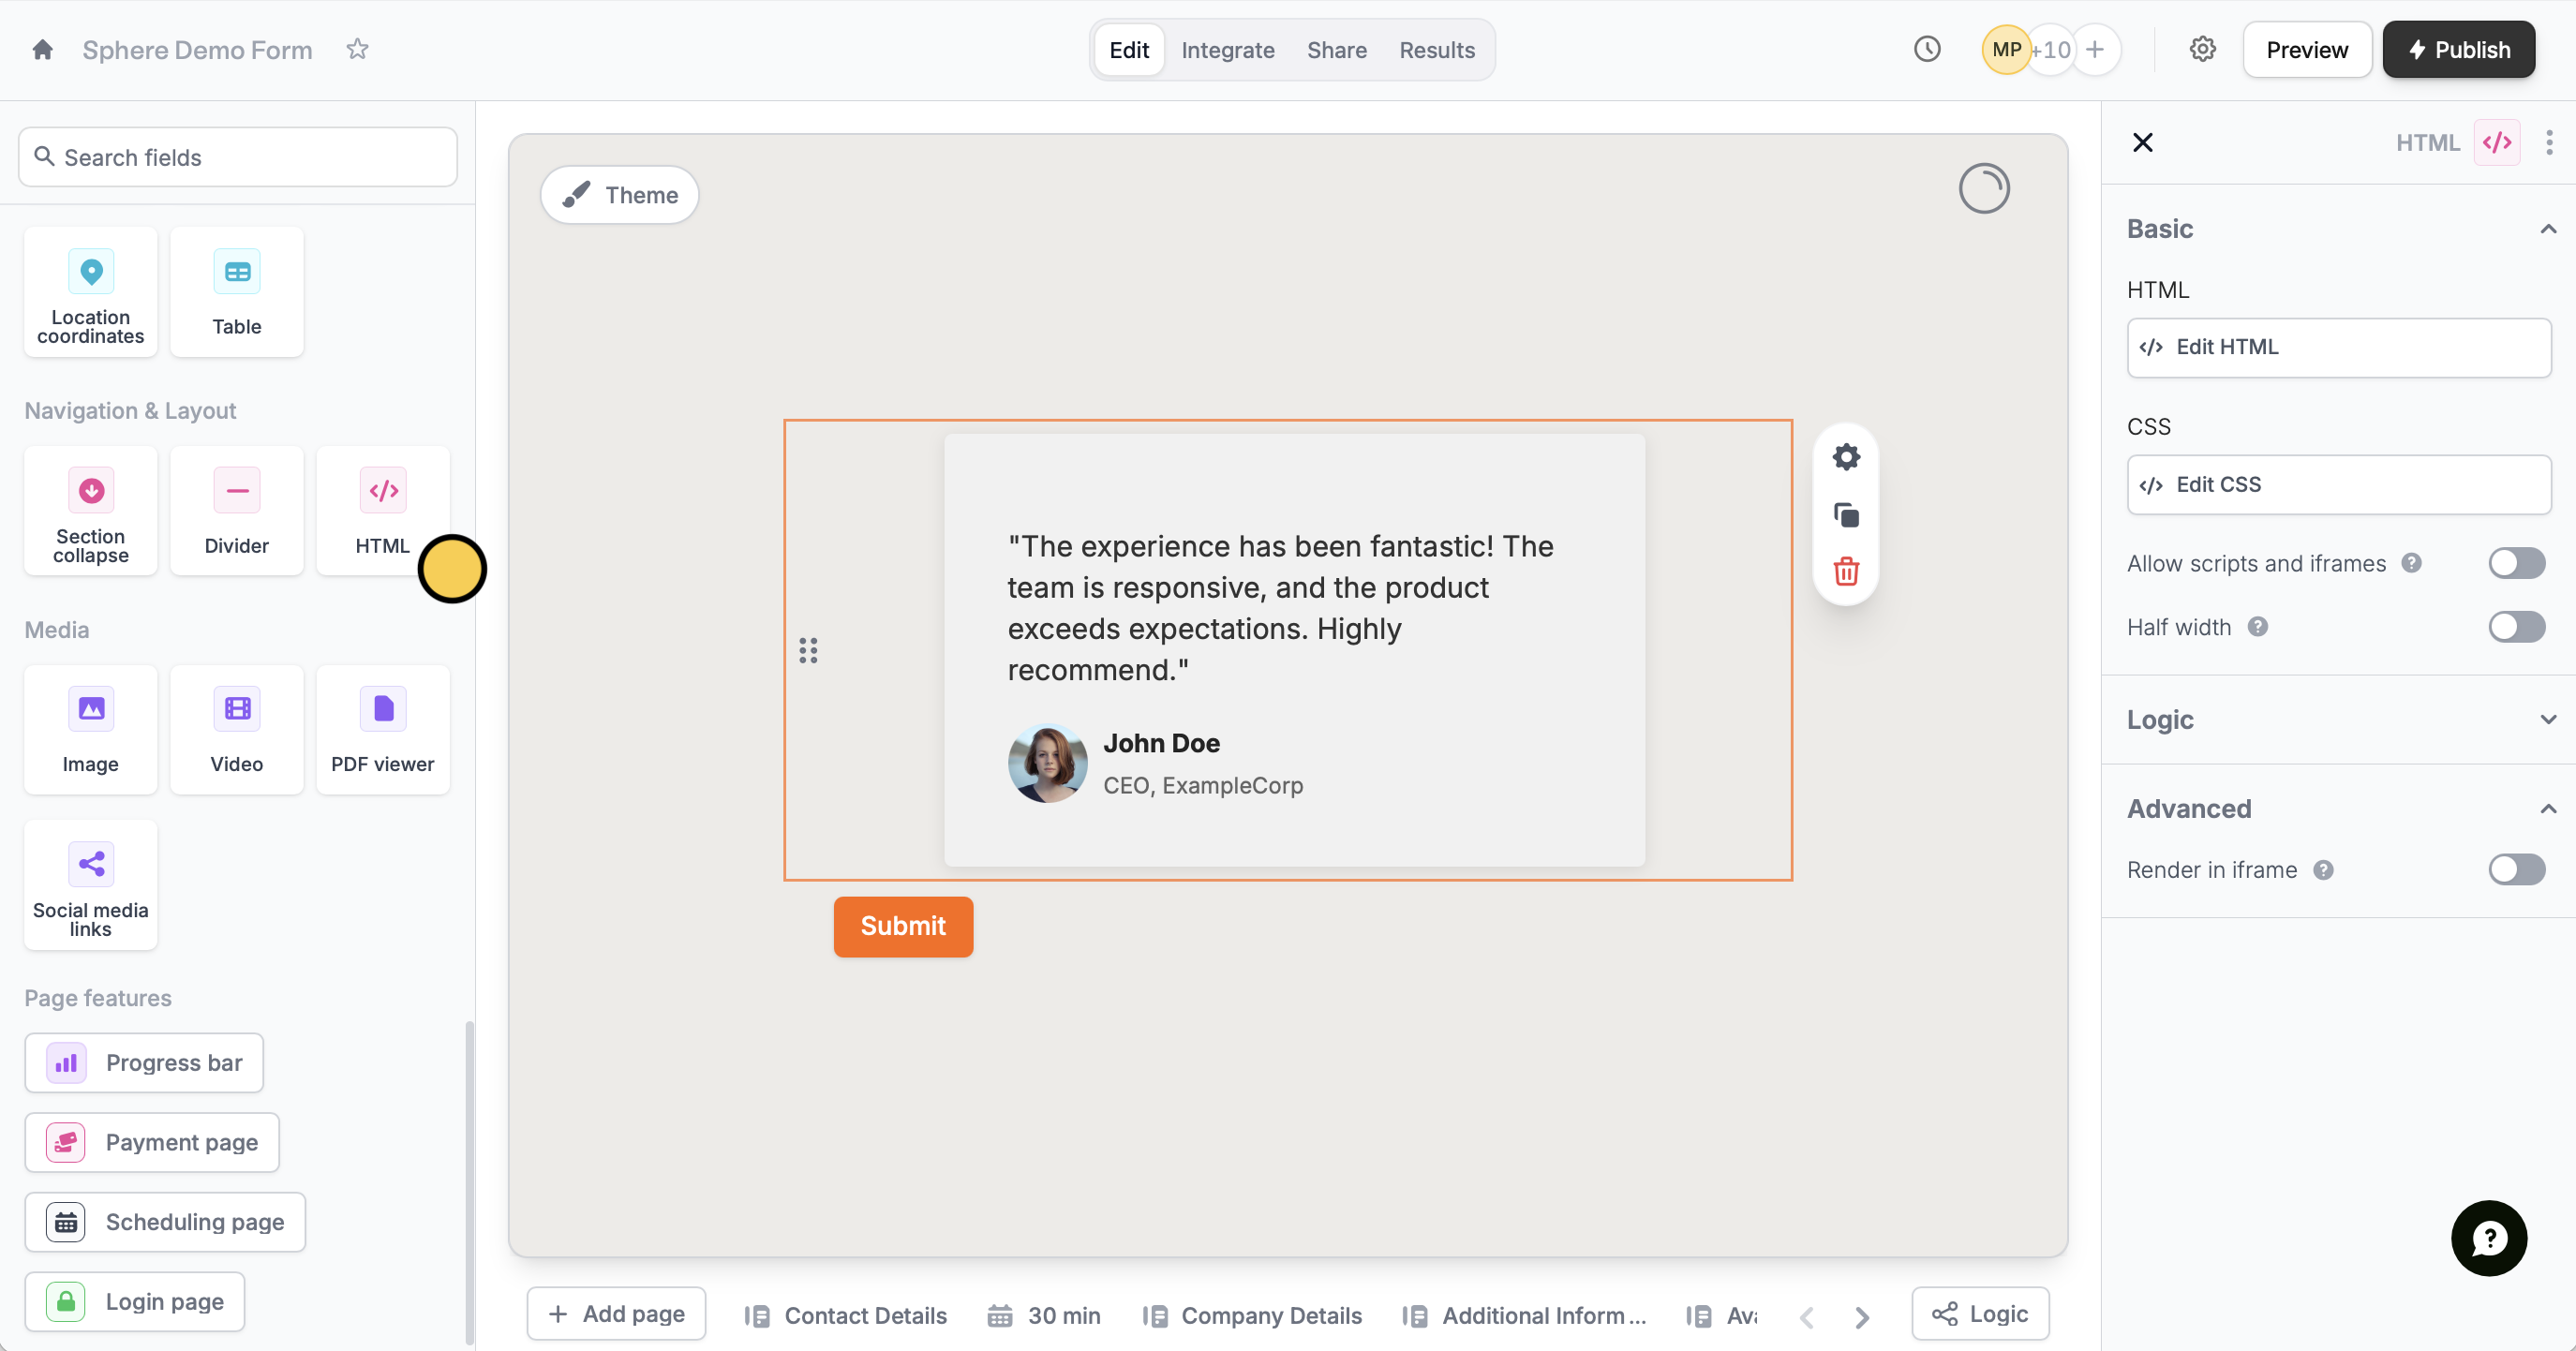 The HTML will render within the field of your form. You can reposition it within your form just like any other field. Note that CSS will only be applied to the field itself.
You can also use [logic](/help/conditional-hiding) to make HTML and CSS blocks appear only when relevant to a respondent's choice.
## Custom scripts and iframes
The HTML block also supports scripts and iFrames. To support these, enable the `Allow scripts and iFrames` toggle in the right-hand panel.
Note that scripts only run in your published form, not in preview mode or in the editor. Go to the live mode of your form to test it out.
Furthermore, you will need to connect a [custom domain](/help/custom-domains) for the scripts to run and for iFrames to render.
Currently, the HTML block is not easily suitable for adding form inputs. For example, it can’t be used to create custom input fields.
## HTML vs. CSS
**HTML** is the markup language used to structure content on the web. By writing HTML code for your form, you can control the layout of your form elements and add custom styles to make your form stand out.
On the other hand, **CSS** is the language used to style HTML content. By writing CSS code for your form, you can define the colors, fonts, and other visual properties of your form elements. This allows you to create a cohesive design that matches your brand identity, and makes your form look professional and polished.
## Relevant articles
Hide or show fields based on answers, URL parameters or data.
Show or hide fields based on multiple conditions at once.
The HTML will render within the field of your form. You can reposition it within your form just like any other field. Note that CSS will only be applied to the field itself.
You can also use [logic](/help/conditional-hiding) to make HTML and CSS blocks appear only when relevant to a respondent's choice.
## Custom scripts and iframes
The HTML block also supports scripts and iFrames. To support these, enable the `Allow scripts and iFrames` toggle in the right-hand panel.
Note that scripts only run in your published form, not in preview mode or in the editor. Go to the live mode of your form to test it out.
Furthermore, you will need to connect a [custom domain](/help/custom-domains) for the scripts to run and for iFrames to render.
Currently, the HTML block is not easily suitable for adding form inputs. For example, it can’t be used to create custom input fields.
## HTML vs. CSS
**HTML** is the markup language used to structure content on the web. By writing HTML code for your form, you can control the layout of your form elements and add custom styles to make your form stand out.
On the other hand, **CSS** is the language used to style HTML content. By writing CSS code for your form, you can define the colors, fonts, and other visual properties of your form elements. This allows you to create a cohesive design that matches your brand identity, and makes your form look professional and polished.
## Relevant articles
Hide or show fields based on answers, URL parameters or data.
Show or hide fields based on multiple conditions at once.