> ## Documentation Index
> Fetch the complete documentation index at: https://fillout.com/help/llms.txt
> Use this file to discover all available pages before exploring further.
# Track form submissions with Meta Pixels
> Add a Facebook pixel to track when users open your form, transition to new pages and submit responses.
## What is a Meta Pixel?
A [**Meta Pixel**](https://www.facebook.com/business/help/742478679120153?id=1205376682832142) lets you track user behavior, like when a user opens a webpage. You can add tracking pixels on Facebook business accounts, and then use them in your Fillout forms!
This feature is available on **Business**, and **Enterprise** plans. Learn more about our pricing plans and advanced features [**here**](https://www.fillout.com/pricing).
## How to use pixels in your form
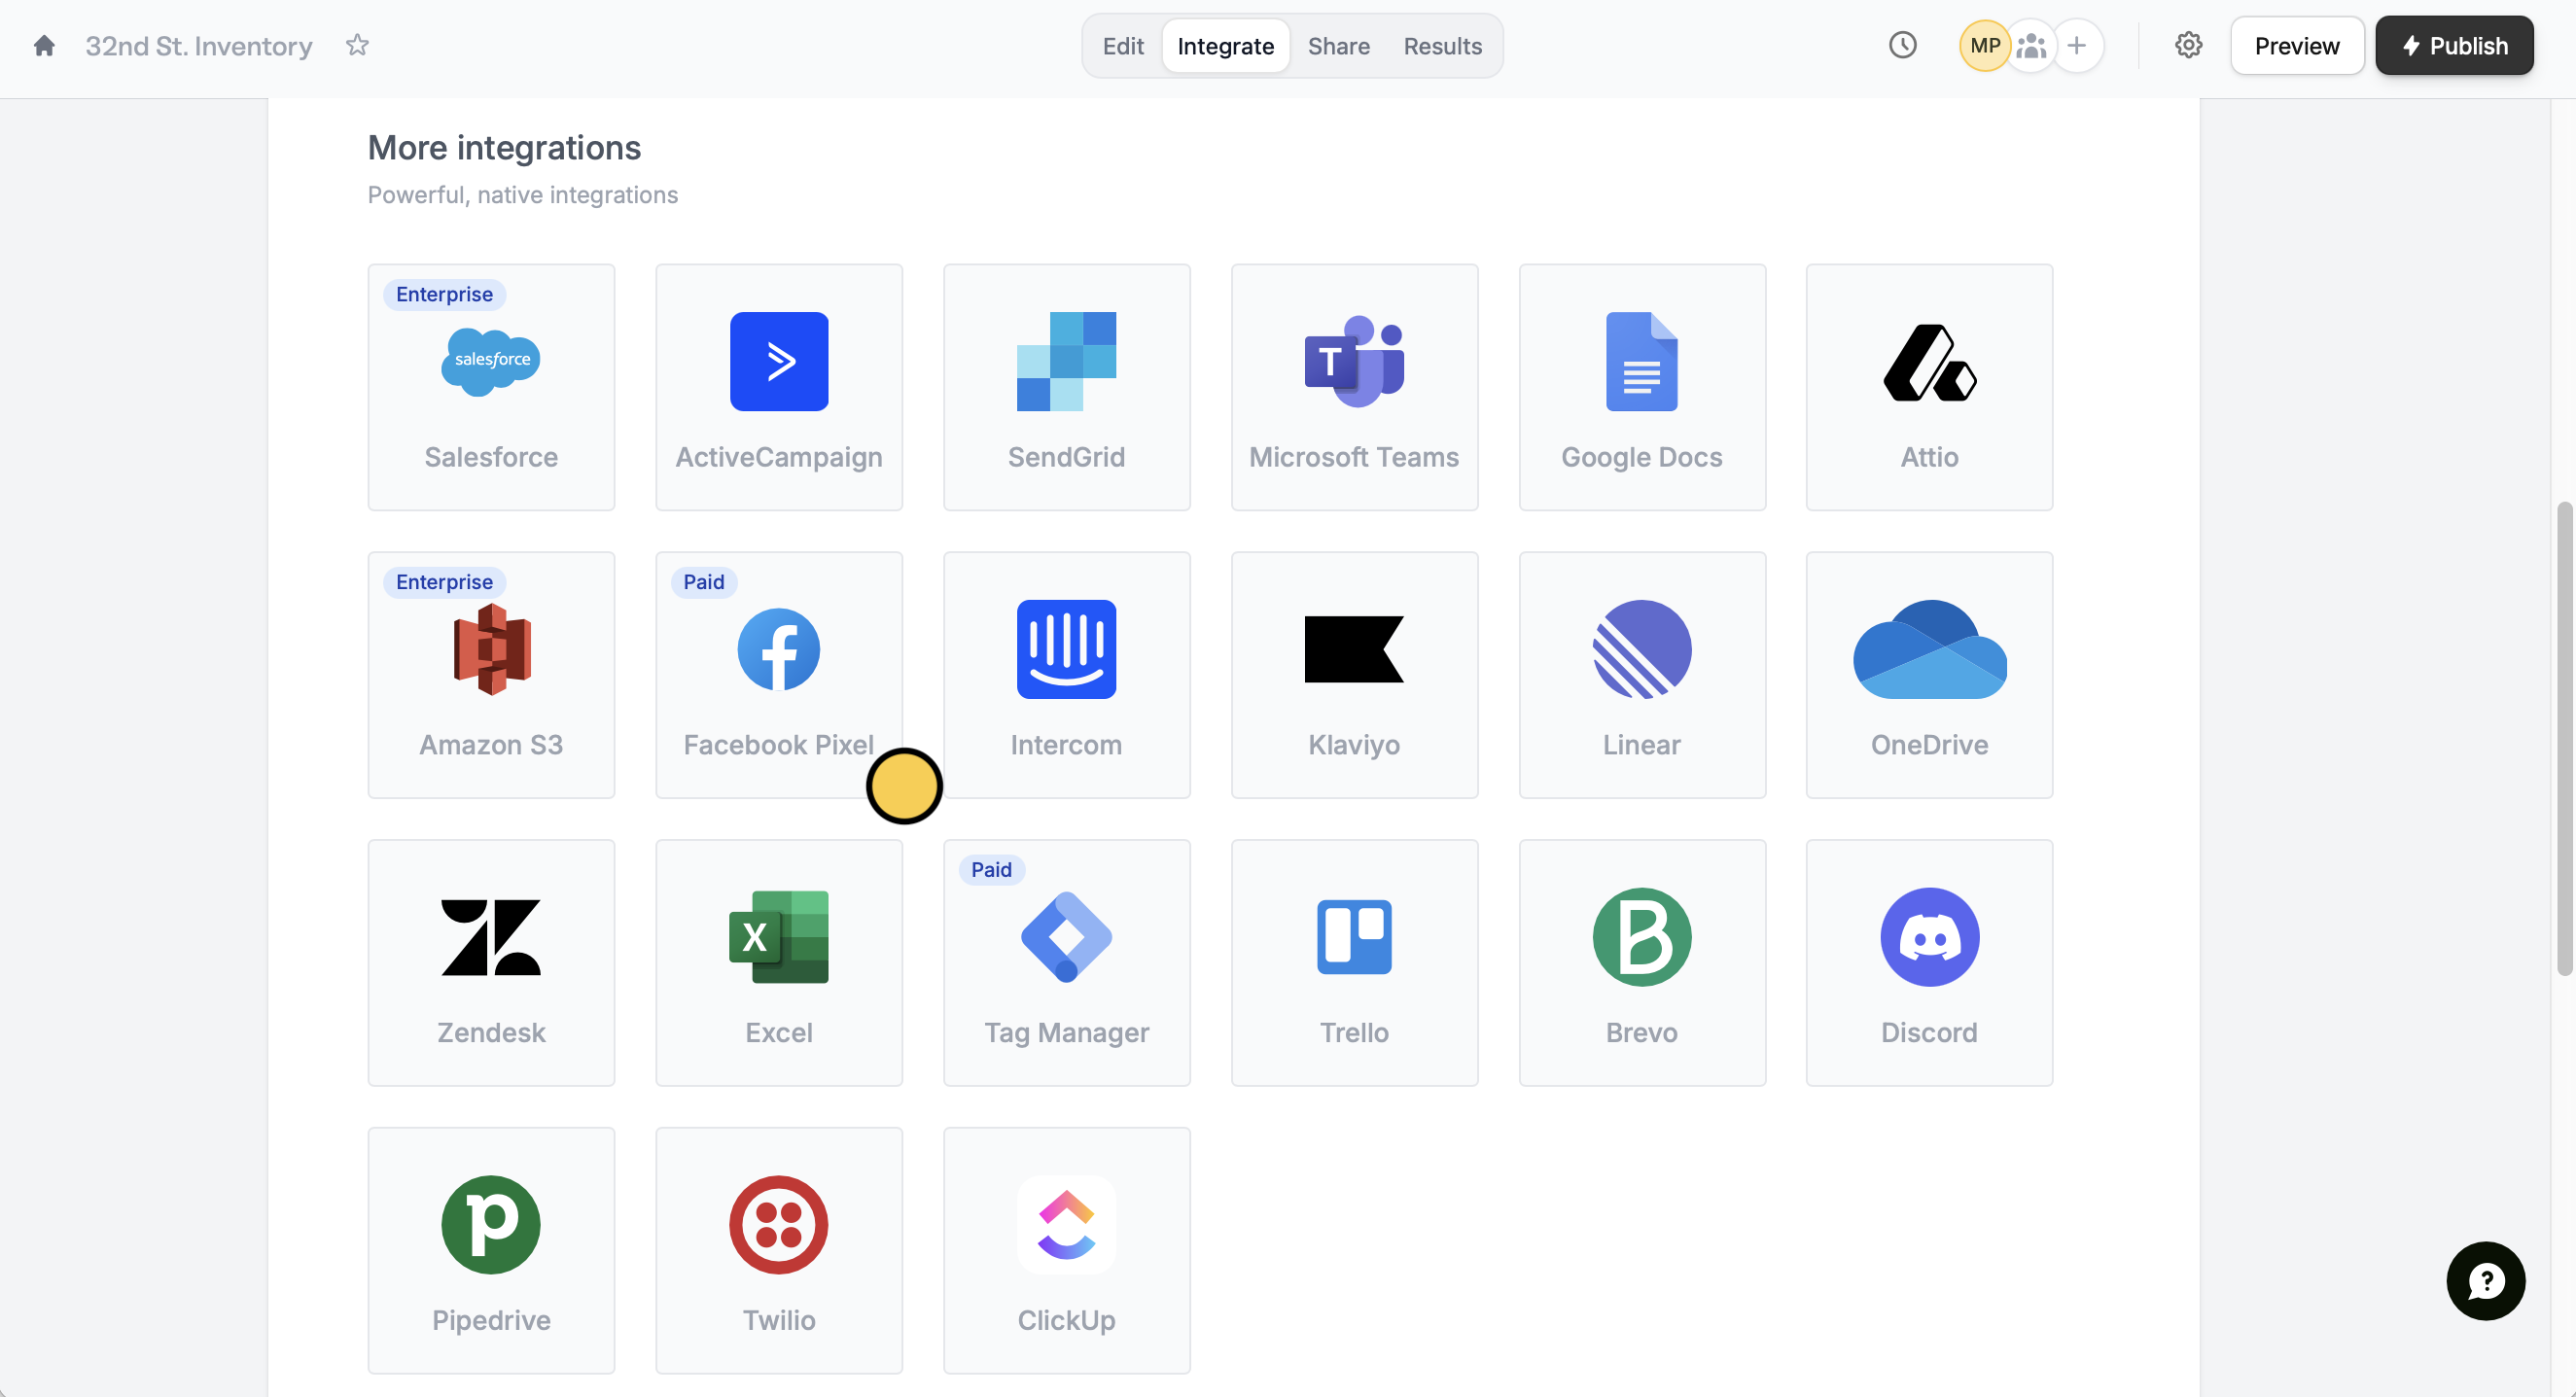
Head over to `Integrate`, and click `Facebook Pixel`.
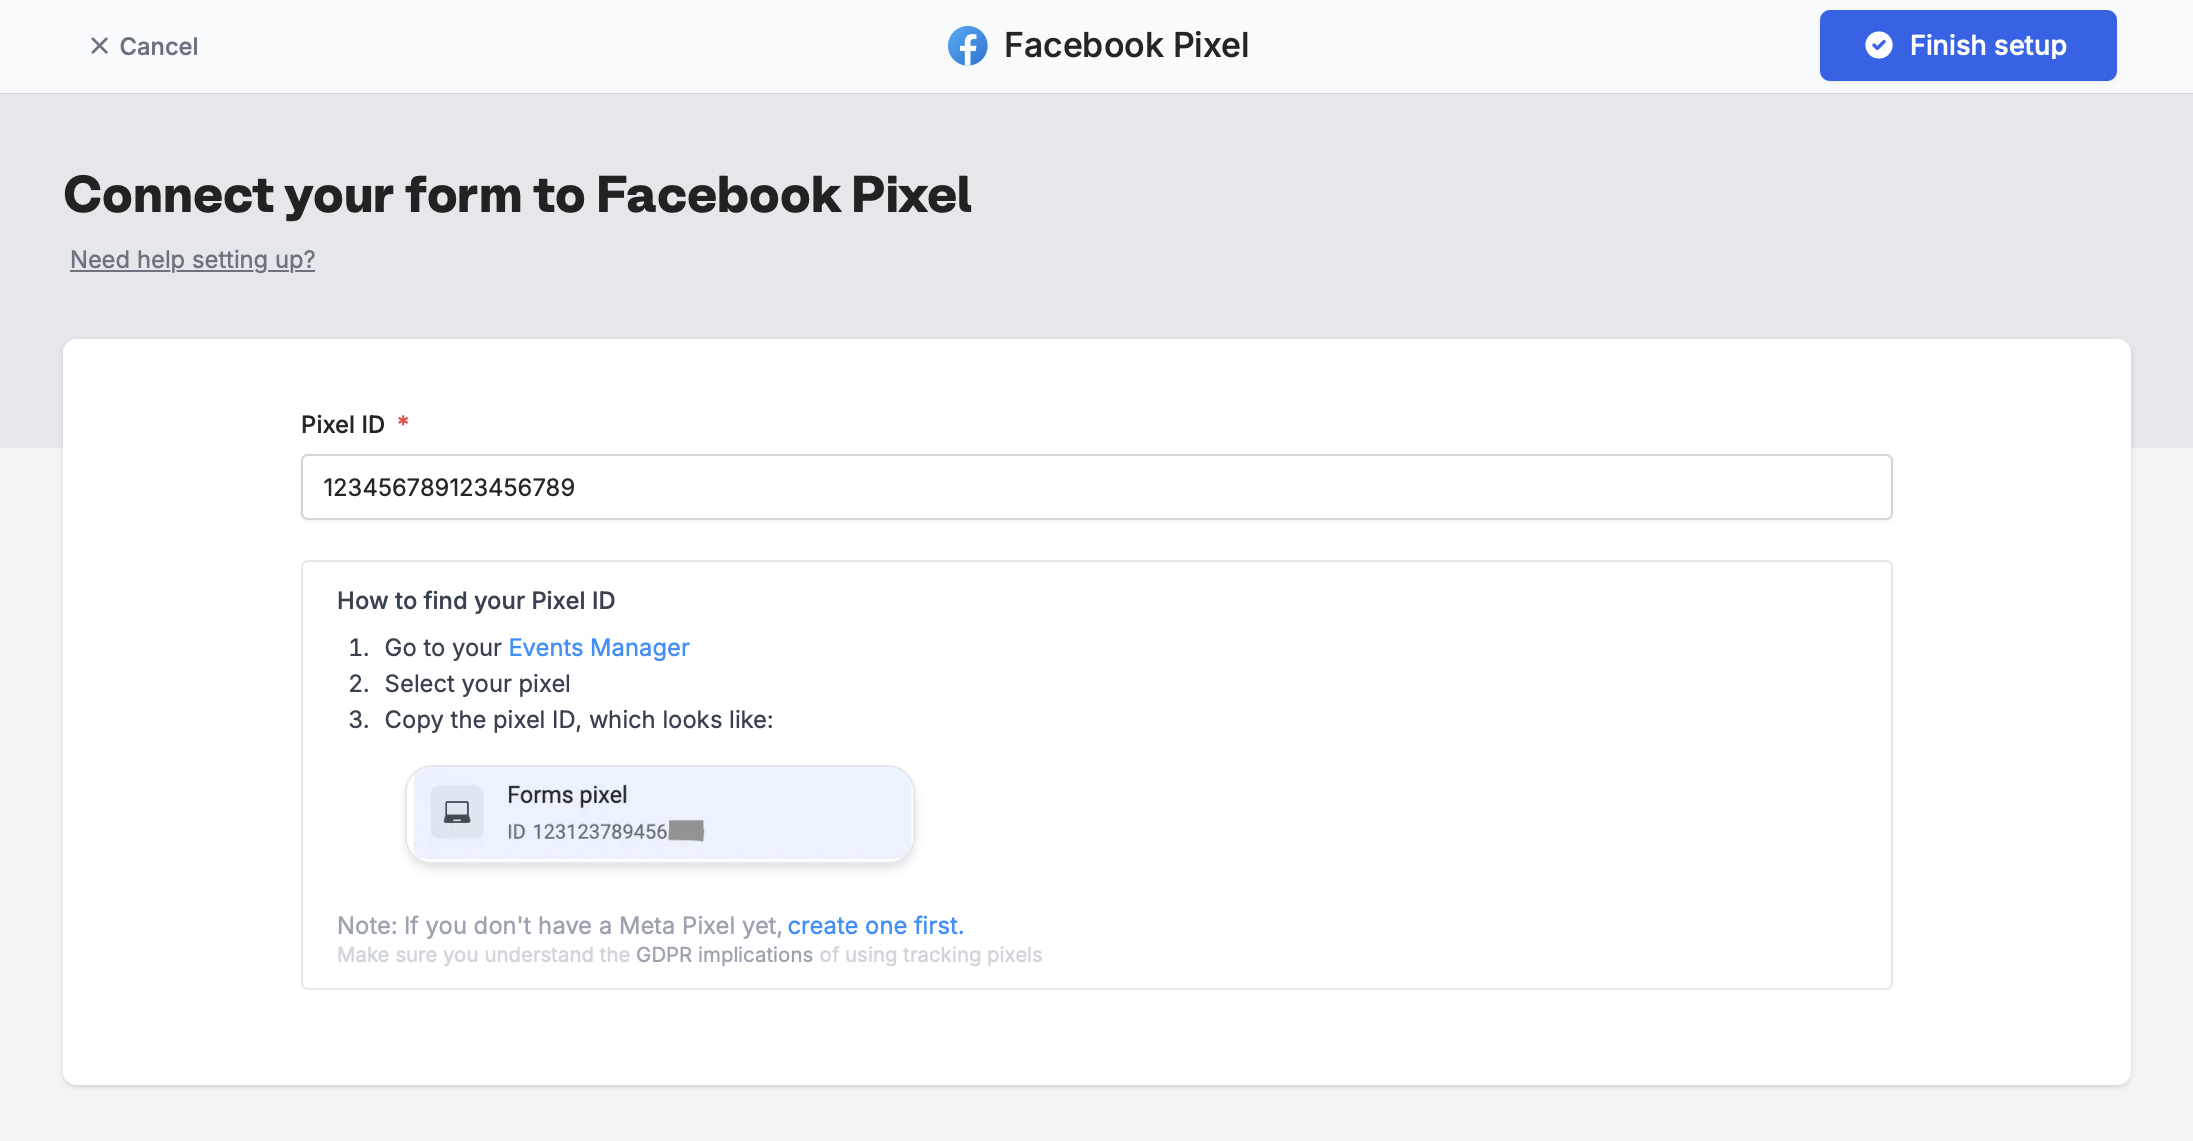
 Input your **Pixel ID**. Follow the instructions below to find your ID. Then, click `Finish setup`.
 That's it! Click `Publish` in the upper right corner.
When someone submits your form with your public form link, you will get events in your Events Manager, which look like the image below.
## How to check event details
On Meta Business Suite, if you click on one of the generated **Fillout events** (**Fillout.FormPageViewed** or **Fillout.FormSubmitted**) you will be able to `View details`.
That's it! Click `Publish` in the upper right corner.
When someone submits your form with your public form link, you will get events in your Events Manager, which look like the image below.
## How to check event details
On Meta Business Suite, if you click on one of the generated **Fillout events** (**Fillout.FormPageViewed** or **Fillout.FormSubmitted**) you will be able to `View details`.
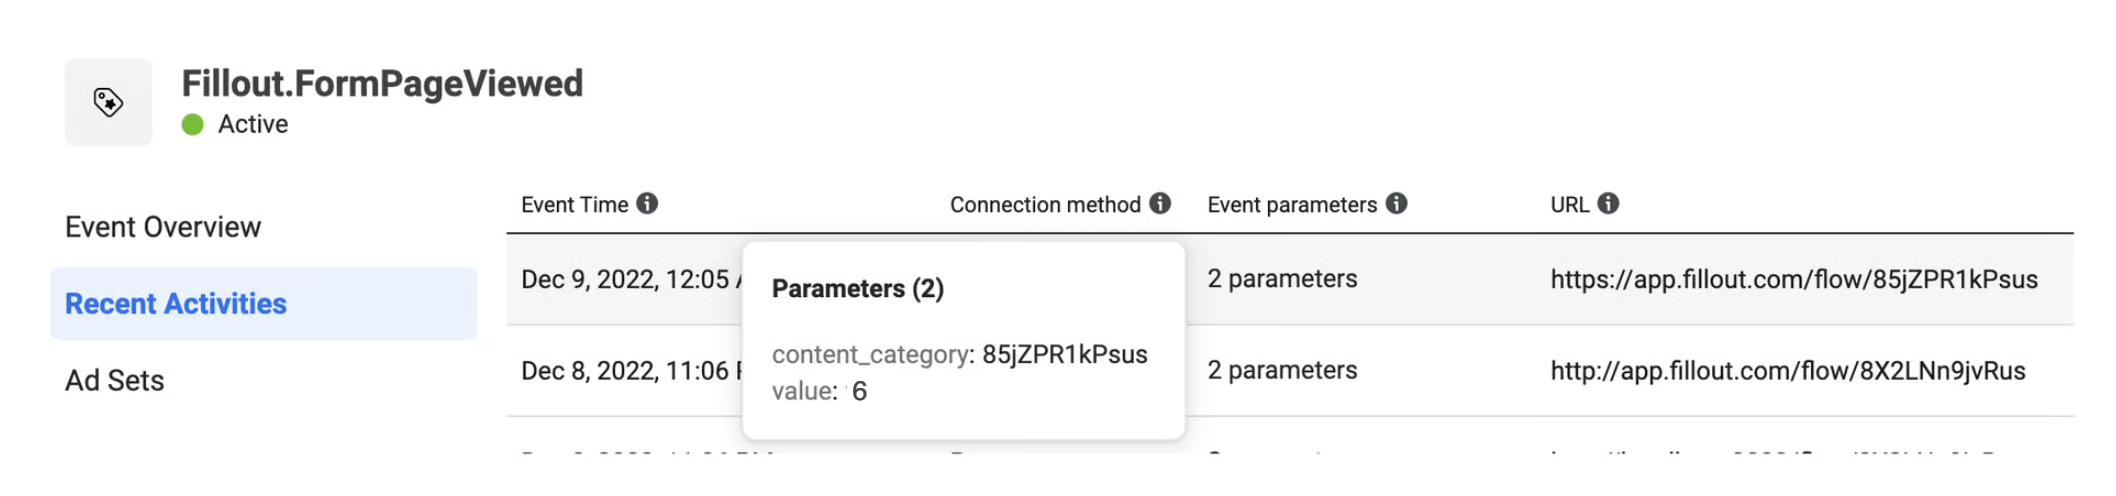 In **Recent Activities**, you can see parameters that were passed to the pixel.
* **content\_category** - the form's unique ID
* **value** - the number of the page or step in the form that the user viewed (e.g., if the user was on the 6th page of the form, the value sent would be "6")
It can take between 2 to 5 minutes for new events to show up in your Events Manager.
If you need to be GDPR compliant, you will want to [display a cookie banner](https://www.fillout.com/help/cookie-consent) on the form, which can be toggled in the form settings.
## Other similar integrations
Use email, GCLID, address, and more.
Check conversions and ROI through responses.
In **Recent Activities**, you can see parameters that were passed to the pixel.
* **content\_category** - the form's unique ID
* **value** - the number of the page or step in the form that the user viewed (e.g., if the user was on the 6th page of the form, the value sent would be "6")
It can take between 2 to 5 minutes for new events to show up in your Events Manager.
If you need to be GDPR compliant, you will want to [display a cookie banner](https://www.fillout.com/help/cookie-consent) on the form, which can be toggled in the form settings.
## Other similar integrations
Use email, GCLID, address, and more.
Check conversions and ROI through responses.