> ## Documentation Index
> Fetch the complete documentation index at: https://fillout.com/help/llms.txt
> Use this file to discover all available pages before exploring further.
# Allow multiple linked records creation
> Let respondents create multiple linked records in your Fillout form.
export const SupportBanner = () => {
const titleId = React.useId();
return ;
};
## How it works
If your form includes a [record picker field](https://www.fillout.com/help/record-pickers) that allows [creating new records](https://www.fillout.com/help/create-new-linked-records#create-new-linked-records), respondents can add multiple linked records in one form.
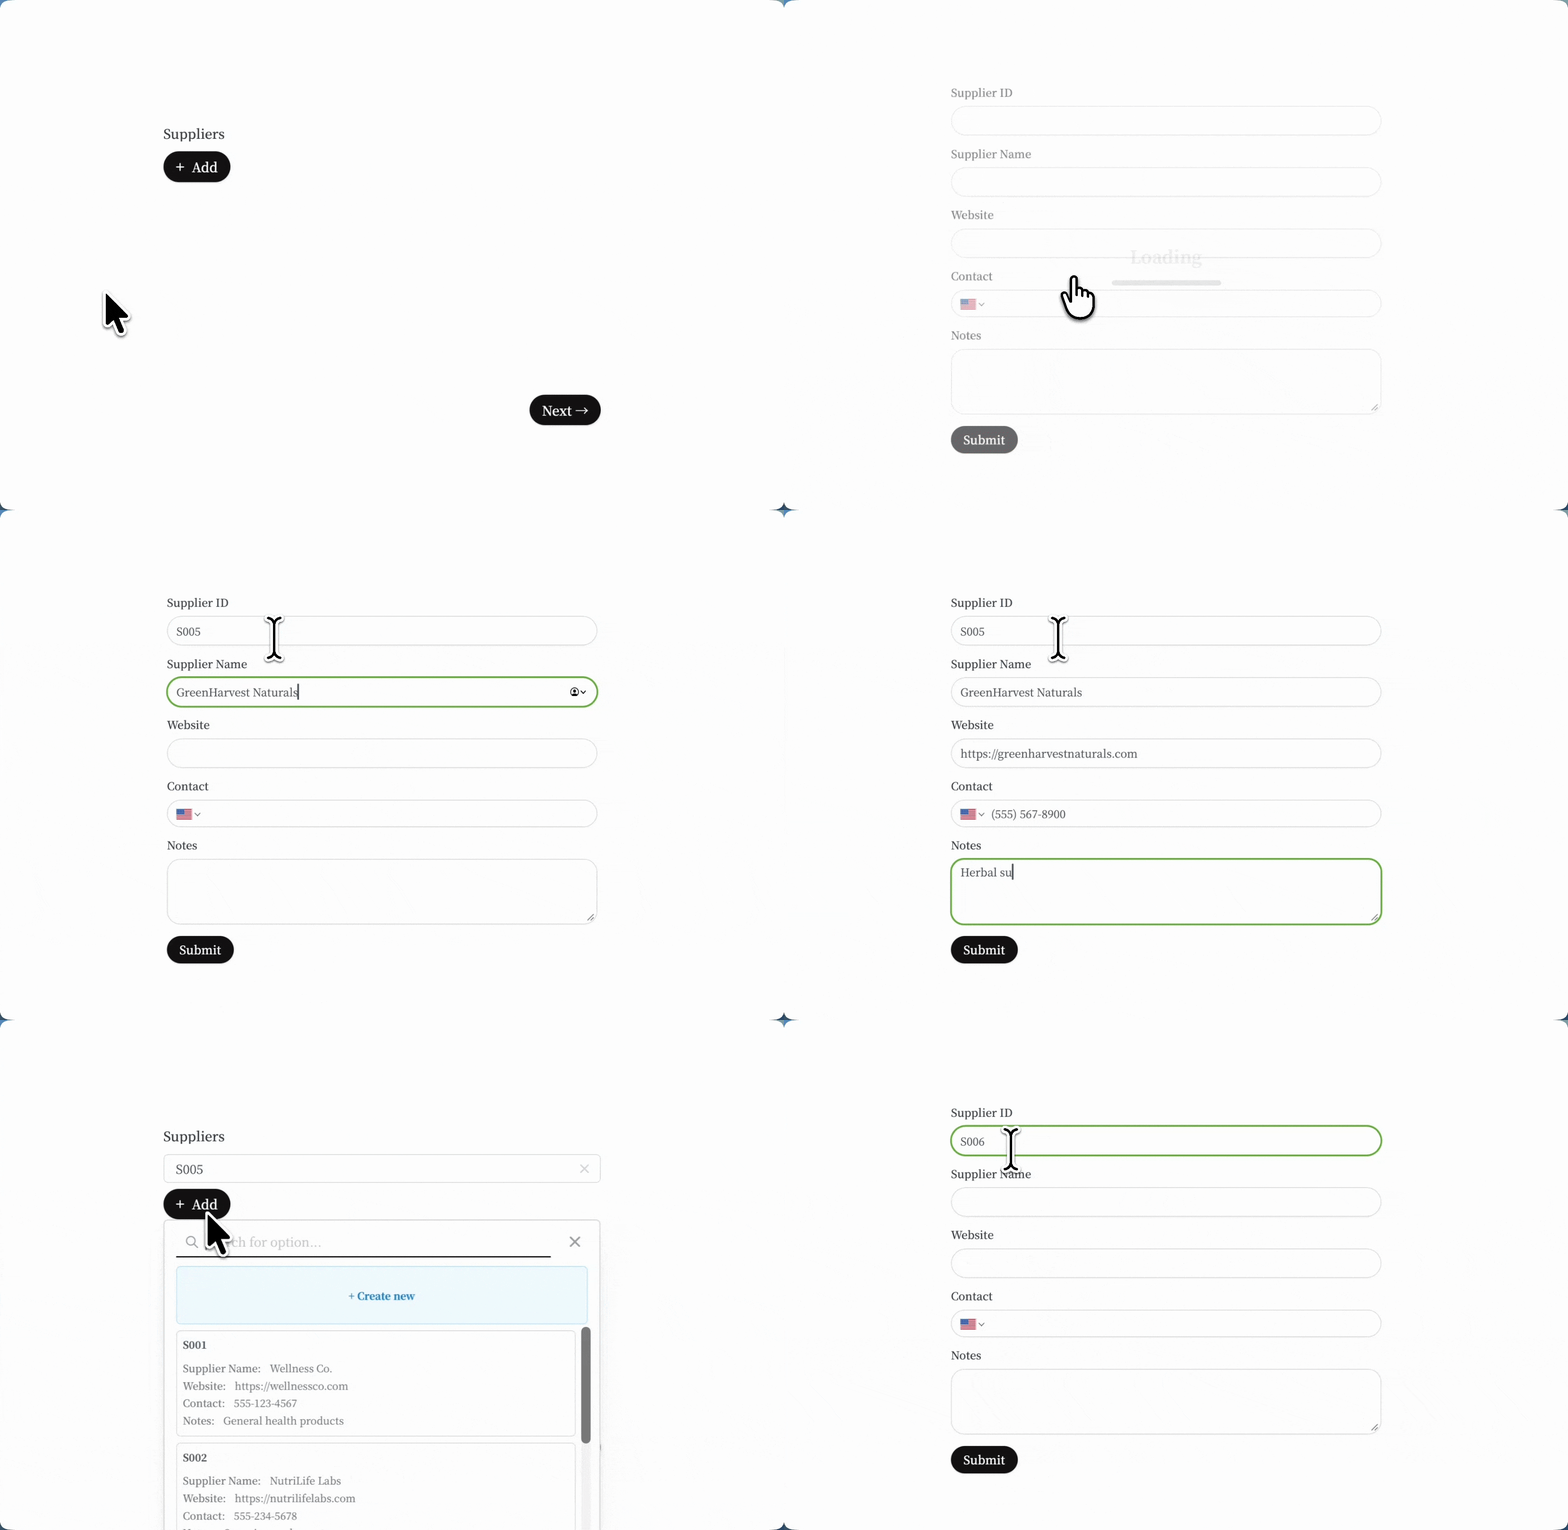
When filling it out, they’ll see an `+ Add` button. Clicking it opens a dropdown. If there are existing records, they’ll appear there. If not, the list will be empty.
They can click `+ Create new` to open a subform and add a linked record. To add more, they simply need to click the two buttons mentioned.
 ## How to enable adding two or more linked records
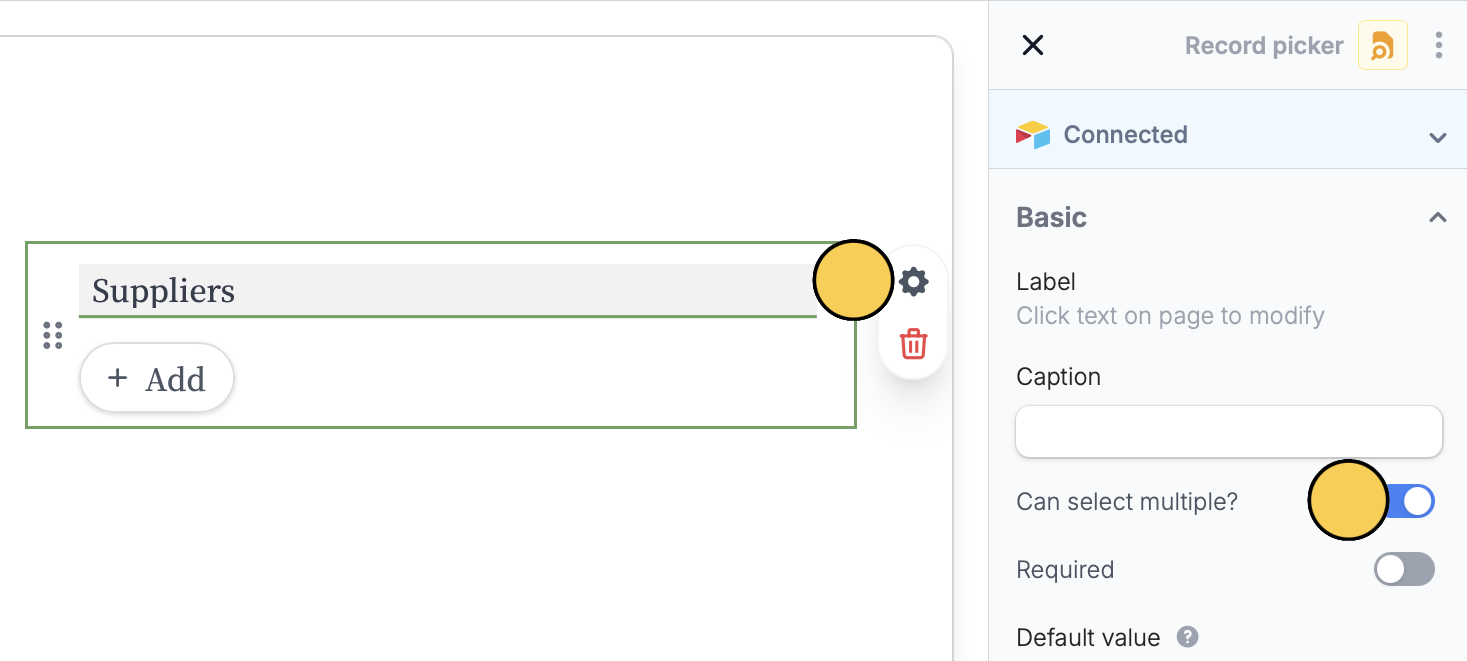
Click your **record picker** followed by its `gear icon` . Then, Toggle `Can select multiple?`.
## How to enable adding two or more linked records
Click your **record picker** followed by its `gear icon` . Then, Toggle `Can select multiple?`.
 Make sure [Can create new records](https://www.fillout.com/help/create-new-linked-records#create-new-linked-records) is enabled in order for this feature to work.
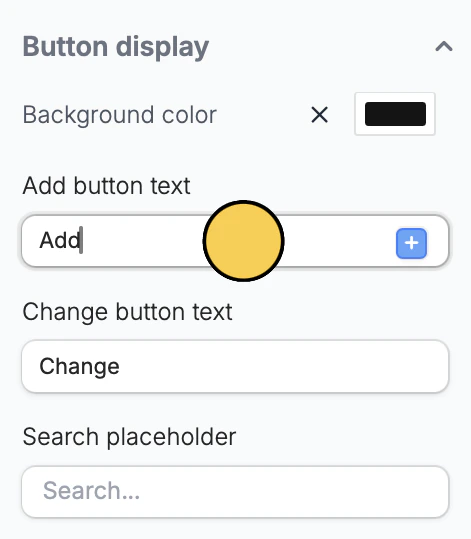
You can change the default button label (Add) to your preferred text. In the right-hand panel, scroll down to **Button display** and edit the text from there.
Make sure [Can create new records](https://www.fillout.com/help/create-new-linked-records#create-new-linked-records) is enabled in order for this feature to work.
You can change the default button label (Add) to your preferred text. In the right-hand panel, scroll down to **Button display** and edit the text from there.
 ## Set minimum and maximum limits
You can control how many records respondents can create (or select). Click your **record picker** followed by its`gear icon` . In the right-hand panel, scroll down to **Validation**.
## Set minimum and maximum limits
You can control how many records respondents can create (or select). Click your **record picker** followed by its`gear icon` . In the right-hand panel, scroll down to **Validation**.
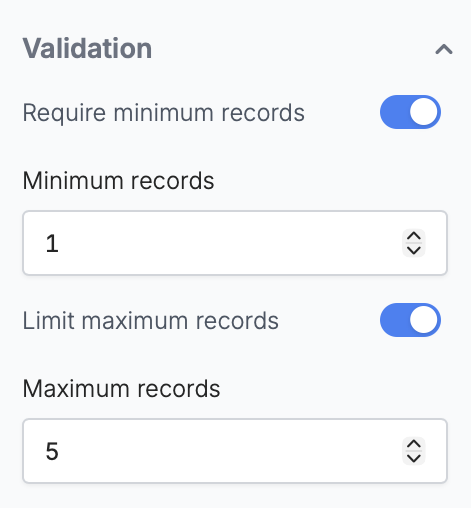 Choose to enable `Require minimum records` and/or `Limit maximum records`, then set your preferred numbers.
### Common use cases
* **Team Management:** Add multiple employees in a single submission
* **Expense Tracking:** Record multiple expenses in one form
* **RSVPs:** Let respondents log data of multiple guests and their details
* **Requests:** Submit multiple product requests or support tickets in one form
Choose to enable `Require minimum records` and/or `Limit maximum records`, then set your preferred numbers.
### Common use cases
* **Team Management:** Add multiple employees in a single submission
* **Expense Tracking:** Record multiple expenses in one form
* **RSVPs:** Let respondents log data of multiple guests and their details
* **Requests:** Submit multiple product requests or support tickets in one form