> ## Documentation Index
> Fetch the complete documentation index at: https://fillout.com/help/llms.txt
> Use this file to discover all available pages before exploring further.
# Create Fillout 3rd Party Apps
> Create direct integrations between Fillout and other tools or platforms. Add webhooks to listen for form responses, retrieve forms, etc.
## Overview
3rd party applications in Fillout can be used to create direct integrations with other tools or platforms and allow you or your users to access Fillout forms and responses. You can use a Fillout app to:
* Connect Fillout with external platforms or internal tools
* Retrieve forms and form responses
* Listen for new submissions using webhooks
* Build custom workflows and automations
* Create integrations for shared or public use
To connect Fillout to your app, you’ll first start by creating an OAuth application in Fillout. Requests for direct integrations, partnership integrations, or public OAuth apps may require review and approval from the Fillout team before they can be used by other users.
## Creating an OAuth app
On the upper left corner of your Fillout dashboard, click your `Account name` followed by `Settings`.
 In the **Developer** page, select `OAuth integrations`.
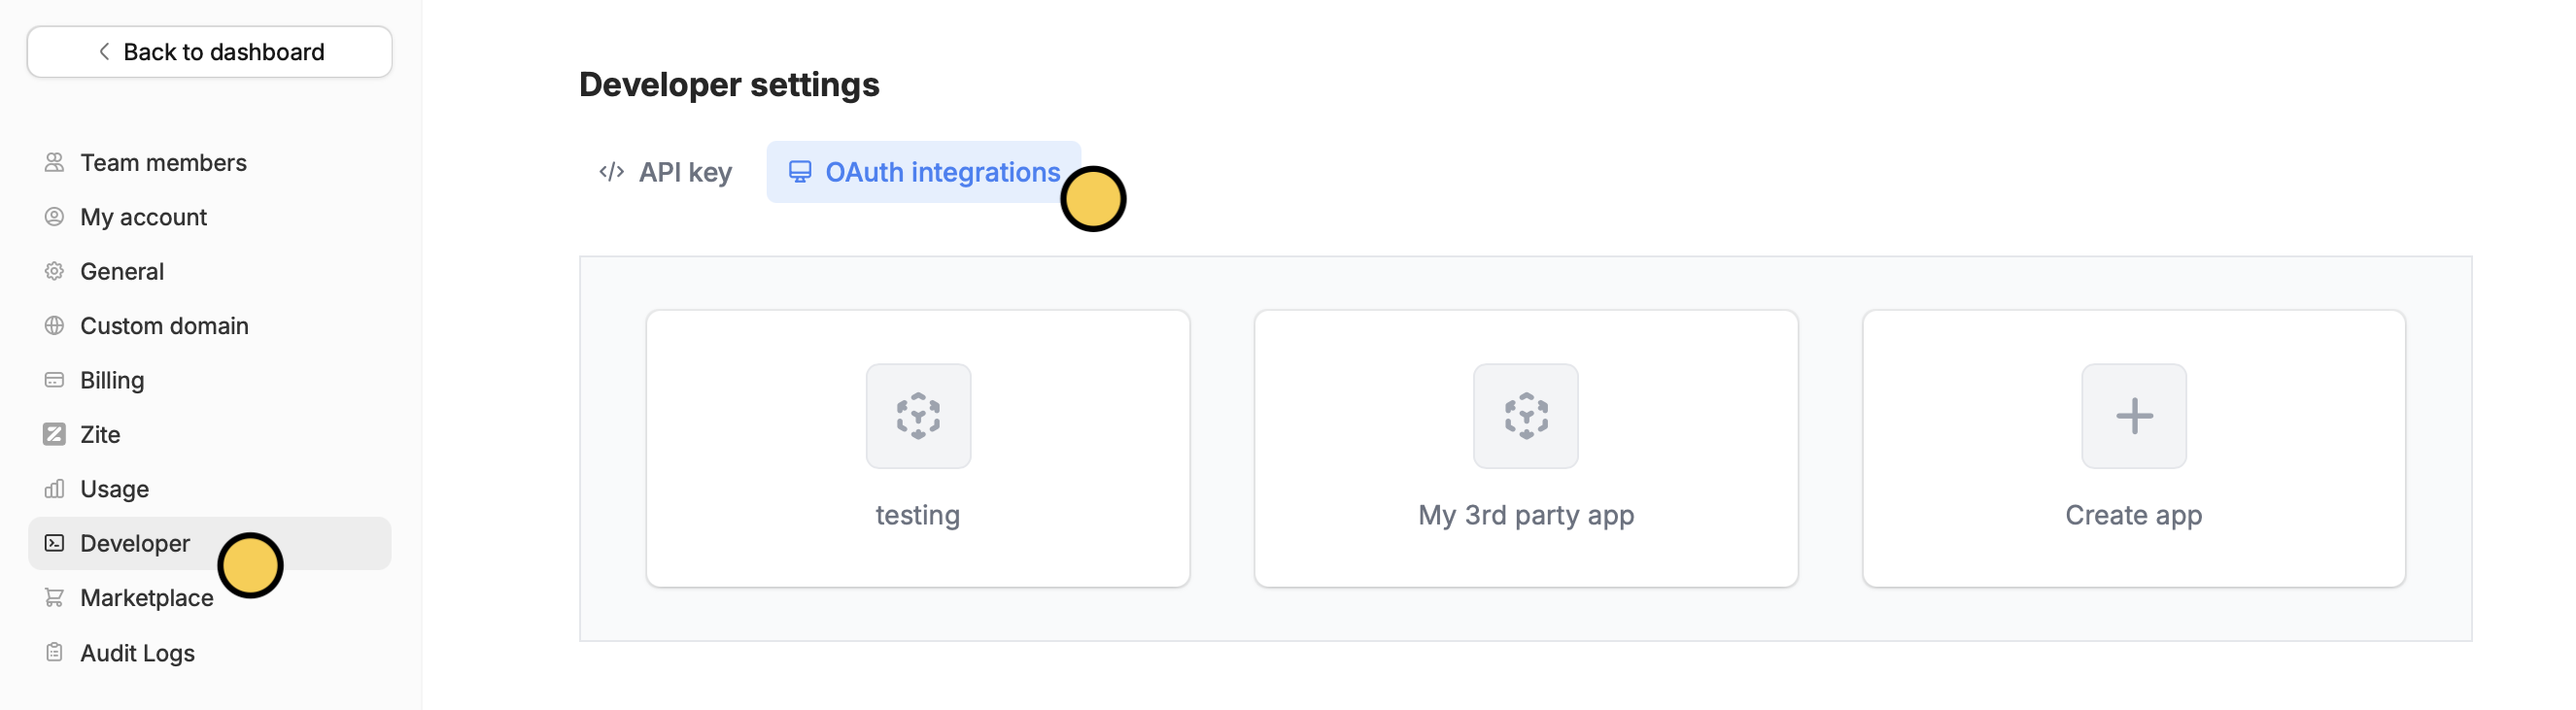 Click `Create app` and enter a **name** for your app.
 You’ll want to upload an **App icon** (users will see this when they first connect), and also set up some basic properties:
* **Redirect URIs** - endpoints you’d like to get sent to during the OAuth token exchange process to receive the token (more info below)
* **Client ID** - the public ID of your application
* **Client secret** - must be generated to get started.
Make sure to save this token, it will only be shown once.
You’ll want to upload an **App icon** (users will see this when they first connect), and also set up some basic properties:
* **Redirect URIs** - endpoints you’d like to get sent to during the OAuth token exchange process to receive the token (more info below)
* **Client ID** - the public ID of your application
* **Client secret** - must be generated to get started.
Make sure to save this token, it will only be shown once.
 ## OAuth process
### Authorization request
`GET https://build.fillout.com/authorize/oauth`
To initiate the OAuth process, you’ll start by sending users to the above endpoint, with the following query parameters:
* `client_id`: the client ID of your app, which you can find while configuring it (see above)
* `redirect_uri`: the URL you expect to be redirected to, once access is granted for the token
* `state:` any string you’d like to use to retain state when redirecting back to your app
After authorization, the user’s browser will be redirected back to the redirect URI passed. Successful requests will forward the following query parameters to that URI:
* `code`: a unique oauth authorization code you can use to exchange for an access token
* `state`: the state parameter you passed in initially
### Token creation request
`POST https://server.fillout.com/public/oauth/accessToken`
Call this endpoint once you’ve successfully been redirected to after the authorization request. Pass, in the body of the request:
* `code`: the code you received in the previous step
* `client_id`: your client id for your app
* `client_secret`: the client secret you generated for your app
* `redirect_uri`: the redirect uri you originally received to generate this code.
A successful response will look like:
```json theme={null}
{
"access_token": "abcdefg",
"base_url": "https://api.fillout.com",
}
```
The `access_token` will grant access to the [Fillout API](/fillout-rest-api)
The `base_url` is the base URL for the api. Usually, this will be `https://api.fillout.com`, but may vary if you are in different geo-locations, or are self-hosting.
### Invalidate access token
`DELETE https://server.fillout.com/public/oauth/invalidate`
To authenticate this request, pass the following headers:
```json theme={null}
{
"Authentication": "Bearer "
}
```
## OAuth process
### Authorization request
`GET https://build.fillout.com/authorize/oauth`
To initiate the OAuth process, you’ll start by sending users to the above endpoint, with the following query parameters:
* `client_id`: the client ID of your app, which you can find while configuring it (see above)
* `redirect_uri`: the URL you expect to be redirected to, once access is granted for the token
* `state:` any string you’d like to use to retain state when redirecting back to your app
After authorization, the user’s browser will be redirected back to the redirect URI passed. Successful requests will forward the following query parameters to that URI:
* `code`: a unique oauth authorization code you can use to exchange for an access token
* `state`: the state parameter you passed in initially
### Token creation request
`POST https://server.fillout.com/public/oauth/accessToken`
Call this endpoint once you’ve successfully been redirected to after the authorization request. Pass, in the body of the request:
* `code`: the code you received in the previous step
* `client_id`: your client id for your app
* `client_secret`: the client secret you generated for your app
* `redirect_uri`: the redirect uri you originally received to generate this code.
A successful response will look like:
```json theme={null}
{
"access_token": "abcdefg",
"base_url": "https://api.fillout.com",
}
```
The `access_token` will grant access to the [Fillout API](/fillout-rest-api)
The `base_url` is the base URL for the api. Usually, this will be `https://api.fillout.com`, but may vary if you are in different geo-locations, or are self-hosting.
### Invalidate access token
`DELETE https://server.fillout.com/public/oauth/invalidate`
To authenticate this request, pass the following headers:
```json theme={null}
{
"Authentication": "Bearer "
}
```