> ## Documentation Index
> Fetch the complete documentation index at: https://fillout.com/help/llms.txt
> Use this file to discover all available pages before exploring further.
# Generate PDFs with form responses
> Autofill and sign PDFs + documents with form submissions. Attach completed documents to email notifications, allow immediate download in the form or upload to 3rd party apps.
## Video tutorial
## How it works
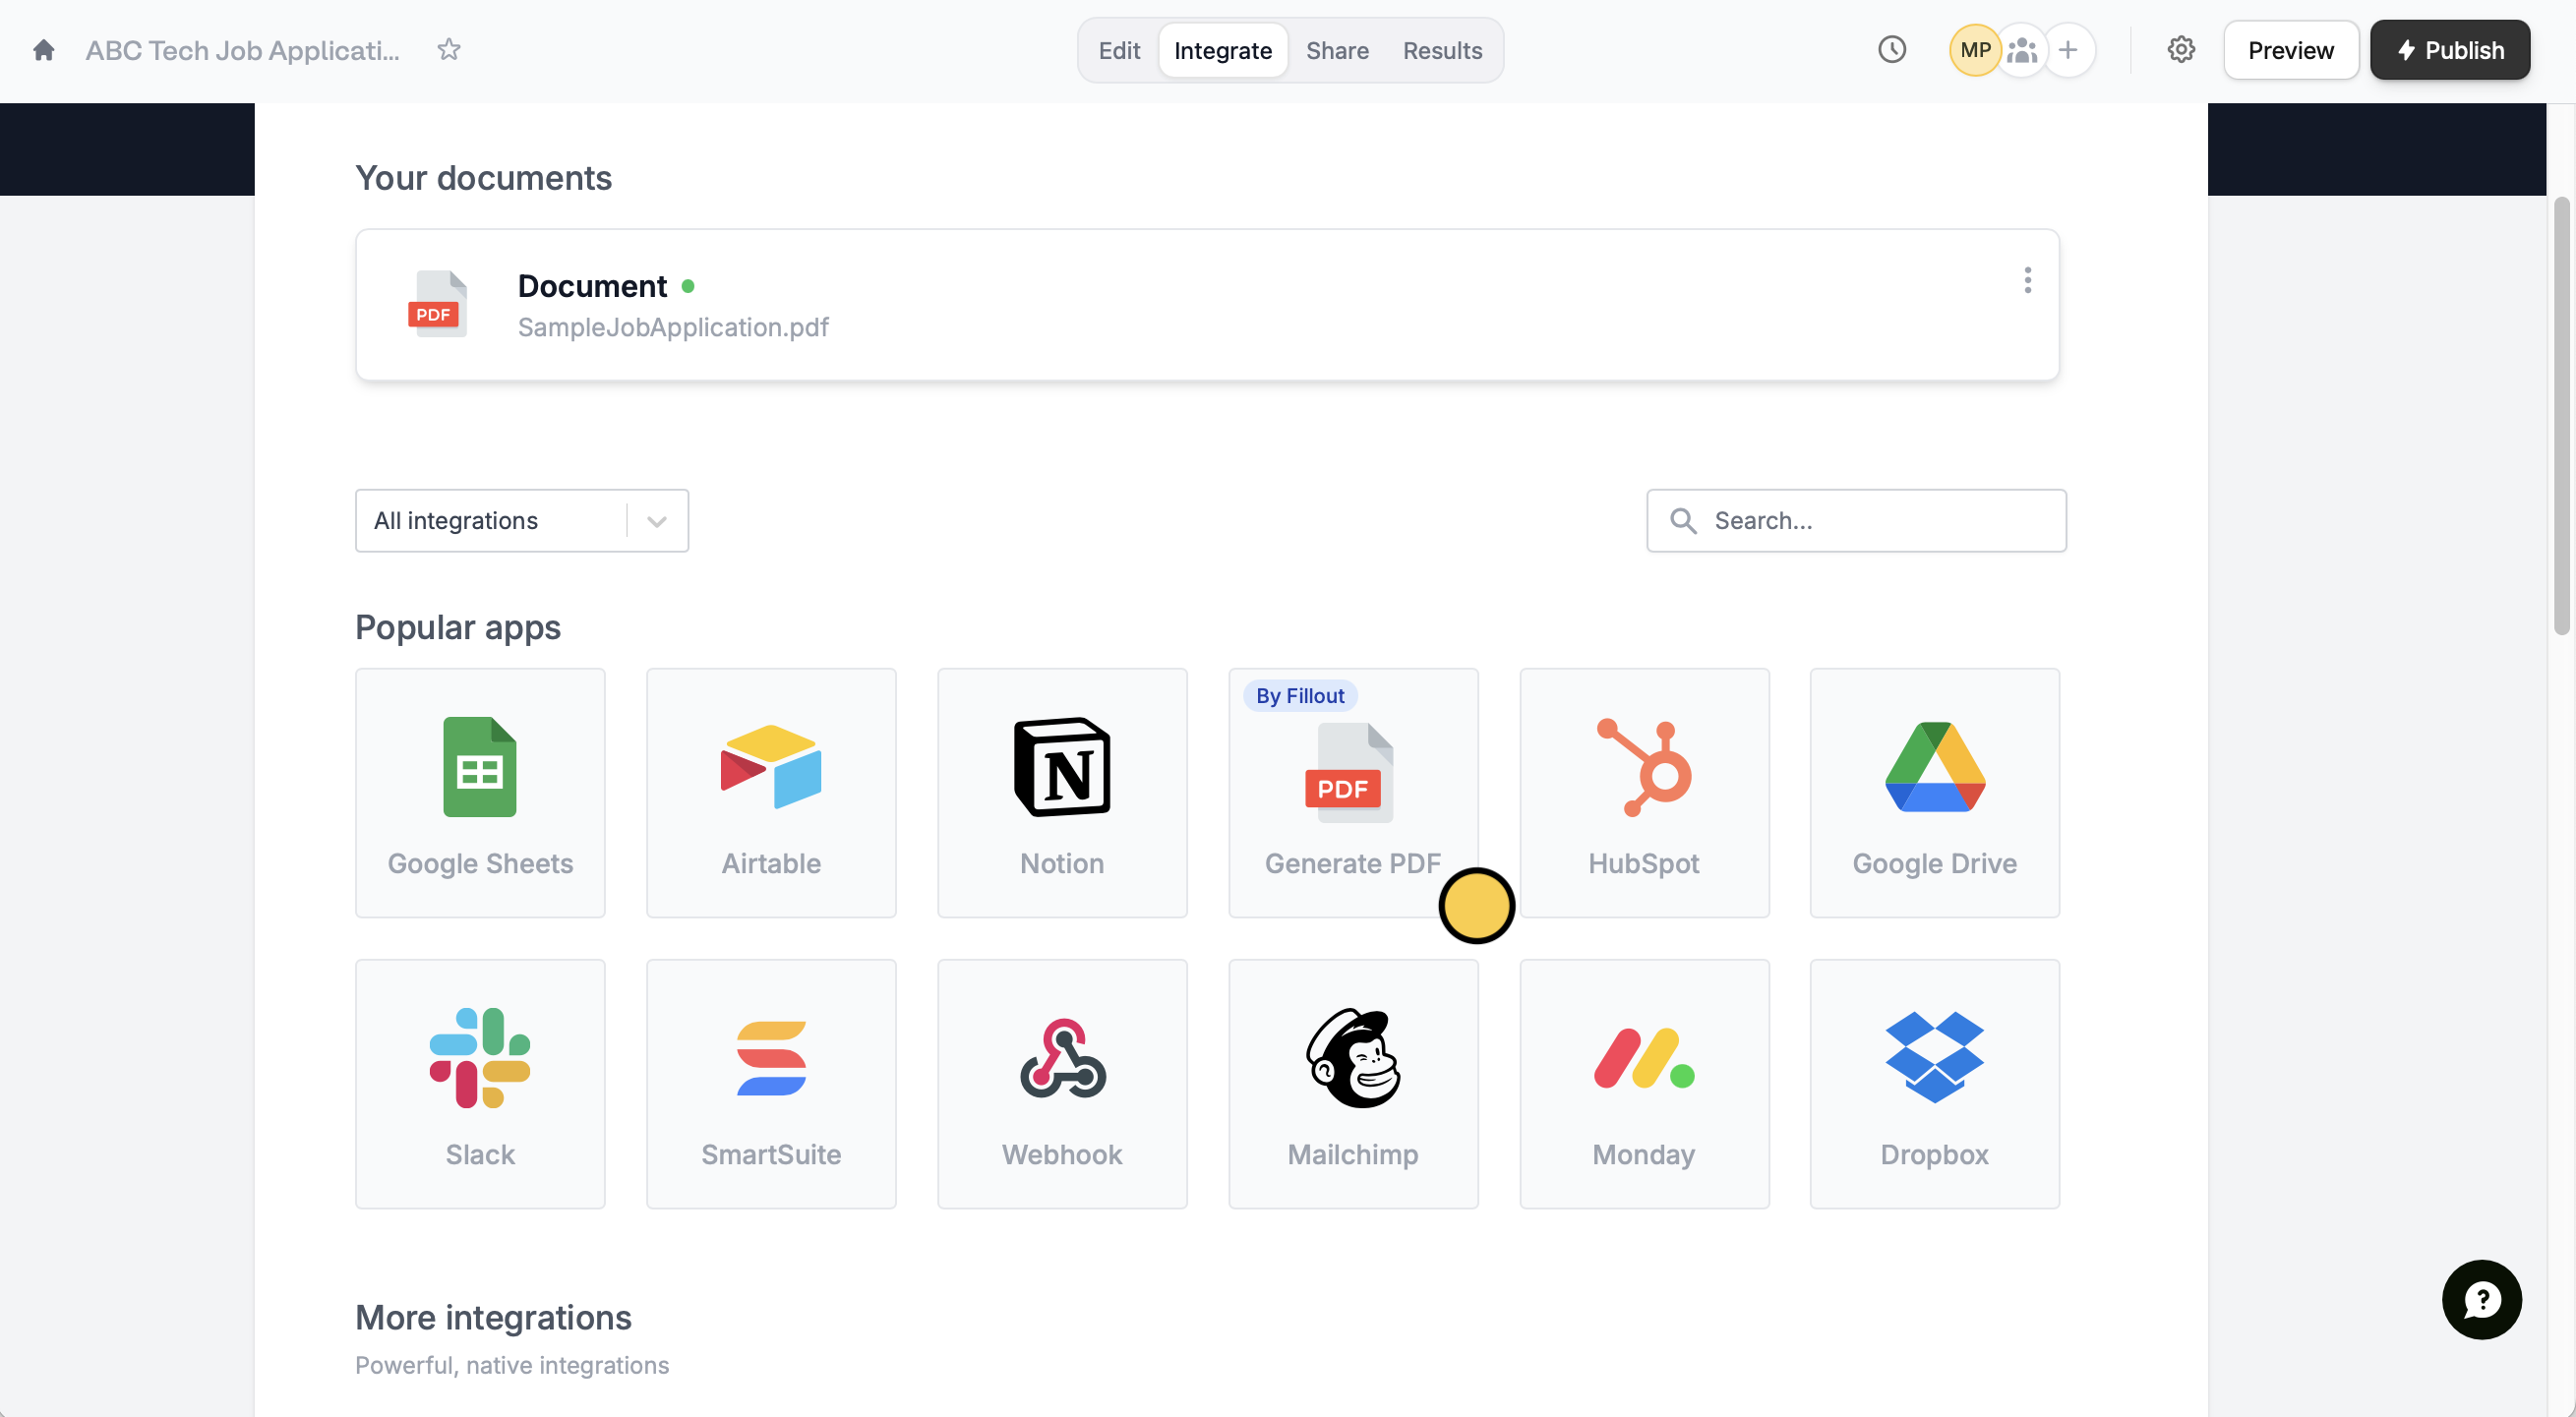
Open the form you would like to link with a PDF or document and head over to the `Integrate` tab. Look for `Generate PDF`.
Drag and drop your PDF or document file.
You can **generate multiple documents** if needed.
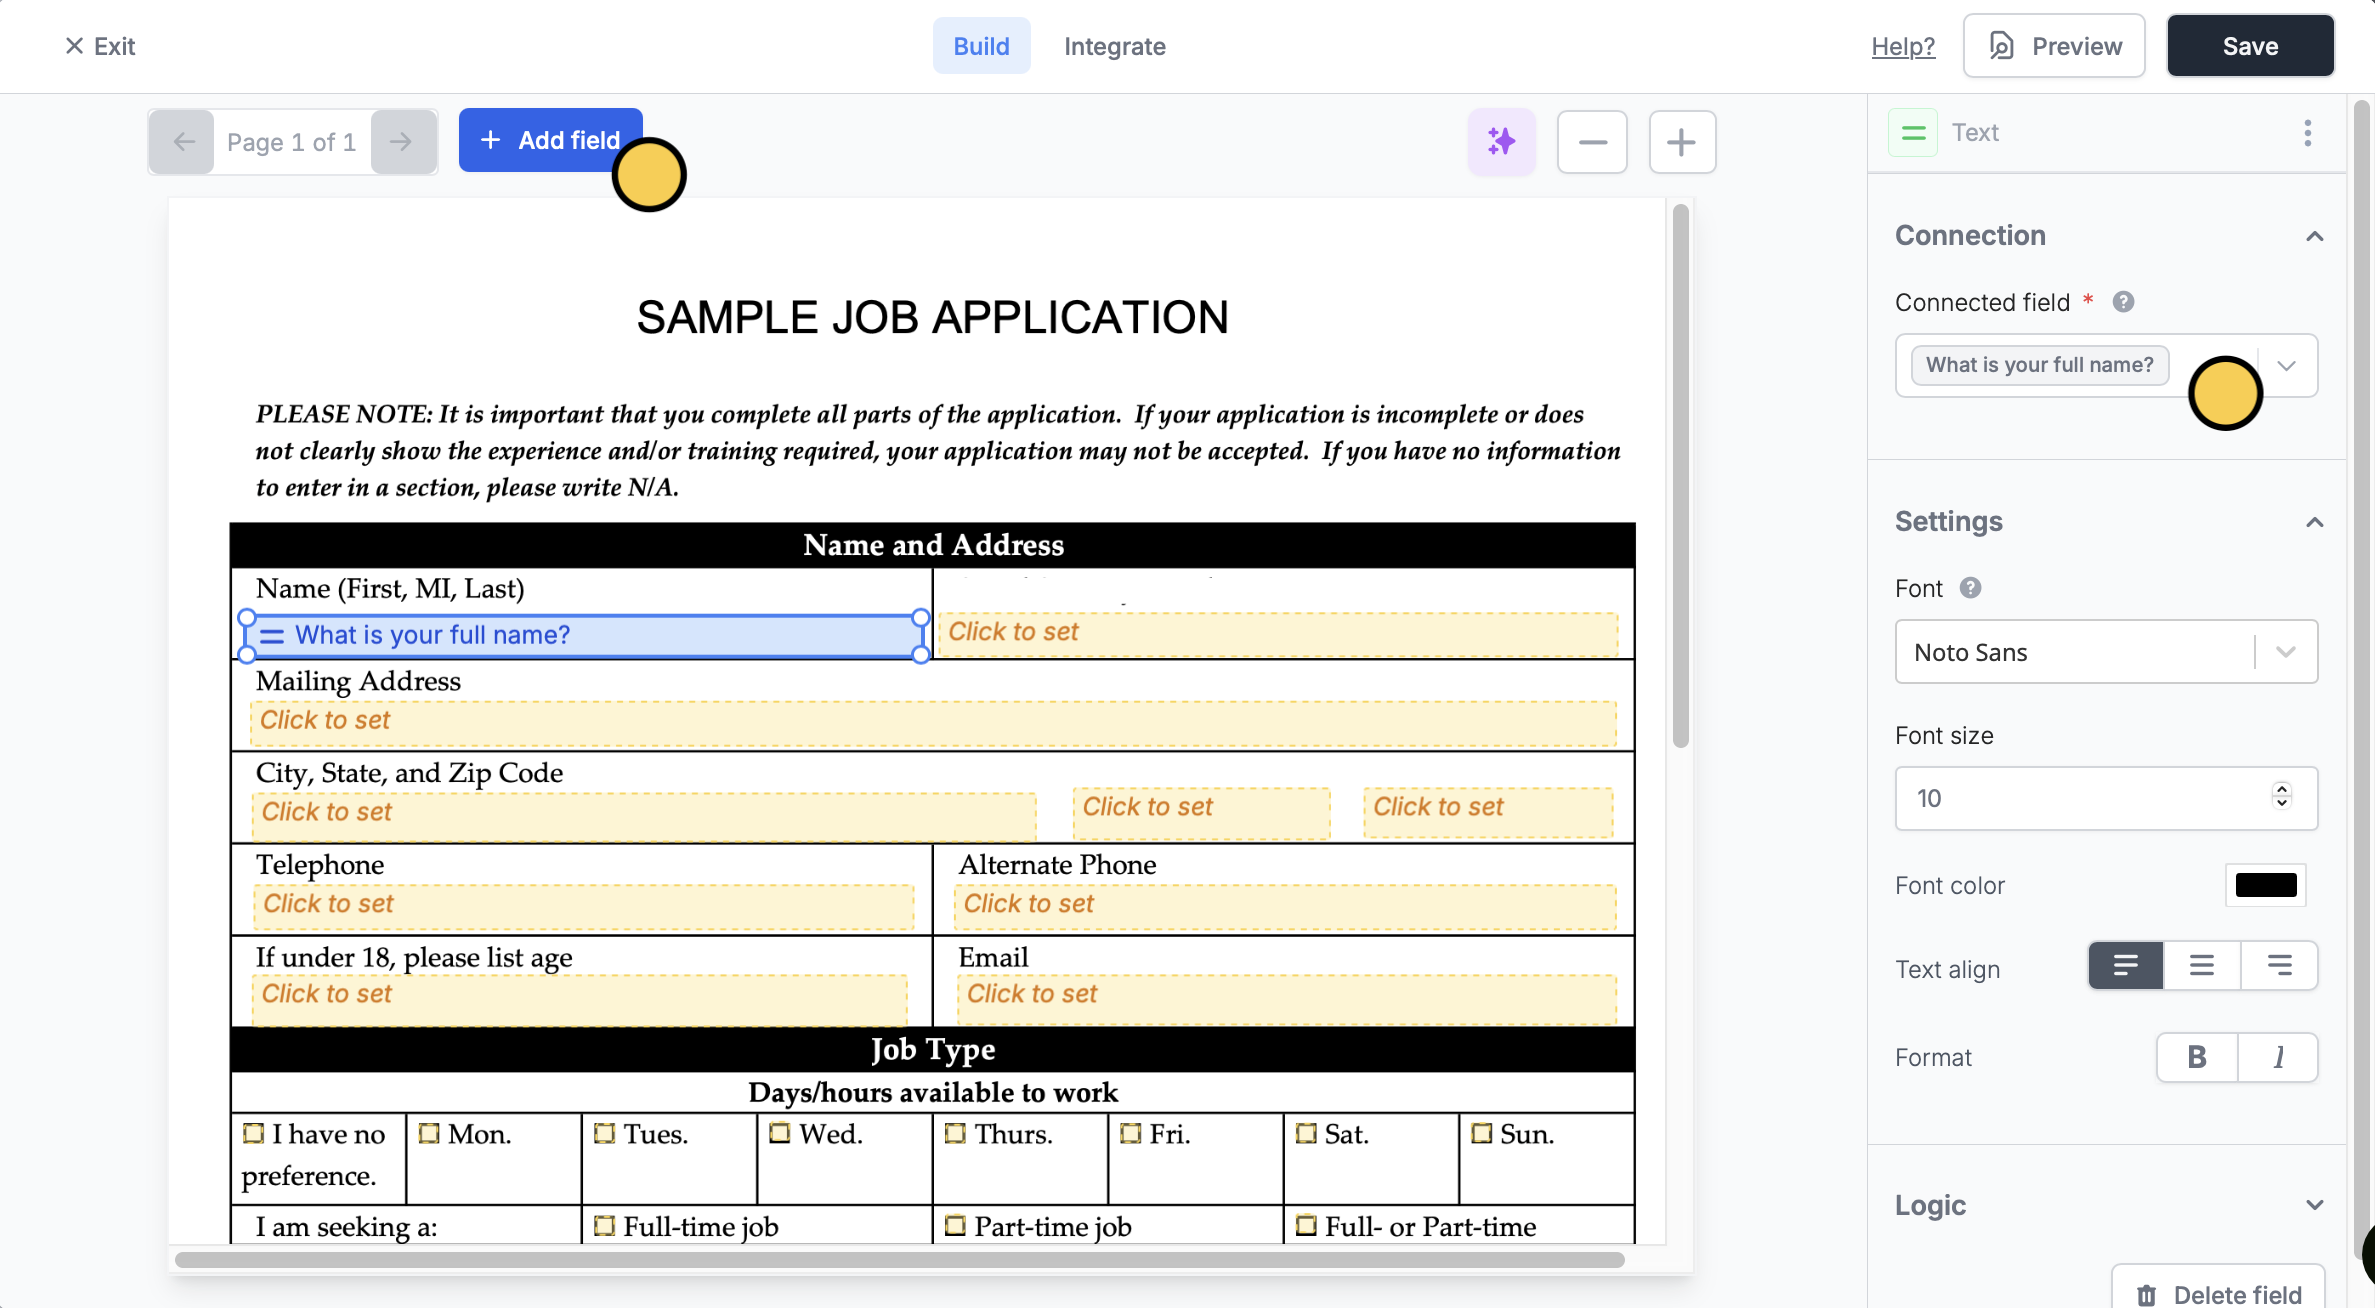
If your PDF contains recognizable form fields, Fillout will automatically detect them and add those fields to the document in amber. If not, click `+ Add field` and drag/resize fields as necessary wherever you would like to insert text on your PDF.
Then, choose the appropriate **Connected fields** in the right-hand panel. You can also change the **Font settings** used for respondent input.
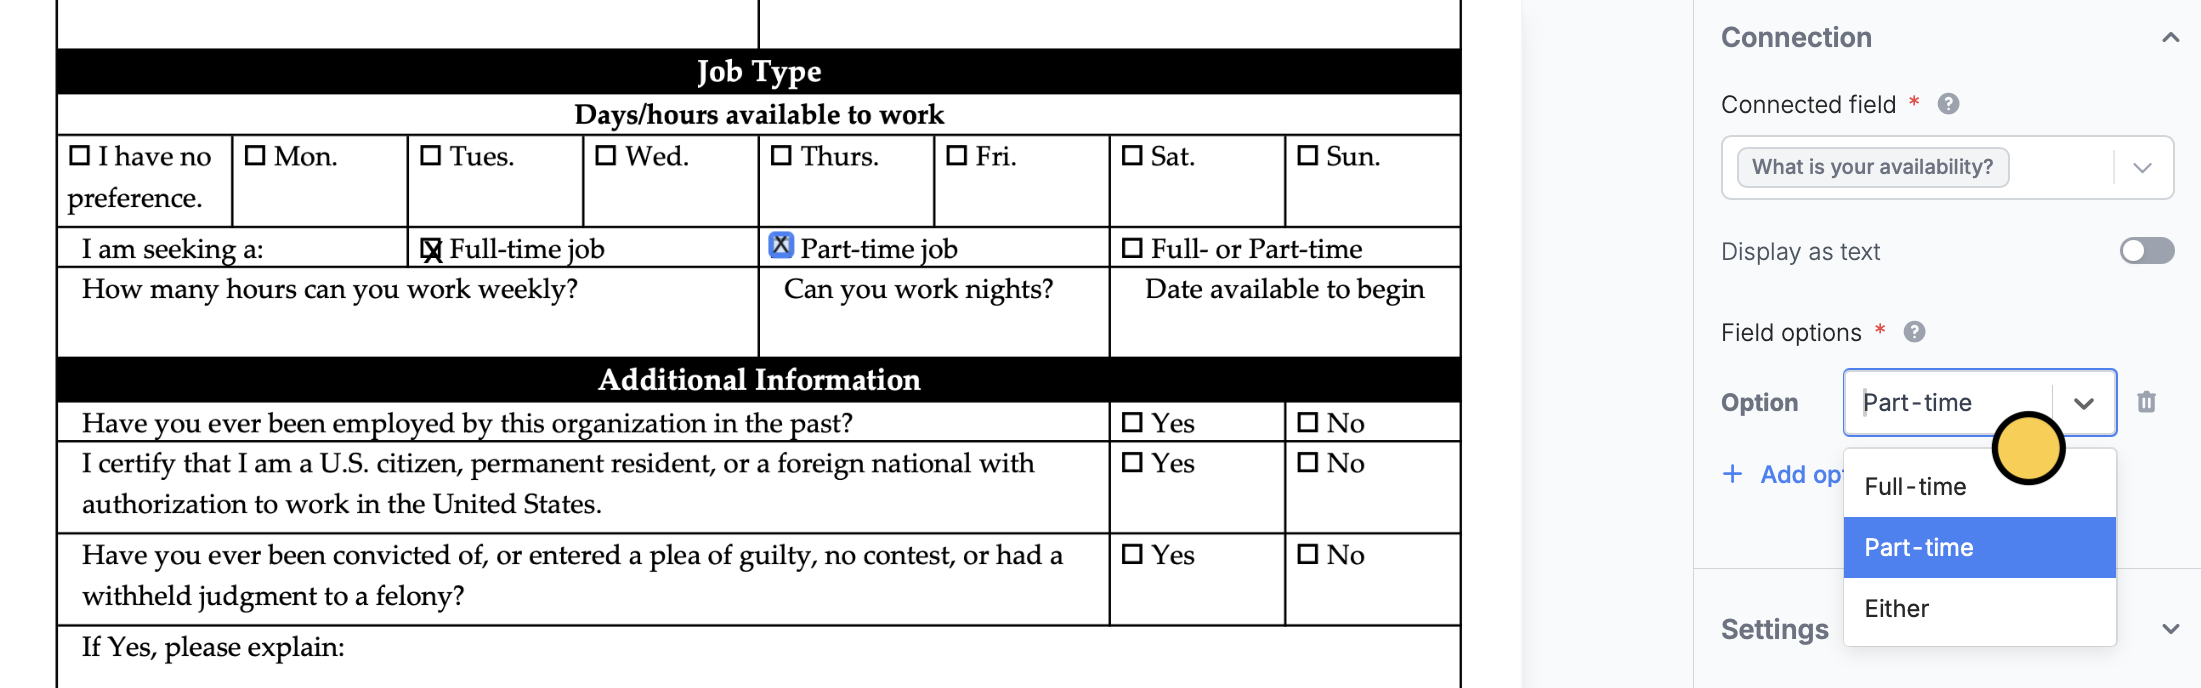
For **Choice** fields or questions, click `+ Add option` to insert multiple fields corresponding to each possible form option.
Click `Preview` to generate a document using your mappings and the latest submission from your form. Once you’re happy with the result, click `Publish` in the upper right corner to finalize the document.
## Set up your preferred workflow (Optional)
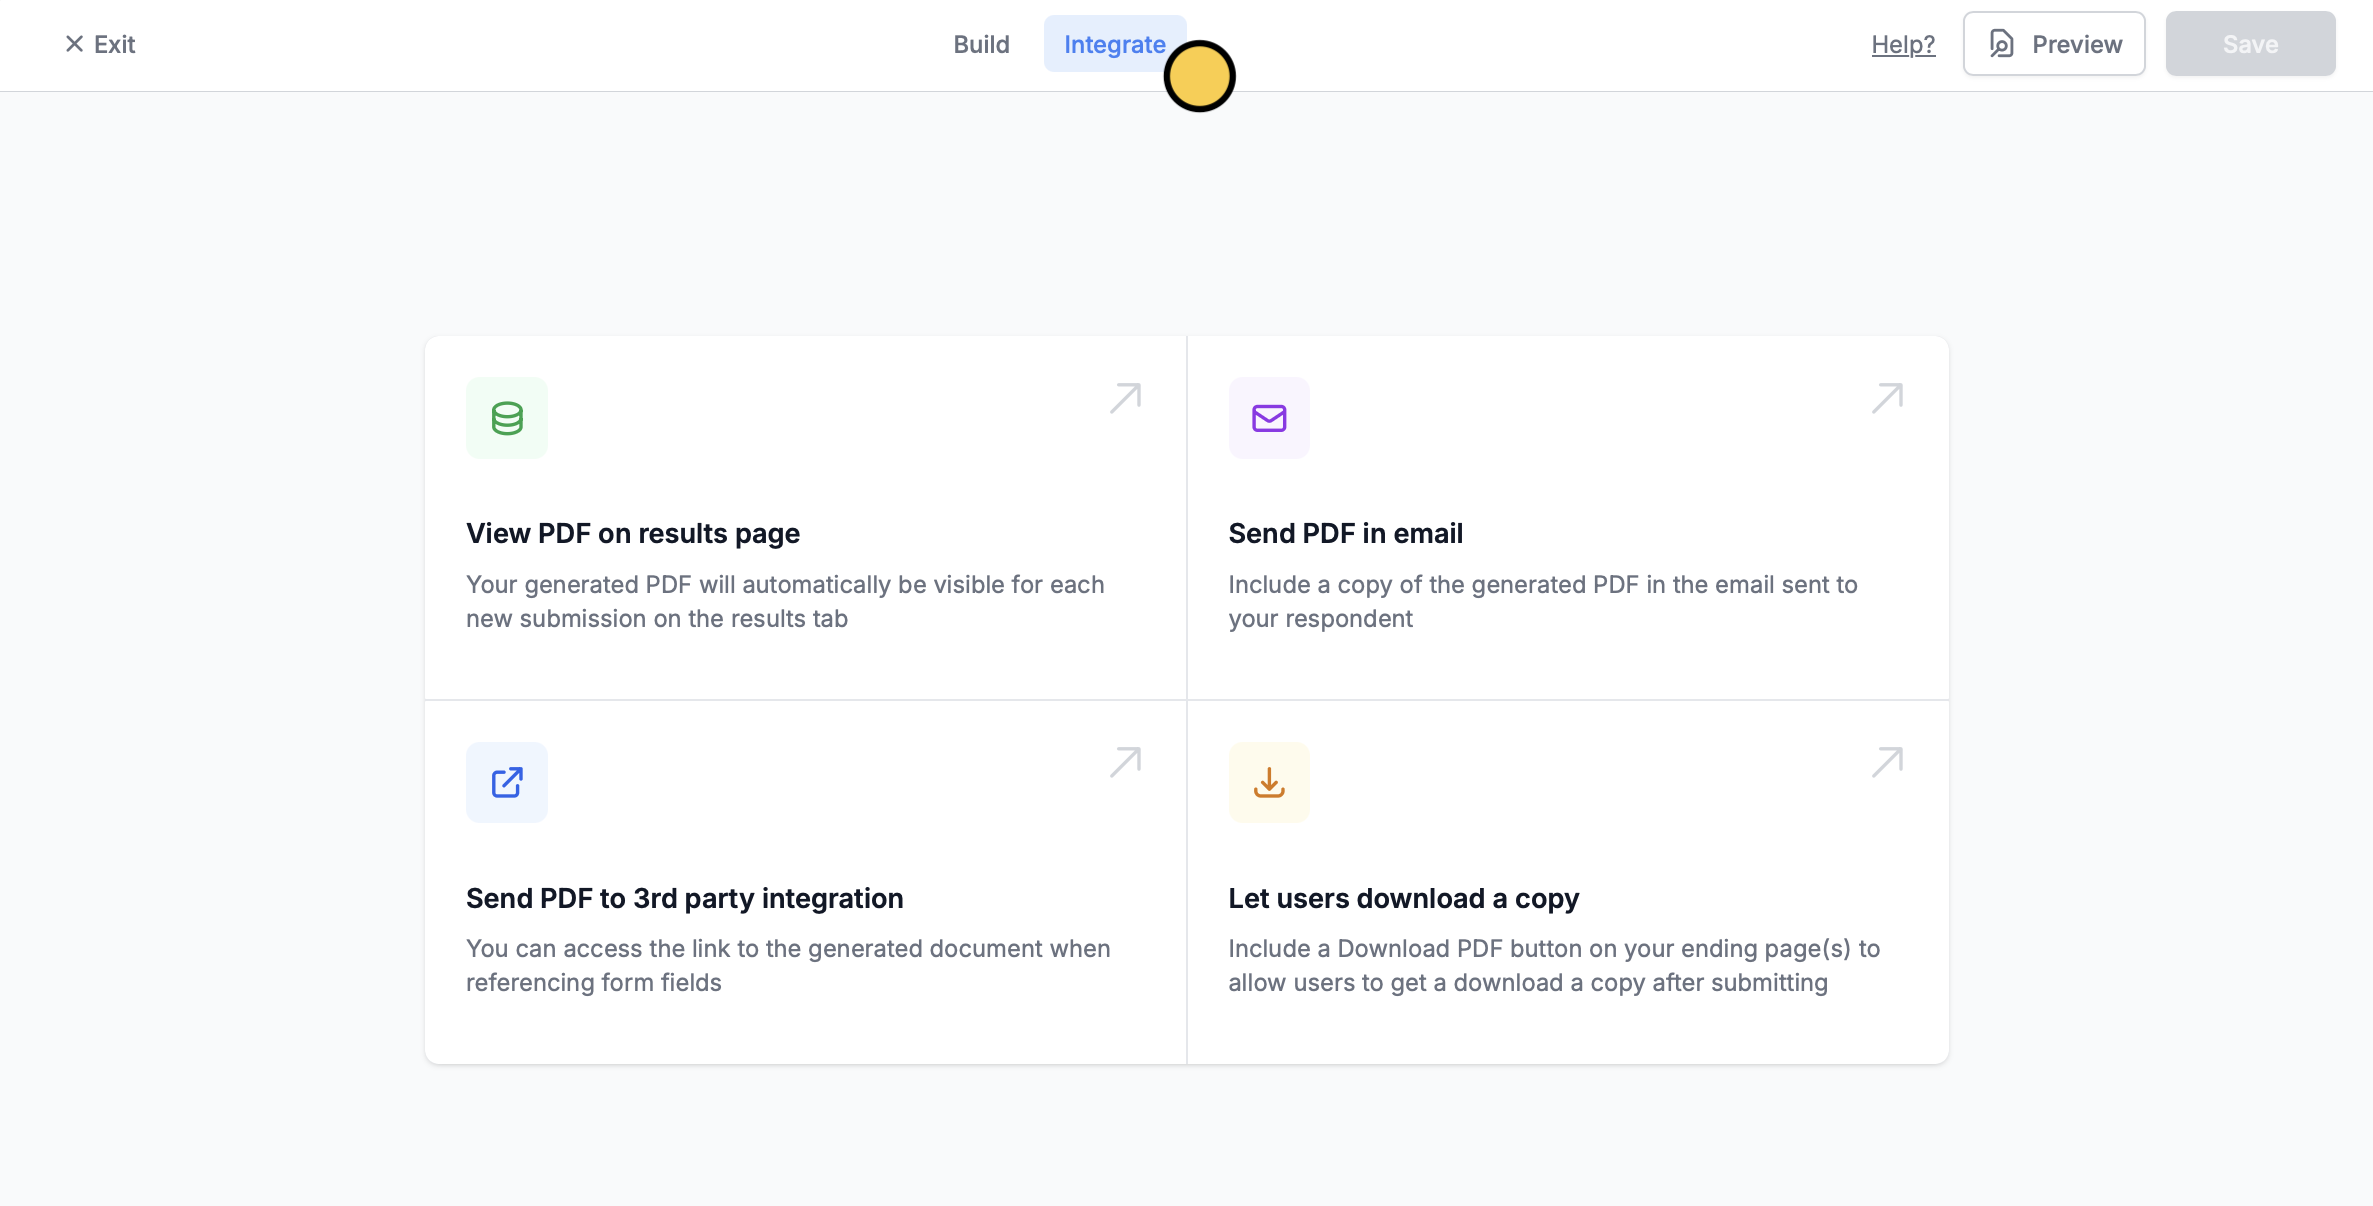
Now that your document mappings are configured, there are several ways to use your generated document.
By default, every time a new form submission is received, you can download the latest document in the `Results` tab. Look for the **Generated documents** column.
### Send PDF in email
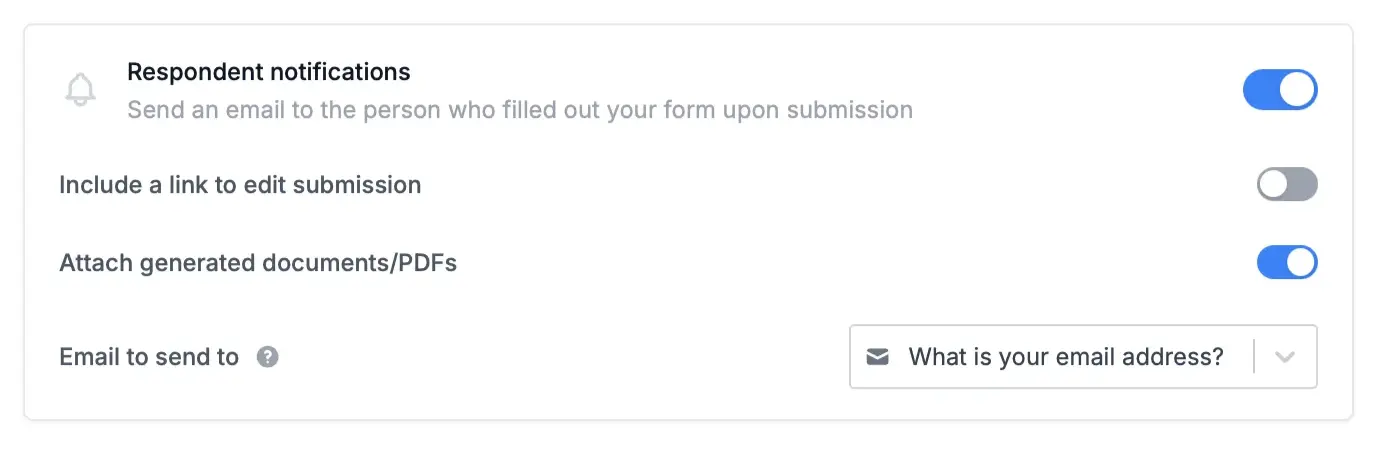
Email autofilled PDFs to respondents. Click this feature or [open form settings](https://www.fillout.com/help/respondent-emails). Then, enable `Respondent notifications` and `Attach generated documents/PDFs`.
Alternatively, you can also do this with [custom emails](/respondent-emails) as well.
### Send PDF to 3rd party integration
You can upload autofilled PDFs to 3rd party apps, like Airtable, Notion, SmartSuite, GoogleSheets, Dropbox, and more. Connect your form to your preferred app in the `Integrate` page.
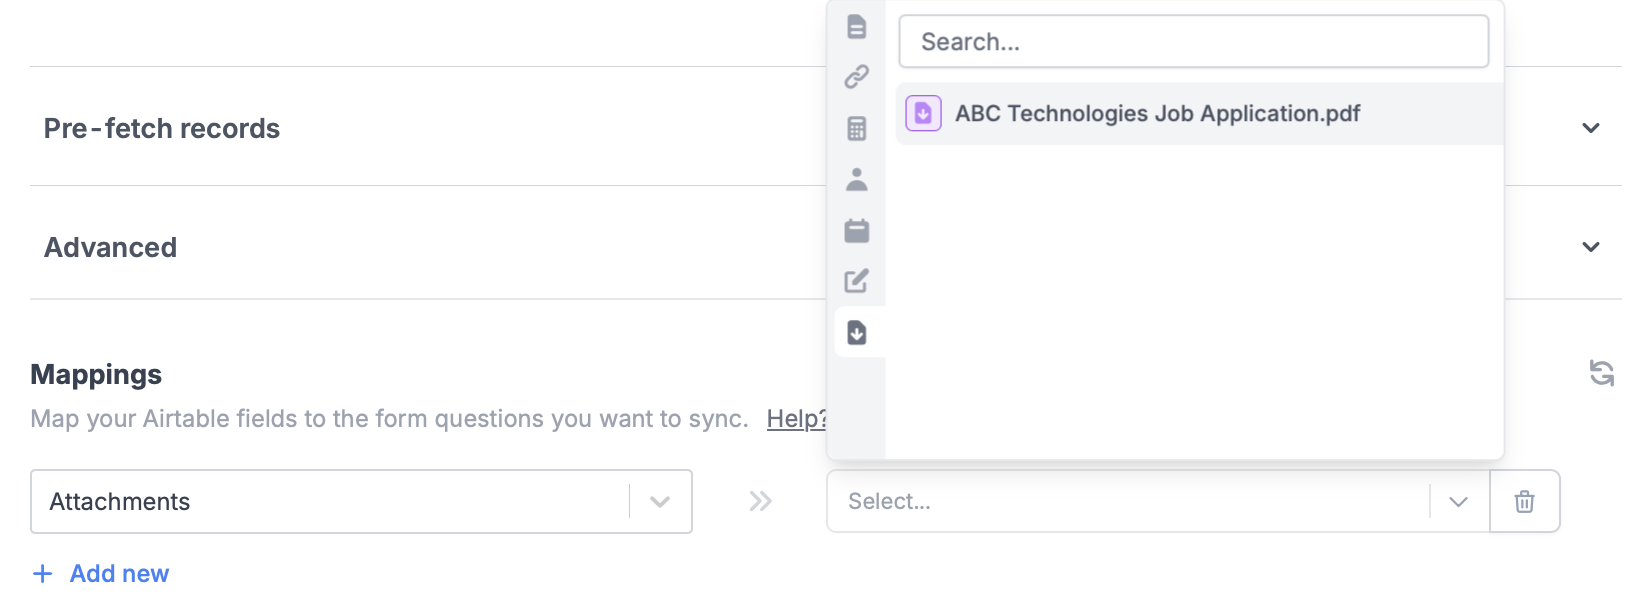
Under [**Mappings**](https://www.fillout.com/help/additional-integration-mappings#how-to-map-fields-manually), link a file upload field (from your 3rd party app) to the appropriate `Document` you created.
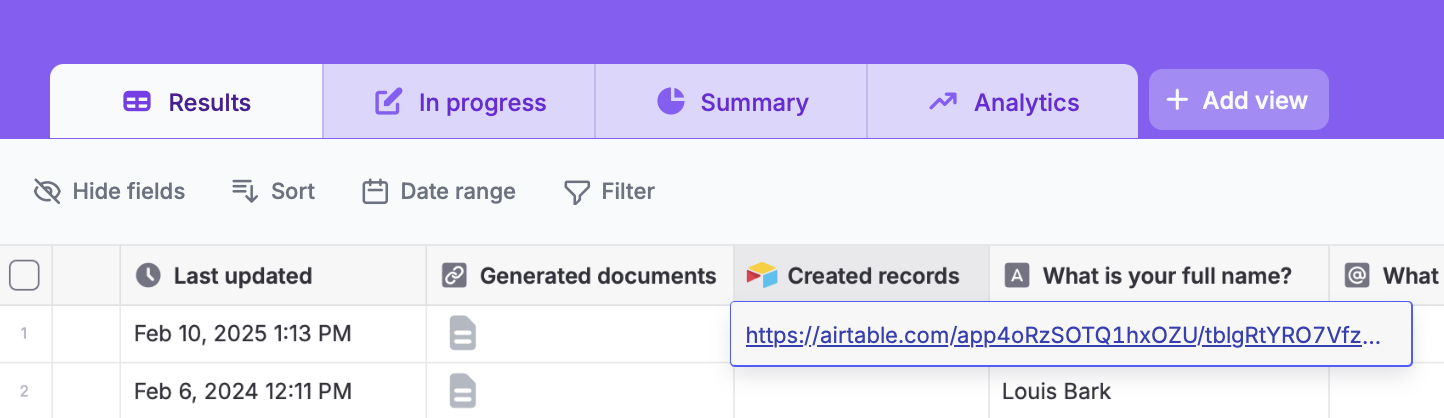
When you receive a submission, you will see an **integration link** in your form's `Results` page that will take you to the uploaded file in your chosen app.
### Let users download a copy
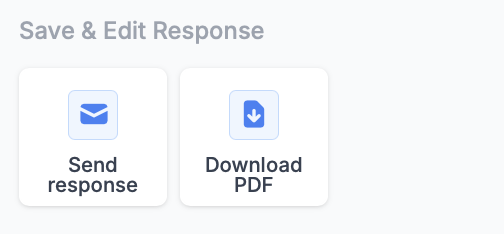
Lastly, you can add a `Download PDF` button from the left-hand panel to any [ending page](/ending-page) to let your respondents download the generated document once they complete a form.
## Personalized PDF file names
You can automatically rename PDFs by referencing answers from your form, such as name, ID number, or any other collected data. Simply click followed by `Rename document`.
Then hover over the field and type **@** or click to choose the question or field you want to use. In our example, we'll reference their "Name".
Now, each generated PDF will be labelled with the respondent's name. For example, "Clark Kent.pdf".
## Related articles
Email respondents a copy of their answers that can be edited.
Use a form to create or update Airtable bases.
Show a thank you page, redirect, or allow re-submission.
 Drag and drop your PDF or document file.
 Then, choose the appropriate **Connected fields** in the right-hand panel. You can also change the **Font settings** used for respondent input.
For **Choice** fields or questions, click `+ Add option` to insert multiple fields corresponding to each possible form option.
Then, choose the appropriate **Connected fields** in the right-hand panel. You can also change the **Font settings** used for respondent input.
For **Choice** fields or questions, click `+ Add option` to insert multiple fields corresponding to each possible form option.
 By default, every time a new form submission is received, you can download the latest document in the `Results` tab. Look for the **Generated documents** column.
### Send PDF in email
Email autofilled PDFs to respondents. Click this feature or [open form settings](https://www.fillout.com/help/respondent-emails). Then, enable `Respondent notifications` and `Attach generated documents/PDFs`.
By default, every time a new form submission is received, you can download the latest document in the `Results` tab. Look for the **Generated documents** column.
### Send PDF in email
Email autofilled PDFs to respondents. Click this feature or [open form settings](https://www.fillout.com/help/respondent-emails). Then, enable `Respondent notifications` and `Attach generated documents/PDFs`.
 Alternatively, you can also do this with [custom emails](/respondent-emails) as well.
### Send PDF to 3rd party integration
You can upload autofilled PDFs to 3rd party apps, like Airtable, Notion, SmartSuite, GoogleSheets, Dropbox, and more. Connect your form to your preferred app in the `Integrate` page.
Under [**Mappings**](https://www.fillout.com/help/additional-integration-mappings#how-to-map-fields-manually), link a file upload field (from your 3rd party app) to the appropriate `Document` you created.
Alternatively, you can also do this with [custom emails](/respondent-emails) as well.
### Send PDF to 3rd party integration
You can upload autofilled PDFs to 3rd party apps, like Airtable, Notion, SmartSuite, GoogleSheets, Dropbox, and more. Connect your form to your preferred app in the `Integrate` page.
Under [**Mappings**](https://www.fillout.com/help/additional-integration-mappings#how-to-map-fields-manually), link a file upload field (from your 3rd party app) to the appropriate `Document` you created.
 When you receive a submission, you will see an **integration link** in your form's `Results` page that will take you to the uploaded file in your chosen app.
 ### Let users download a copy
Lastly, you can add a `Download PDF` button from the left-hand panel to any [ending page](/ending-page) to let your respondents download the generated document once they complete a form.
### Let users download a copy
Lastly, you can add a `Download PDF` button from the left-hand panel to any [ending page](/ending-page) to let your respondents download the generated document once they complete a form.
 ## Personalized PDF file names
You can automatically rename PDFs by referencing answers from your form, such as name, ID number, or any other collected data. Simply click
## Personalized PDF file names
You can automatically rename PDFs by referencing answers from your form, such as name, ID number, or any other collected data. Simply click 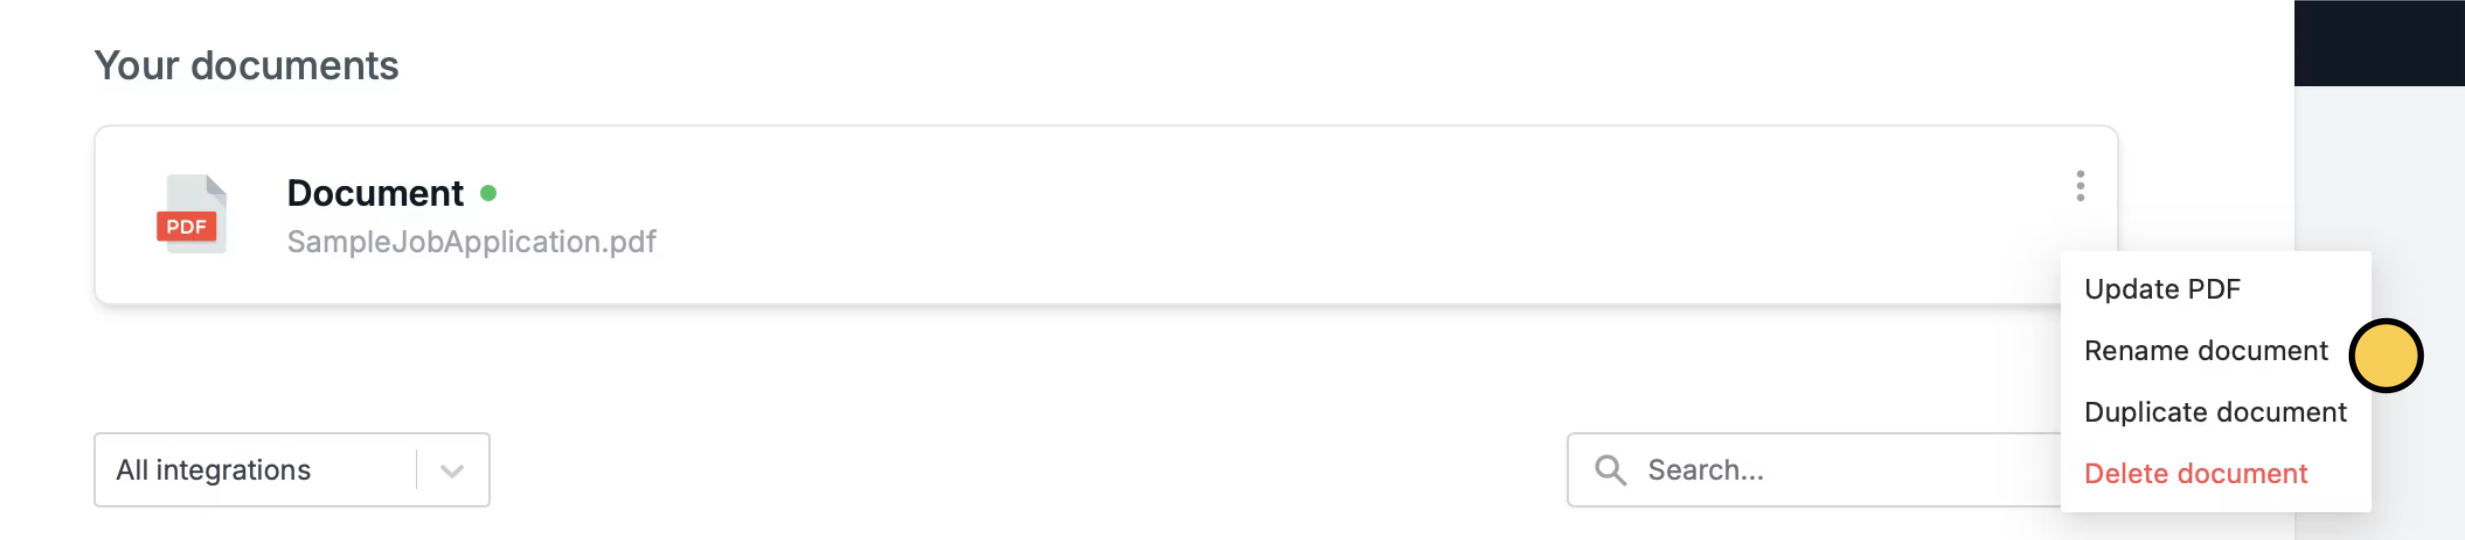 Then hover over the field and type **@** or click
 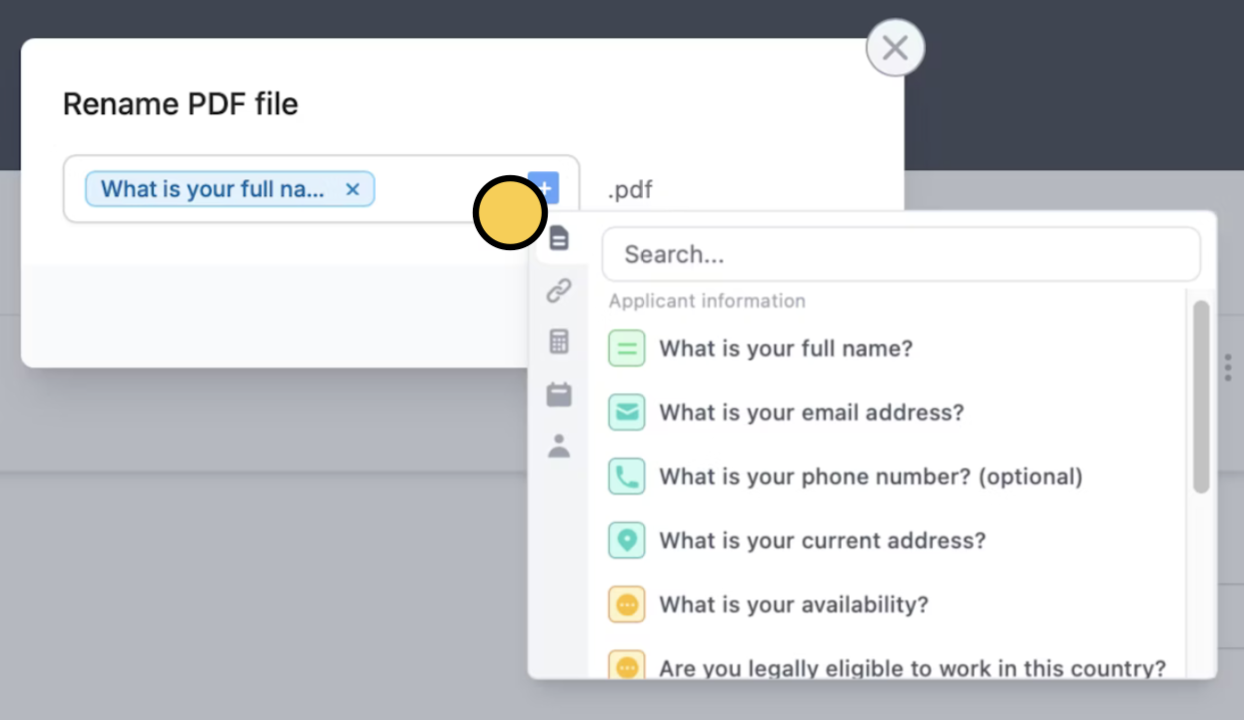 Now, each generated PDF will be labelled with the respondent's name. For example, "Clark Kent.pdf".
## Related articles
Now, each generated PDF will be labelled with the respondent's name. For example, "Clark Kent.pdf".
## Related articles