> ## Documentation Index
> Fetch the complete documentation index at: https://fillout.com/help/llms.txt
> Use this file to discover all available pages before exploring further.
# Pre-fetch dynamic data for your form
> Fetch information from Airtable, Notion or any service before your form loads. Display the data in your form or use it in your form logic.
## How it works
You can fetch information from a database or service and add it to your form. This is possible even if your form is connected to one table but needs to fetch data from another table.
This can be done using **pre-fetch**, which lets you:
* Pull in related record data
* Display external table values
* Use fetched data in logic or personalization
Even when a form is set to create new records, this can still be done as long as pre-fetch is set up.
This feature is available to **Business** and **Enterprise** users. For more details on pricing, click [**here**](https://www.fillout.com/pricing). However, you can still make update forms that pre-fetch information on the **Free** plan, with [this approach](/update-forms).
## How to pull external information into your form
Fillout lets you get data from Airtable, Notion, Smartsuite and webhooks to use in your form.
Navigate to the `Integrate` page from the top menu and choose an integration. If your service isn't listed, select [Webhook](https://www.fillout.com/help/webhook#connect-your-form-to-a-webhook).
Then, click `+ Add new` under **Pre-fetch pages**.
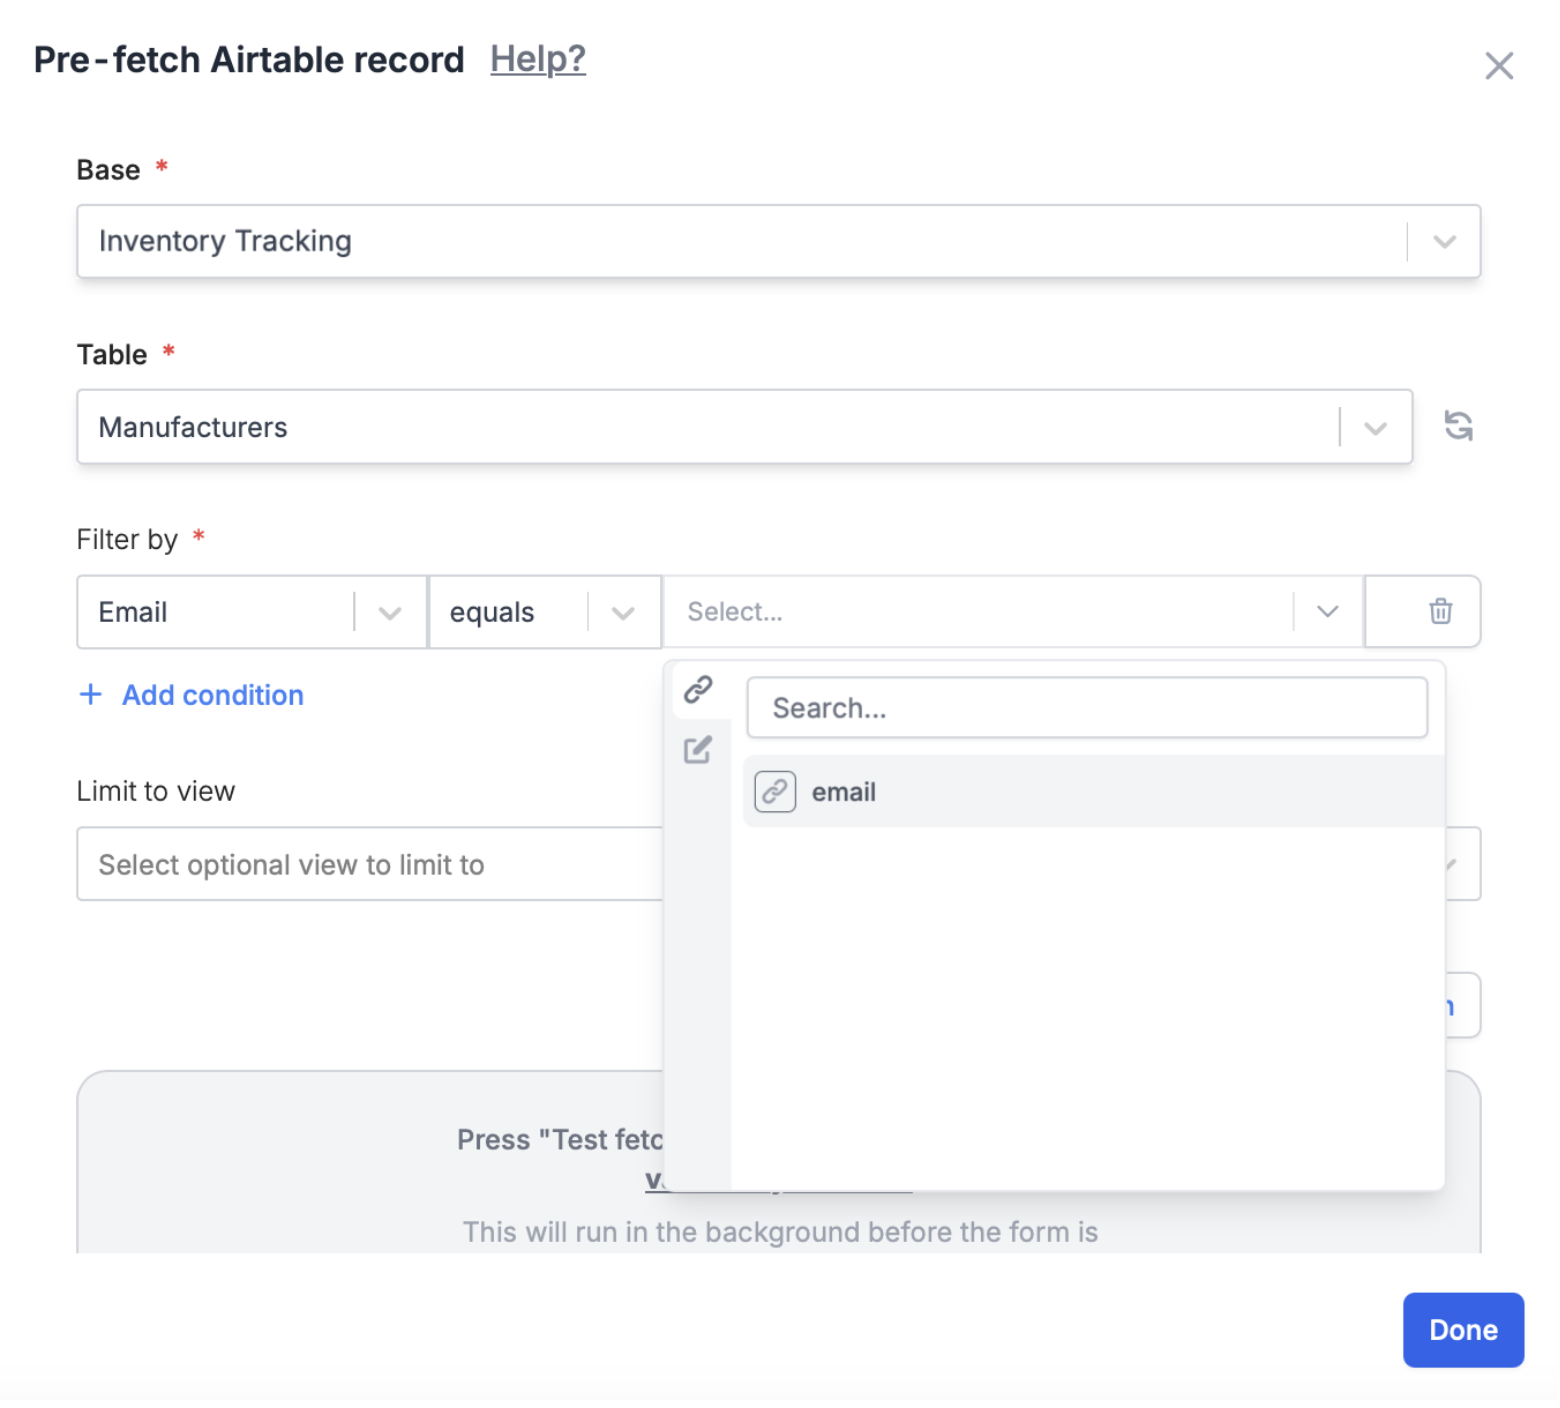
 Enter a **name** for your record, then select a **base** and a **table**. Under **Filter by**, choose an Airtable field to match with a [URL parameter](/url-parameters), static text, or login fields (from the login page). In this example, we'll select email.
 ## Use pre-fetched records in your form
Check out [this article](/answer-piping) to see how you can display pre-fetched records, use the data to show or hide questions, branch to different pages, and more.
You can fetch records from the same database you’re working in, or even an entirely separate one on your account!
## **Related articles**
Pass information to a form to support pre-filling.
Insert previous answers into upcoming questions or fields.
Display content to hide, validate and pre-fill fields.
## Use pre-fetched records in your form
Check out [this article](/answer-piping) to see how you can display pre-fetched records, use the data to show or hide questions, branch to different pages, and more.
You can fetch records from the same database you’re working in, or even an entirely separate one on your account!
## **Related articles**
Pass information to a form to support pre-filling.
Insert previous answers into upcoming questions or fields.
Display content to hide, validate and pre-fill fields.