> ## Documentation Index
> Fetch the complete documentation index at: https://fillout.com/help/llms.txt
> Use this file to discover all available pages before exploring further.
# Pre-fetch records for use in your form
> Fetch information from your Zite database before your Fillout form loads, and automatically fill in fields with that data to improve user experience.
## What is pre-fetching?
**Pre-fetching** means retrieving existing data before a form is displayed and automatically filling in the fields with that data.
## How it works
Typically, a form loads with empty fields. With pre-fetching, the form first looks up data from your database using an identifier (like an email), which you can use to [pre-fill fields](https://www.fillout.com/help/prefill-fields).
For example, you can send users a link like: [https://yourform.com/update-profile?email=juan@email.com](https://yourform.com/update-profile?email=juan@email.com)
When the form opens, it uses the **email** parameter to find a matching record in your database and fills in fields like:
* Name: Juan Dela Cruz
* Email: [juan@email.com](mailto:juan@email.com)
* Birth Date: Dec 2, 1992
* Position: Finance Manager
Users can then review and update field answers as needed.
### Common use cases
* **User Profiles**: Let users update their personal information with pre-populated fields
* **Account Settings**: Enable users to modify preferences without re-entering existing selections
* **E-commerce Checkout**: Pre-fill saved shipping and billing details for faster checkout
* **Admin Dashboards**: Allow administrators to edit existing records with pre-loaded data in forms
* **Content Management**: Let users edit existing posts or pages with previously saved content
## Fetch data into your form
Open your Fillout form and click `Integrate` on top to [link it to your Zite Database](https://www.fillout.com/help/sync-form-results#link-your-form-to-a-zite-database).
Go back to `Integrate` and click `Zite Database`.
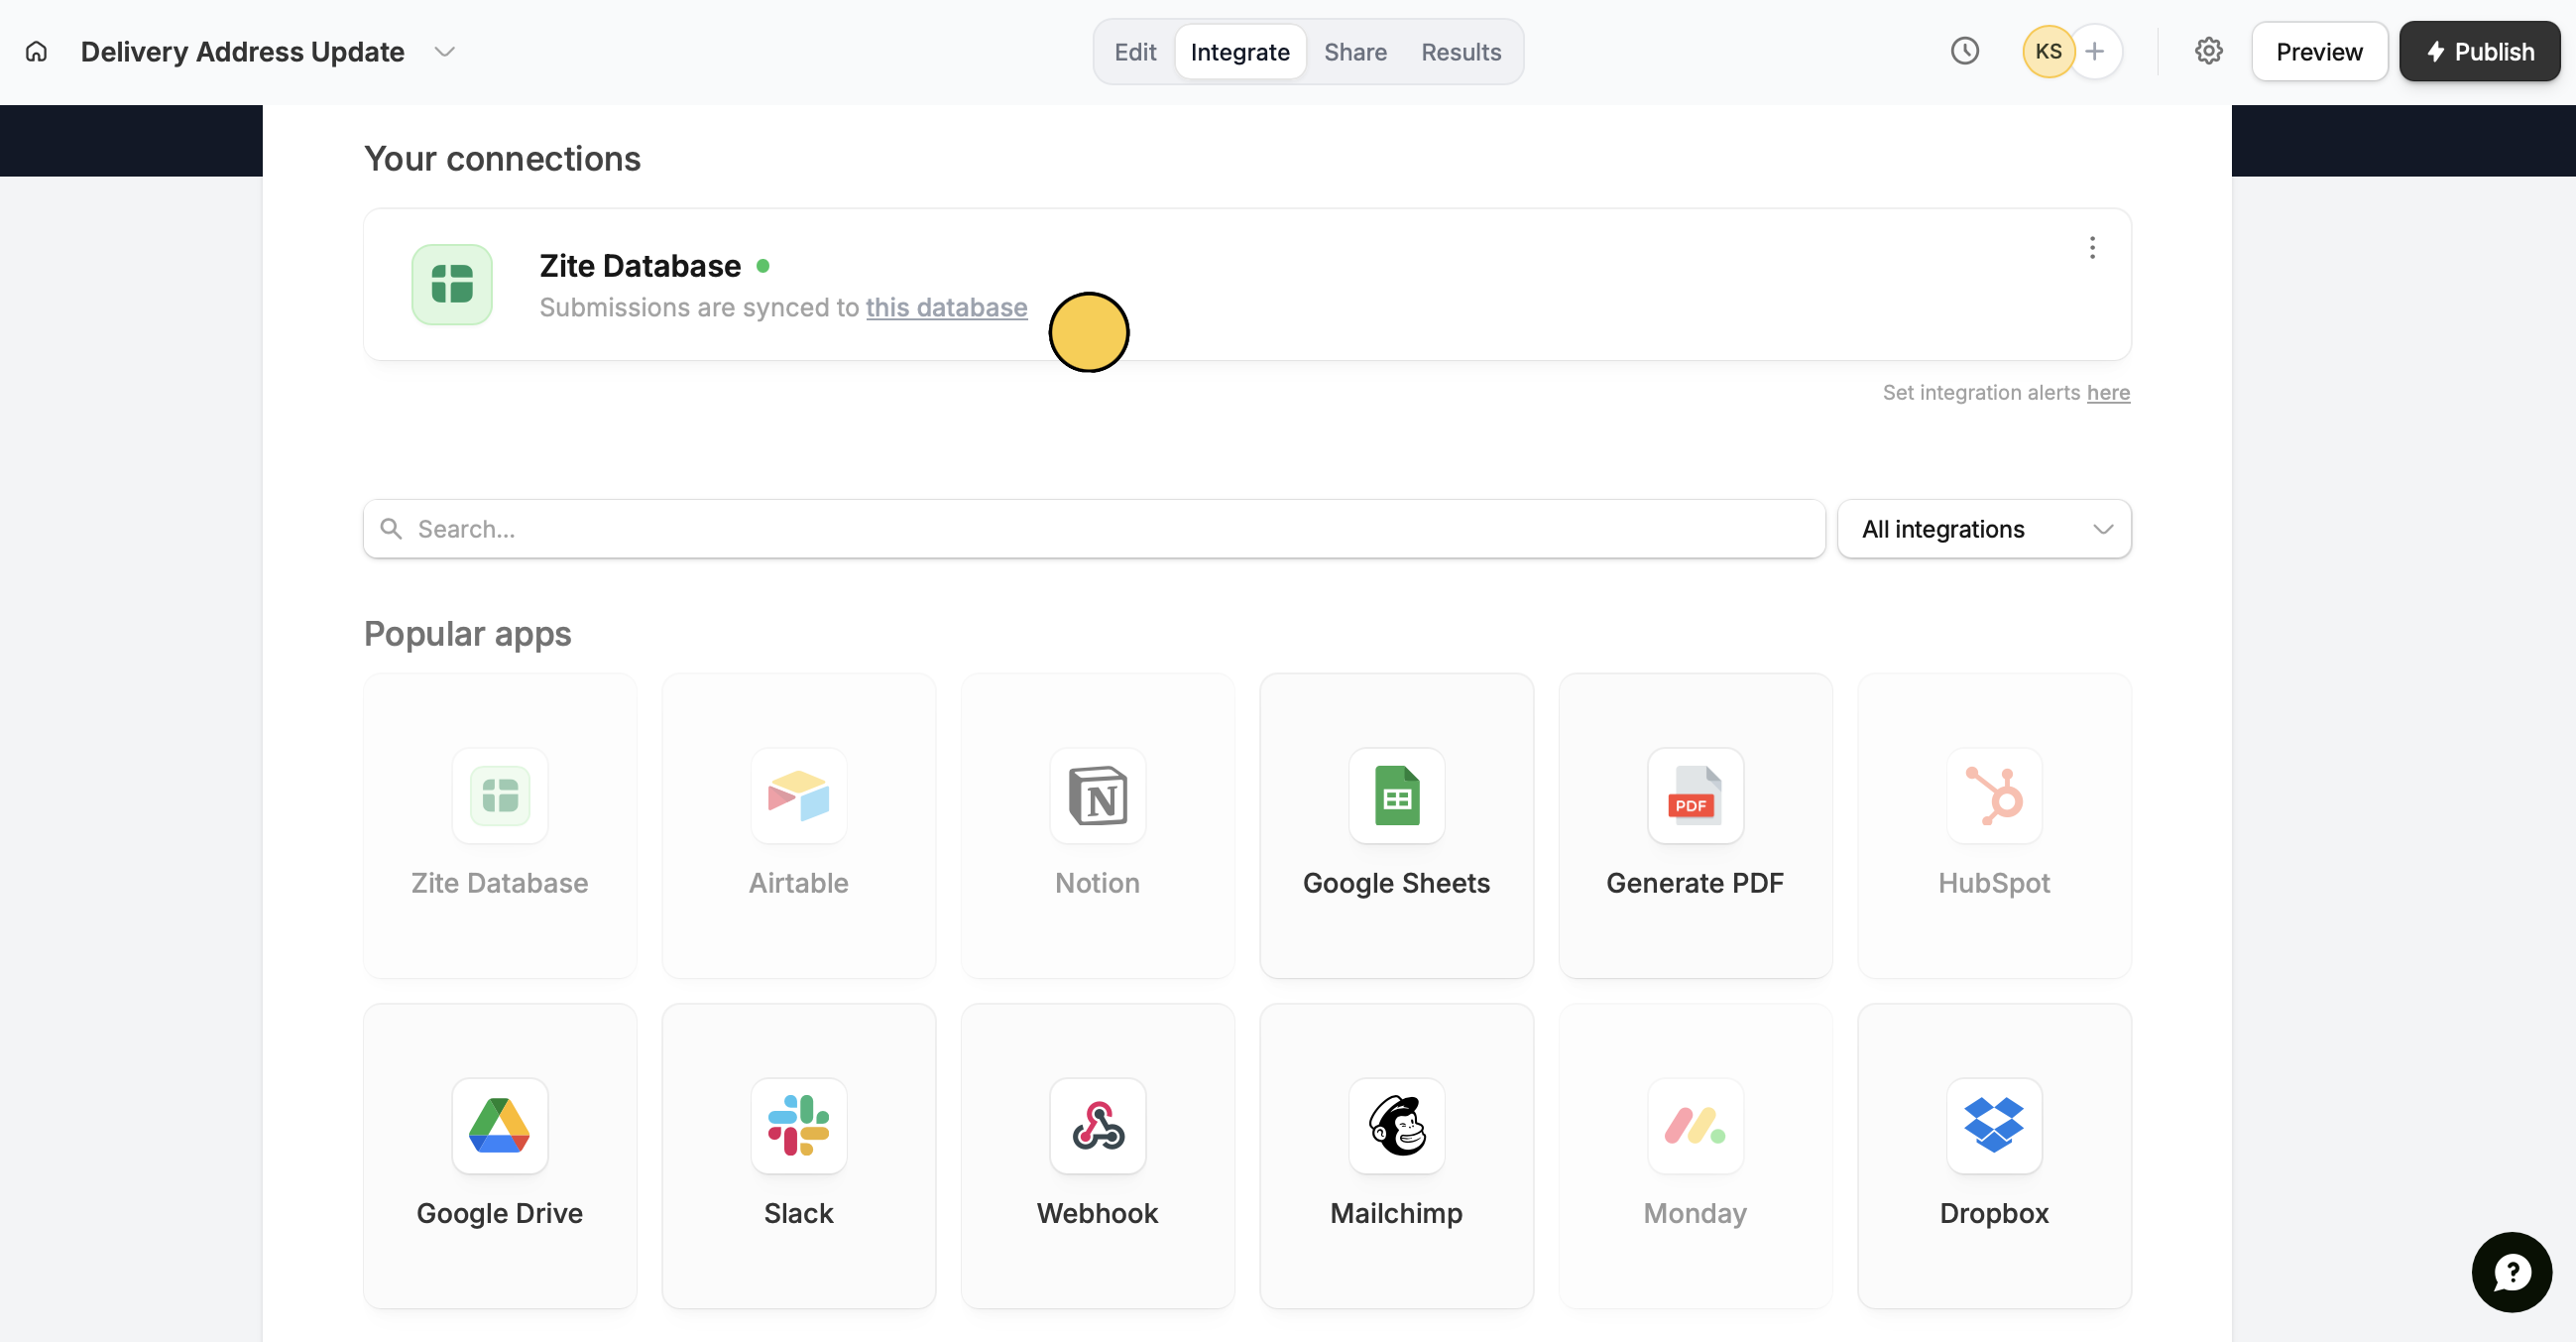 Click `Pre-fetch records` followed by **+ Add new**. In our example, we'll have a form where clients can update their delivery address. Instead of filling everything from scratch, their existing details will be pre-filled.
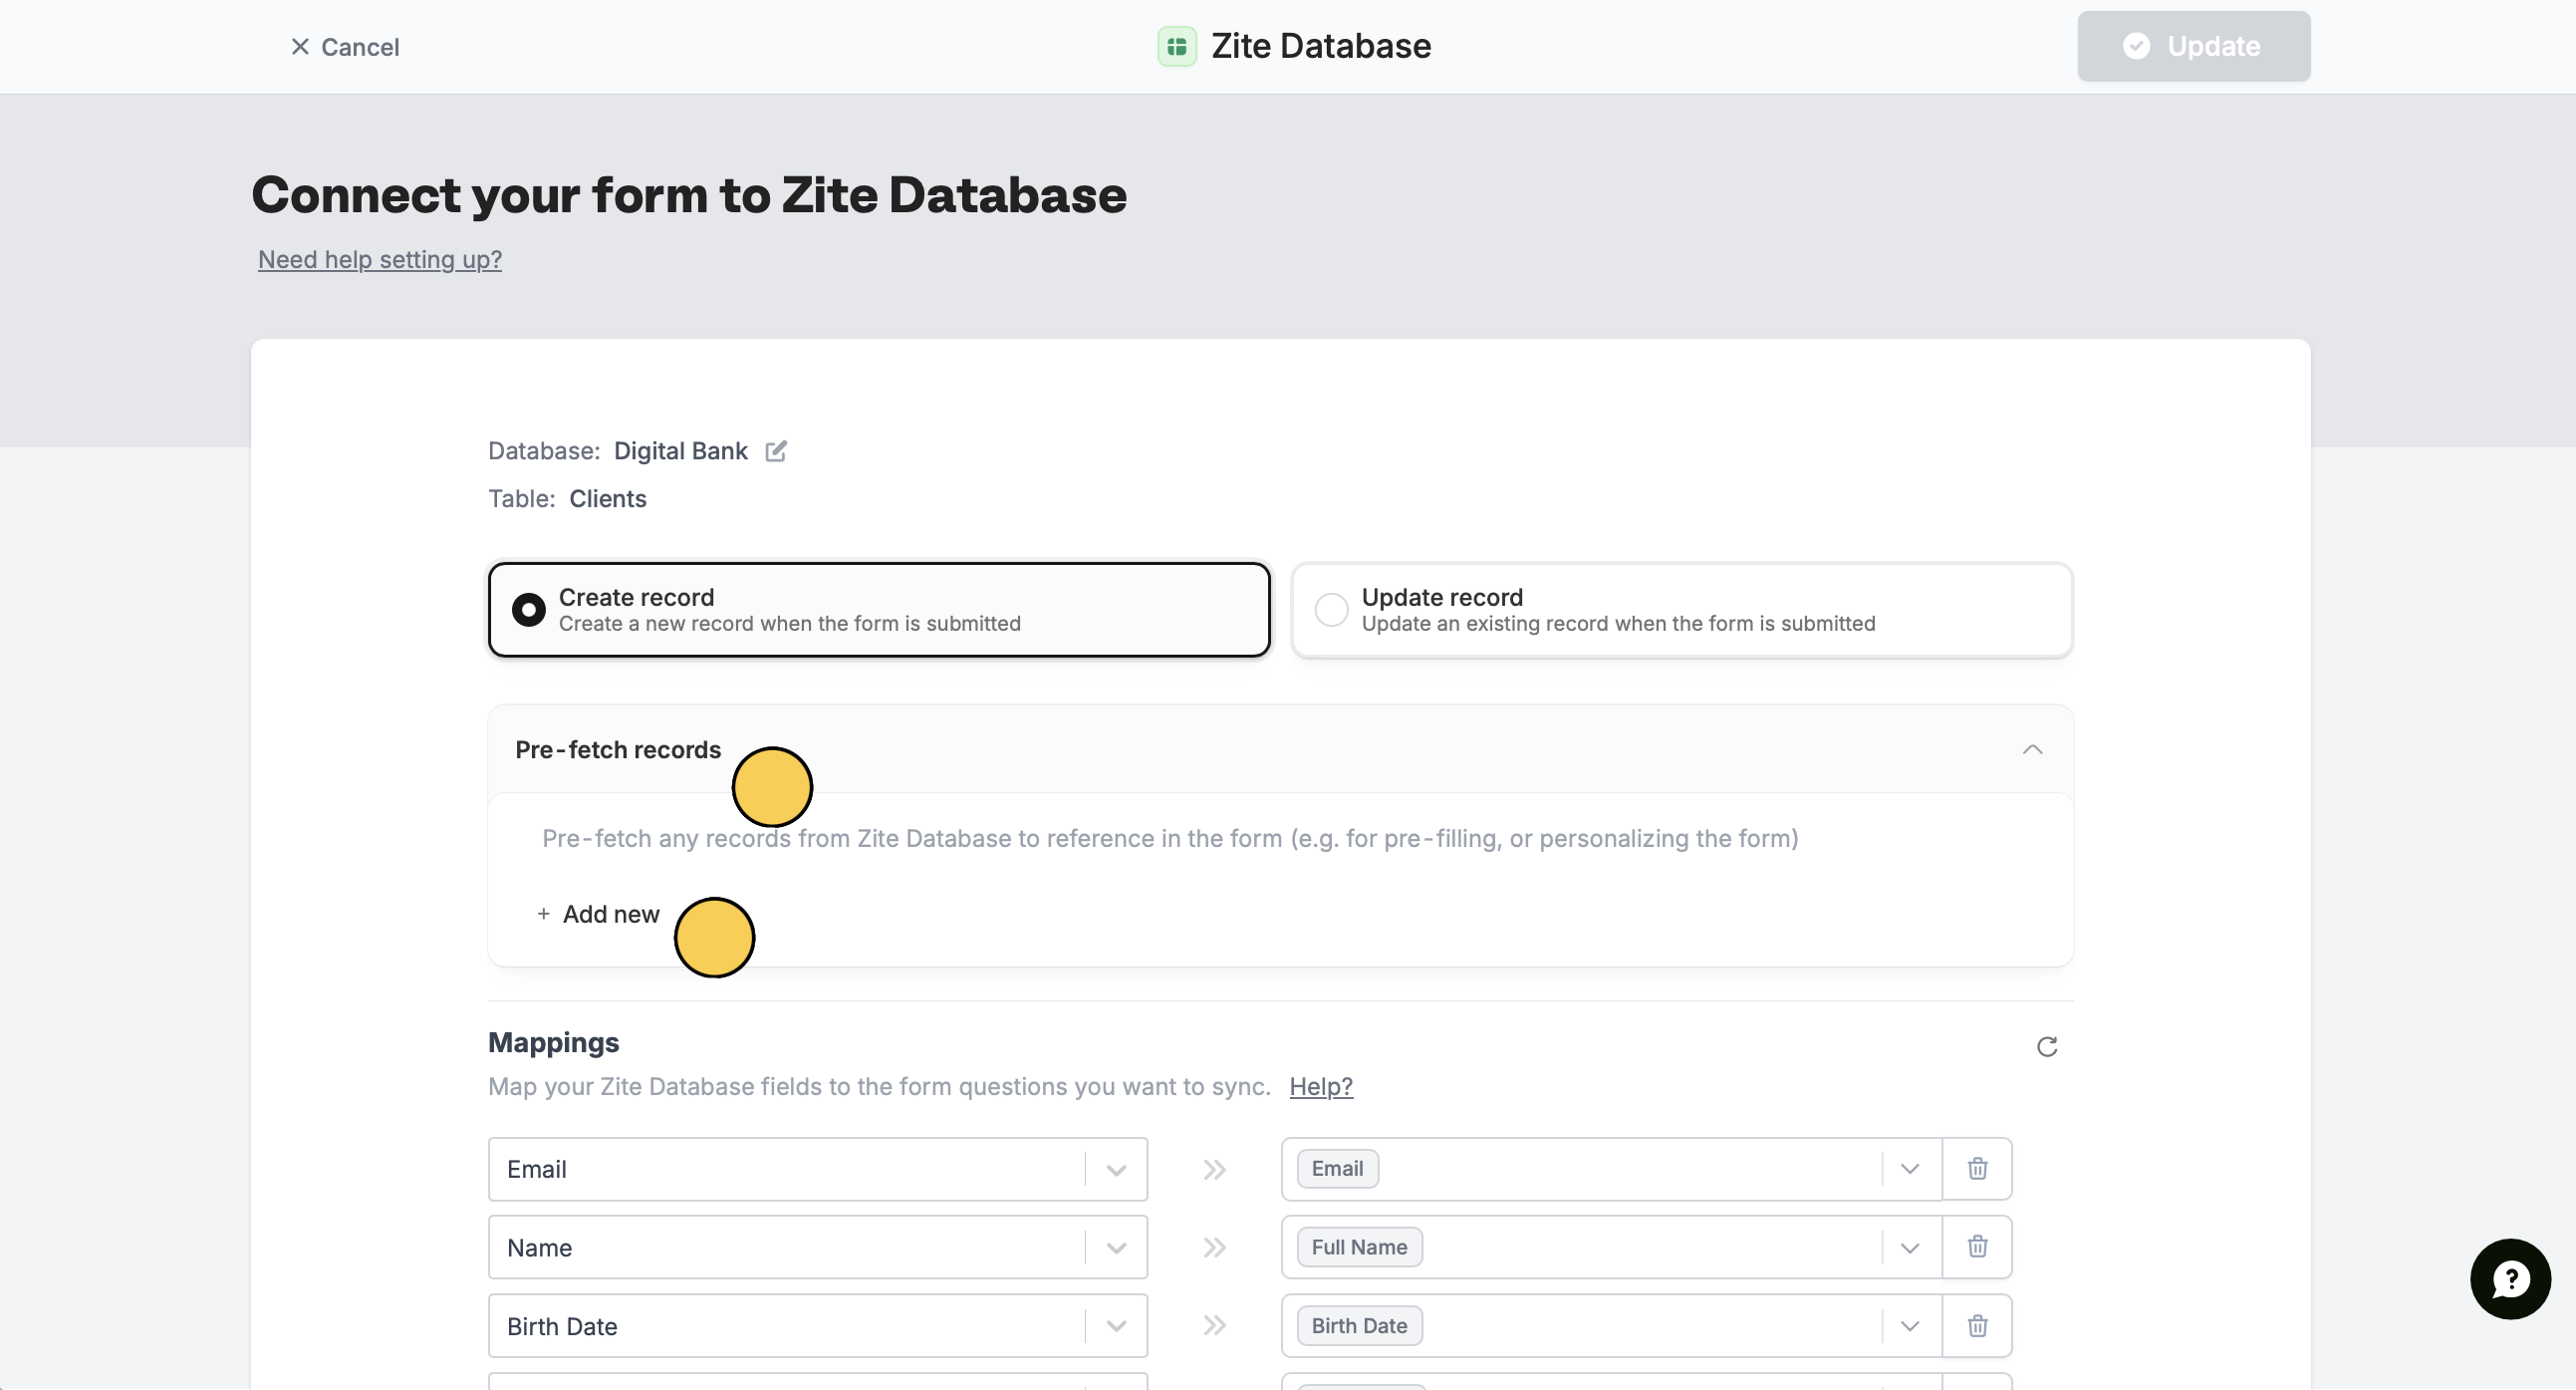 In the popup, **Name your record**. This is just a label to help you identify this pre-fetch setup when using it in your form.
Select the **Table** you'd like to fetch records from. Then **+ Add condition** to **Filter by**.
In the popup, **Name your record**. This is just a label to help you identify this pre-fetch setup when using it in your form.
Select the **Table** you'd like to fetch records from. Then **+ Add condition** to **Filter by**.
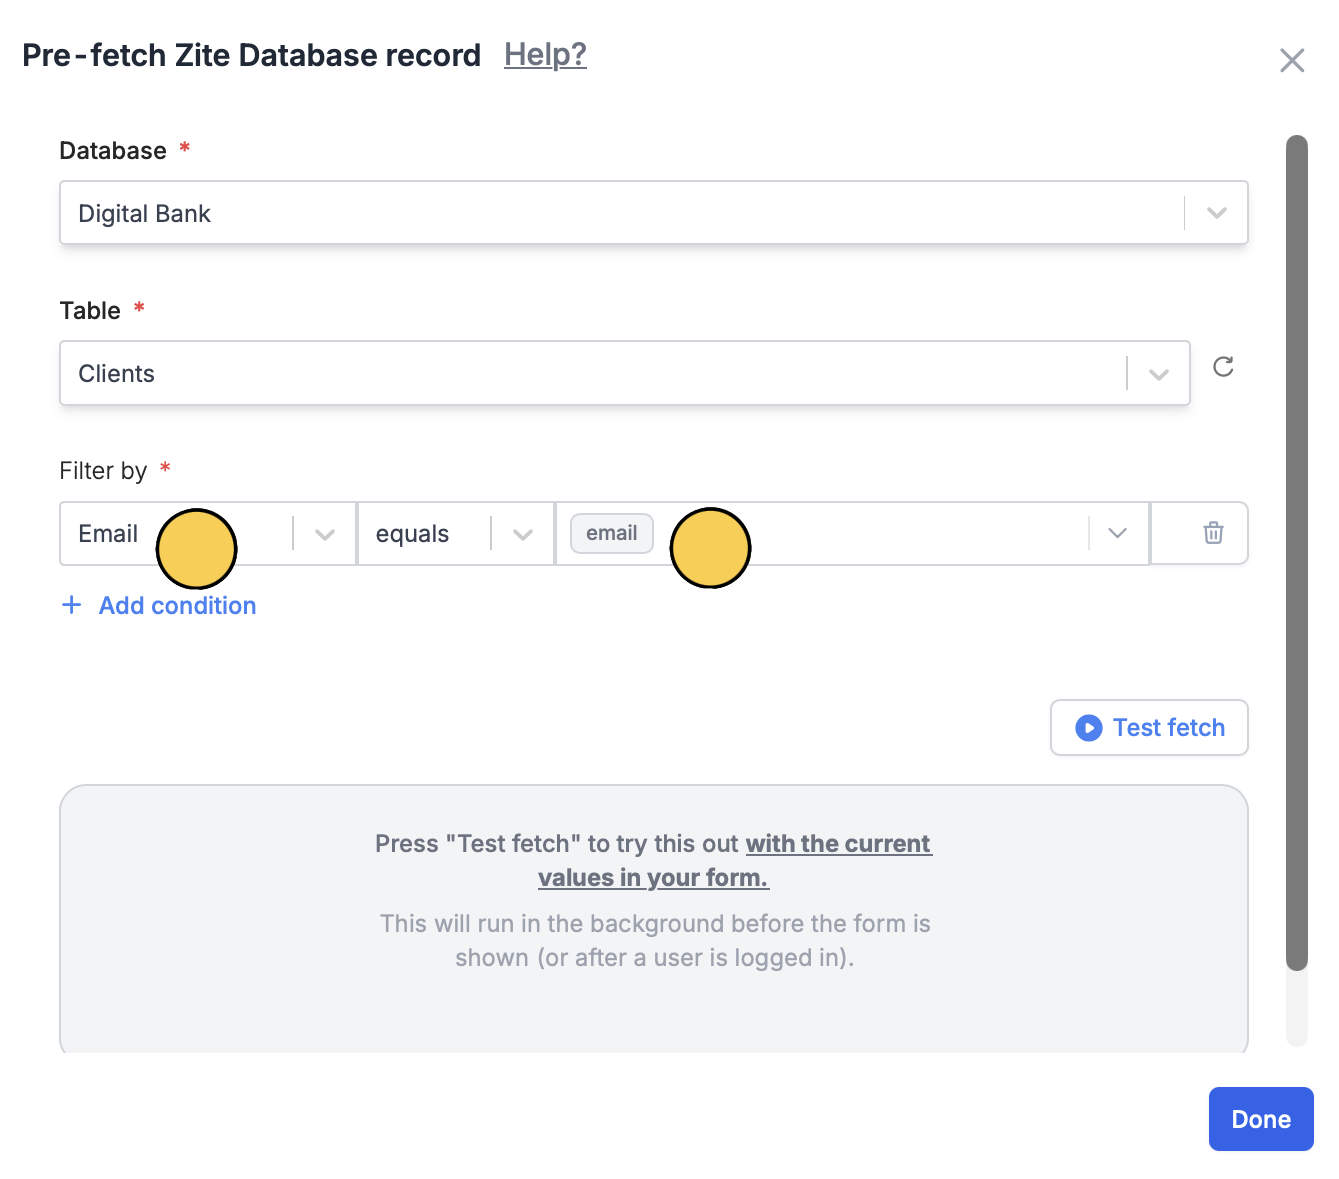 Choose a database column from the left, then match this a [url parameter](https://www.fillout.com/help/url-parameters), static value, or login fields (from your login page) on the right . This condition is how the form identifies which record to fetch.
For our example, we'll fetch records with their `Email`.
Select the **Table** you'd like to fetch records from. Then **+ Add condition** to **Filter by**.
Choose a database column from the left, then match this to a [url parameter](https://www.fillout.com/help/url-parameters), static value, or login fields (from your login page) on the right. This condition is how the form identifies which record to fetch.
For our example, we'll fetch records with their `Email`.
Click `Publish` in the upper right corner [share](https://www.fillout.com/help/sharing) your form using a link that includes the identifier. For example: [https://yourform.com/update-profile?email=juan@email.com](https://yourform.com/update-profile?email=juan@email.com)
Click `Publish` in the upper right corner to [share](https://www.fillout.com/help/sharing) your form using a link that includes the identifier. For example: [https://yourform.com/update-profile?email=juan@email.com](https://yourform.com/update-profile?email=juan@email.com)
## Related articles
Allow users to pick Zite database records from form.
Choose a database column from the left, then match this a [url parameter](https://www.fillout.com/help/url-parameters), static value, or login fields (from your login page) on the right . This condition is how the form identifies which record to fetch.
For our example, we'll fetch records with their `Email`.
Select the **Table** you'd like to fetch records from. Then **+ Add condition** to **Filter by**.
Choose a database column from the left, then match this to a [url parameter](https://www.fillout.com/help/url-parameters), static value, or login fields (from your login page) on the right. This condition is how the form identifies which record to fetch.
For our example, we'll fetch records with their `Email`.
Click `Publish` in the upper right corner [share](https://www.fillout.com/help/sharing) your form using a link that includes the identifier. For example: [https://yourform.com/update-profile?email=juan@email.com](https://yourform.com/update-profile?email=juan@email.com)
Click `Publish` in the upper right corner to [share](https://www.fillout.com/help/sharing) your form using a link that includes the identifier. For example: [https://yourform.com/update-profile?email=juan@email.com](https://yourform.com/update-profile?email=juan@email.com)
## Related articles
Allow users to pick Zite database records from form.