> ## Documentation Index
> Fetch the complete documentation index at: https://fillout.com/help/llms.txt
> Use this file to discover all available pages before exploring further.
# Add a progress bar
> Customize the default progress bar that shows up when respondents answer your Fillout form.
## What is a progress bar?
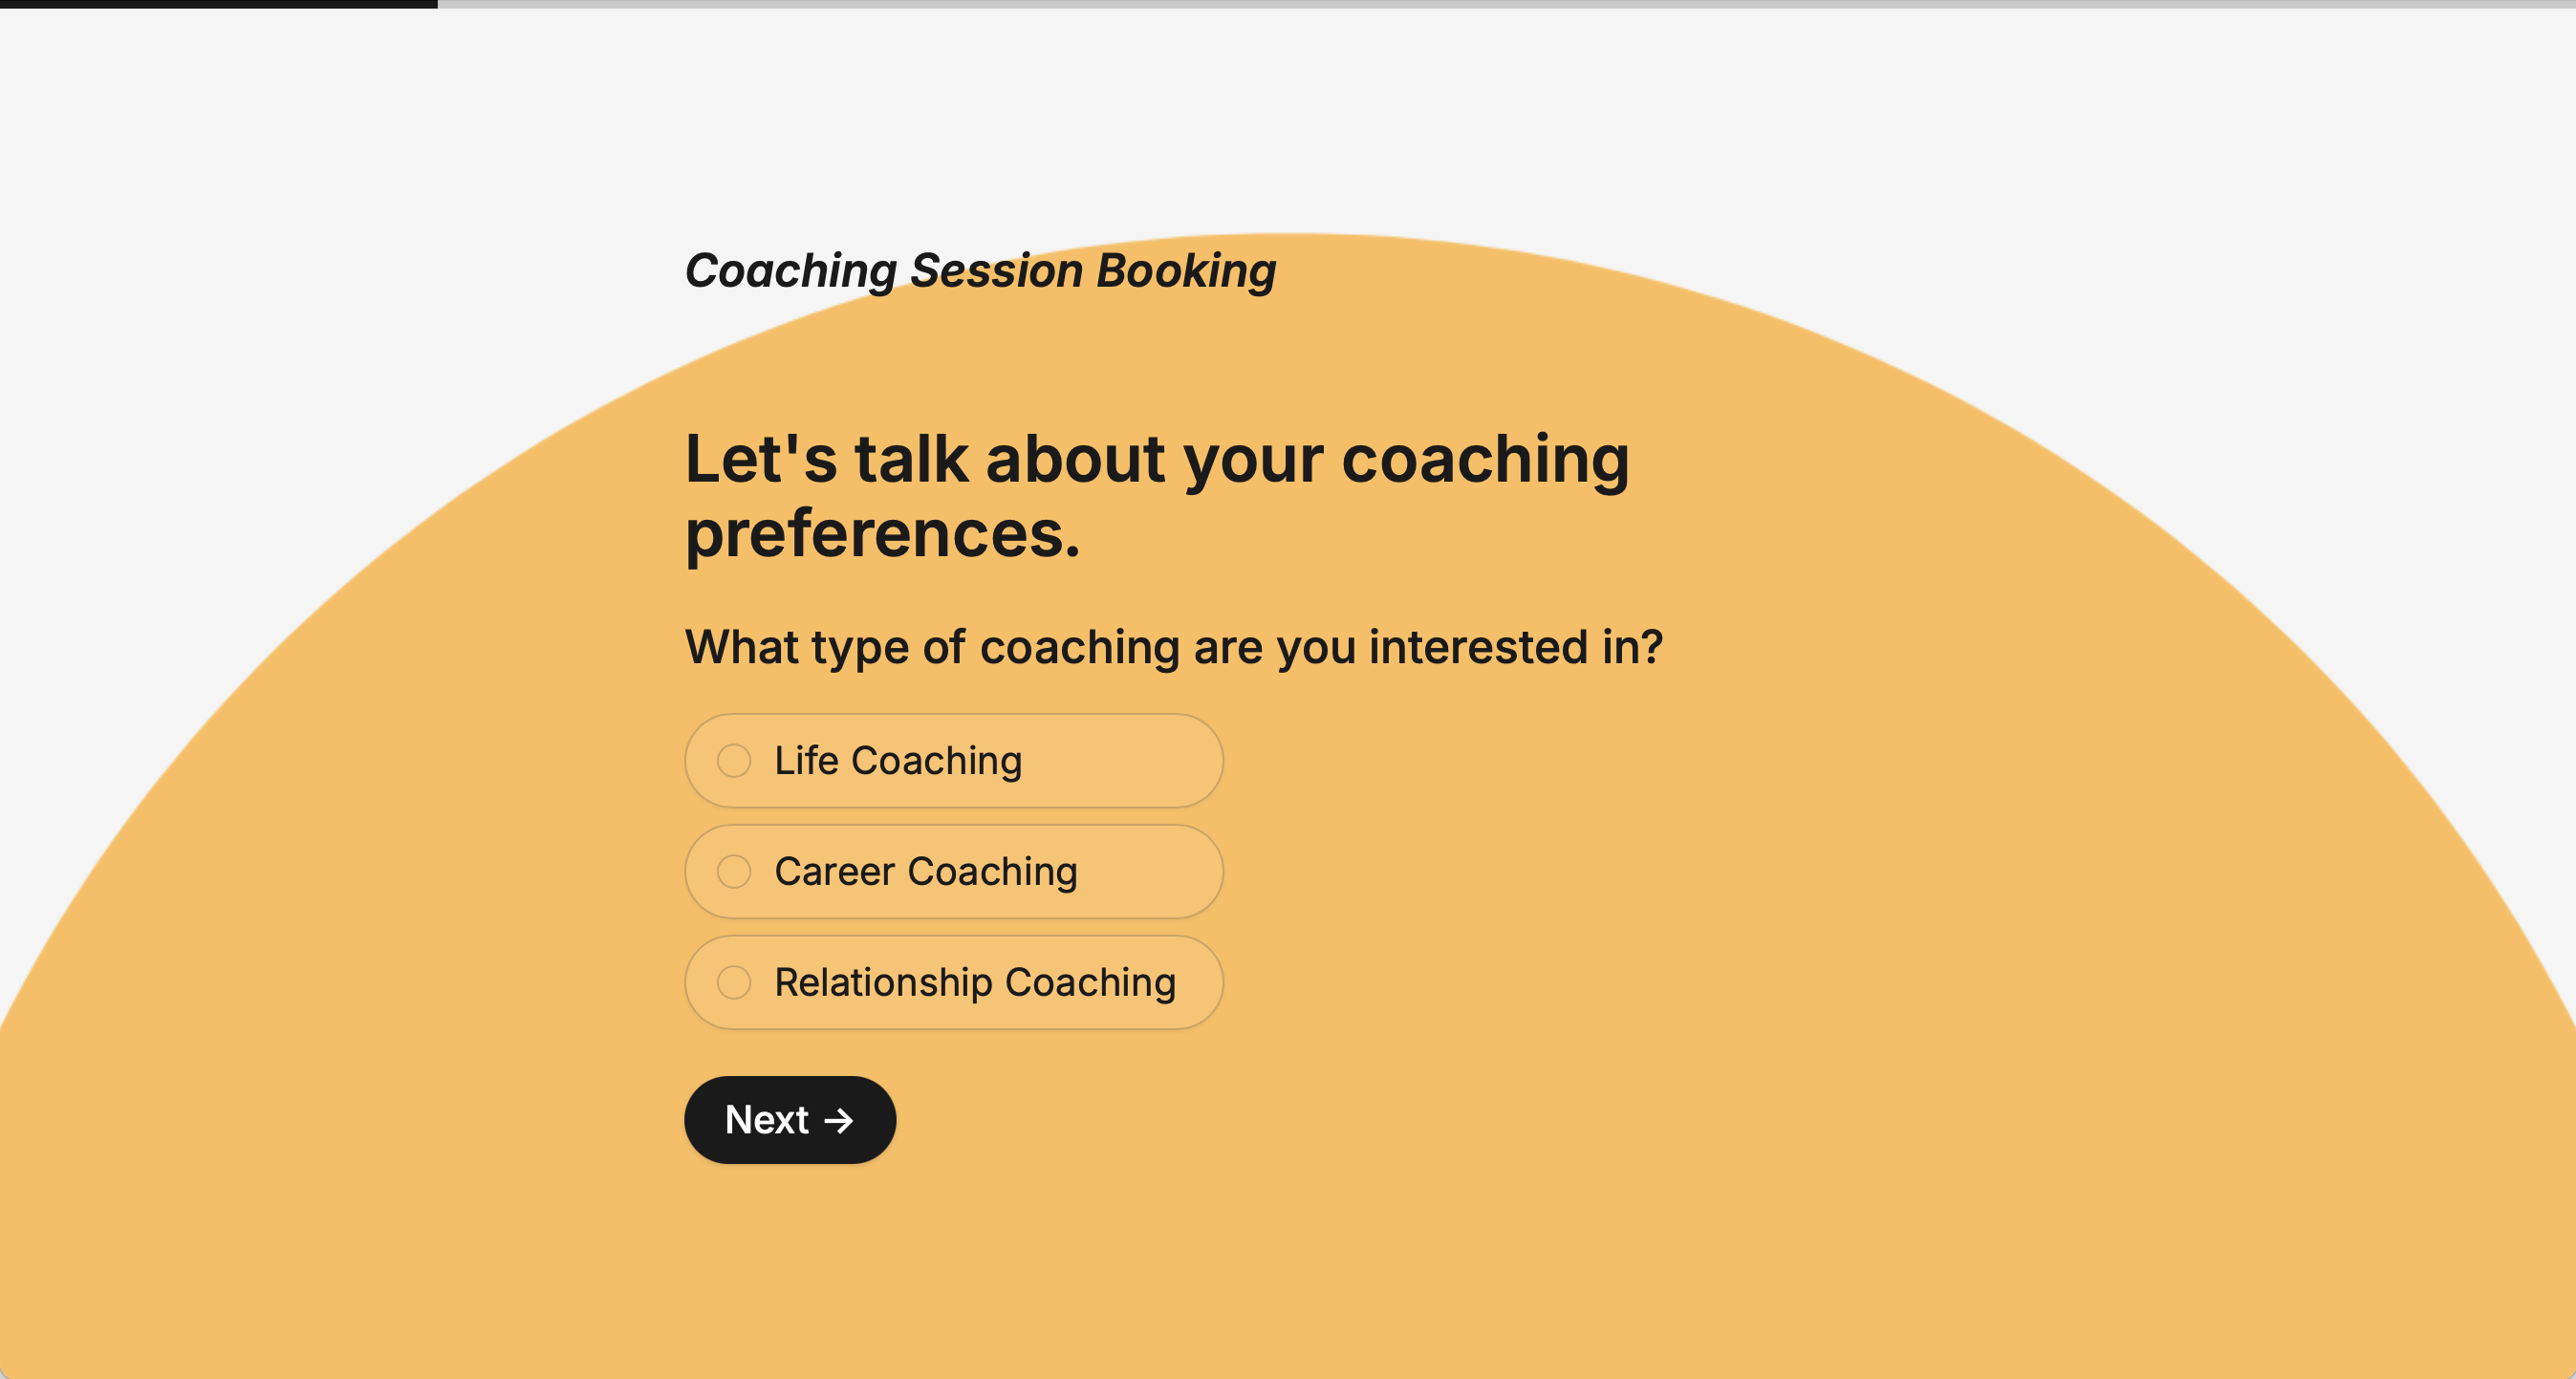
A **progress bar** lets respondents know how much of the form have been completed and how much remains. By default, respondents will see a progress bar at top of the form.
 ## How to change the color
Click `Theme` to open the **Form designer**. Then, change the `Primary` color.
## How to change the color
Click `Theme` to open the **Form designer**. Then, change the `Primary` color.
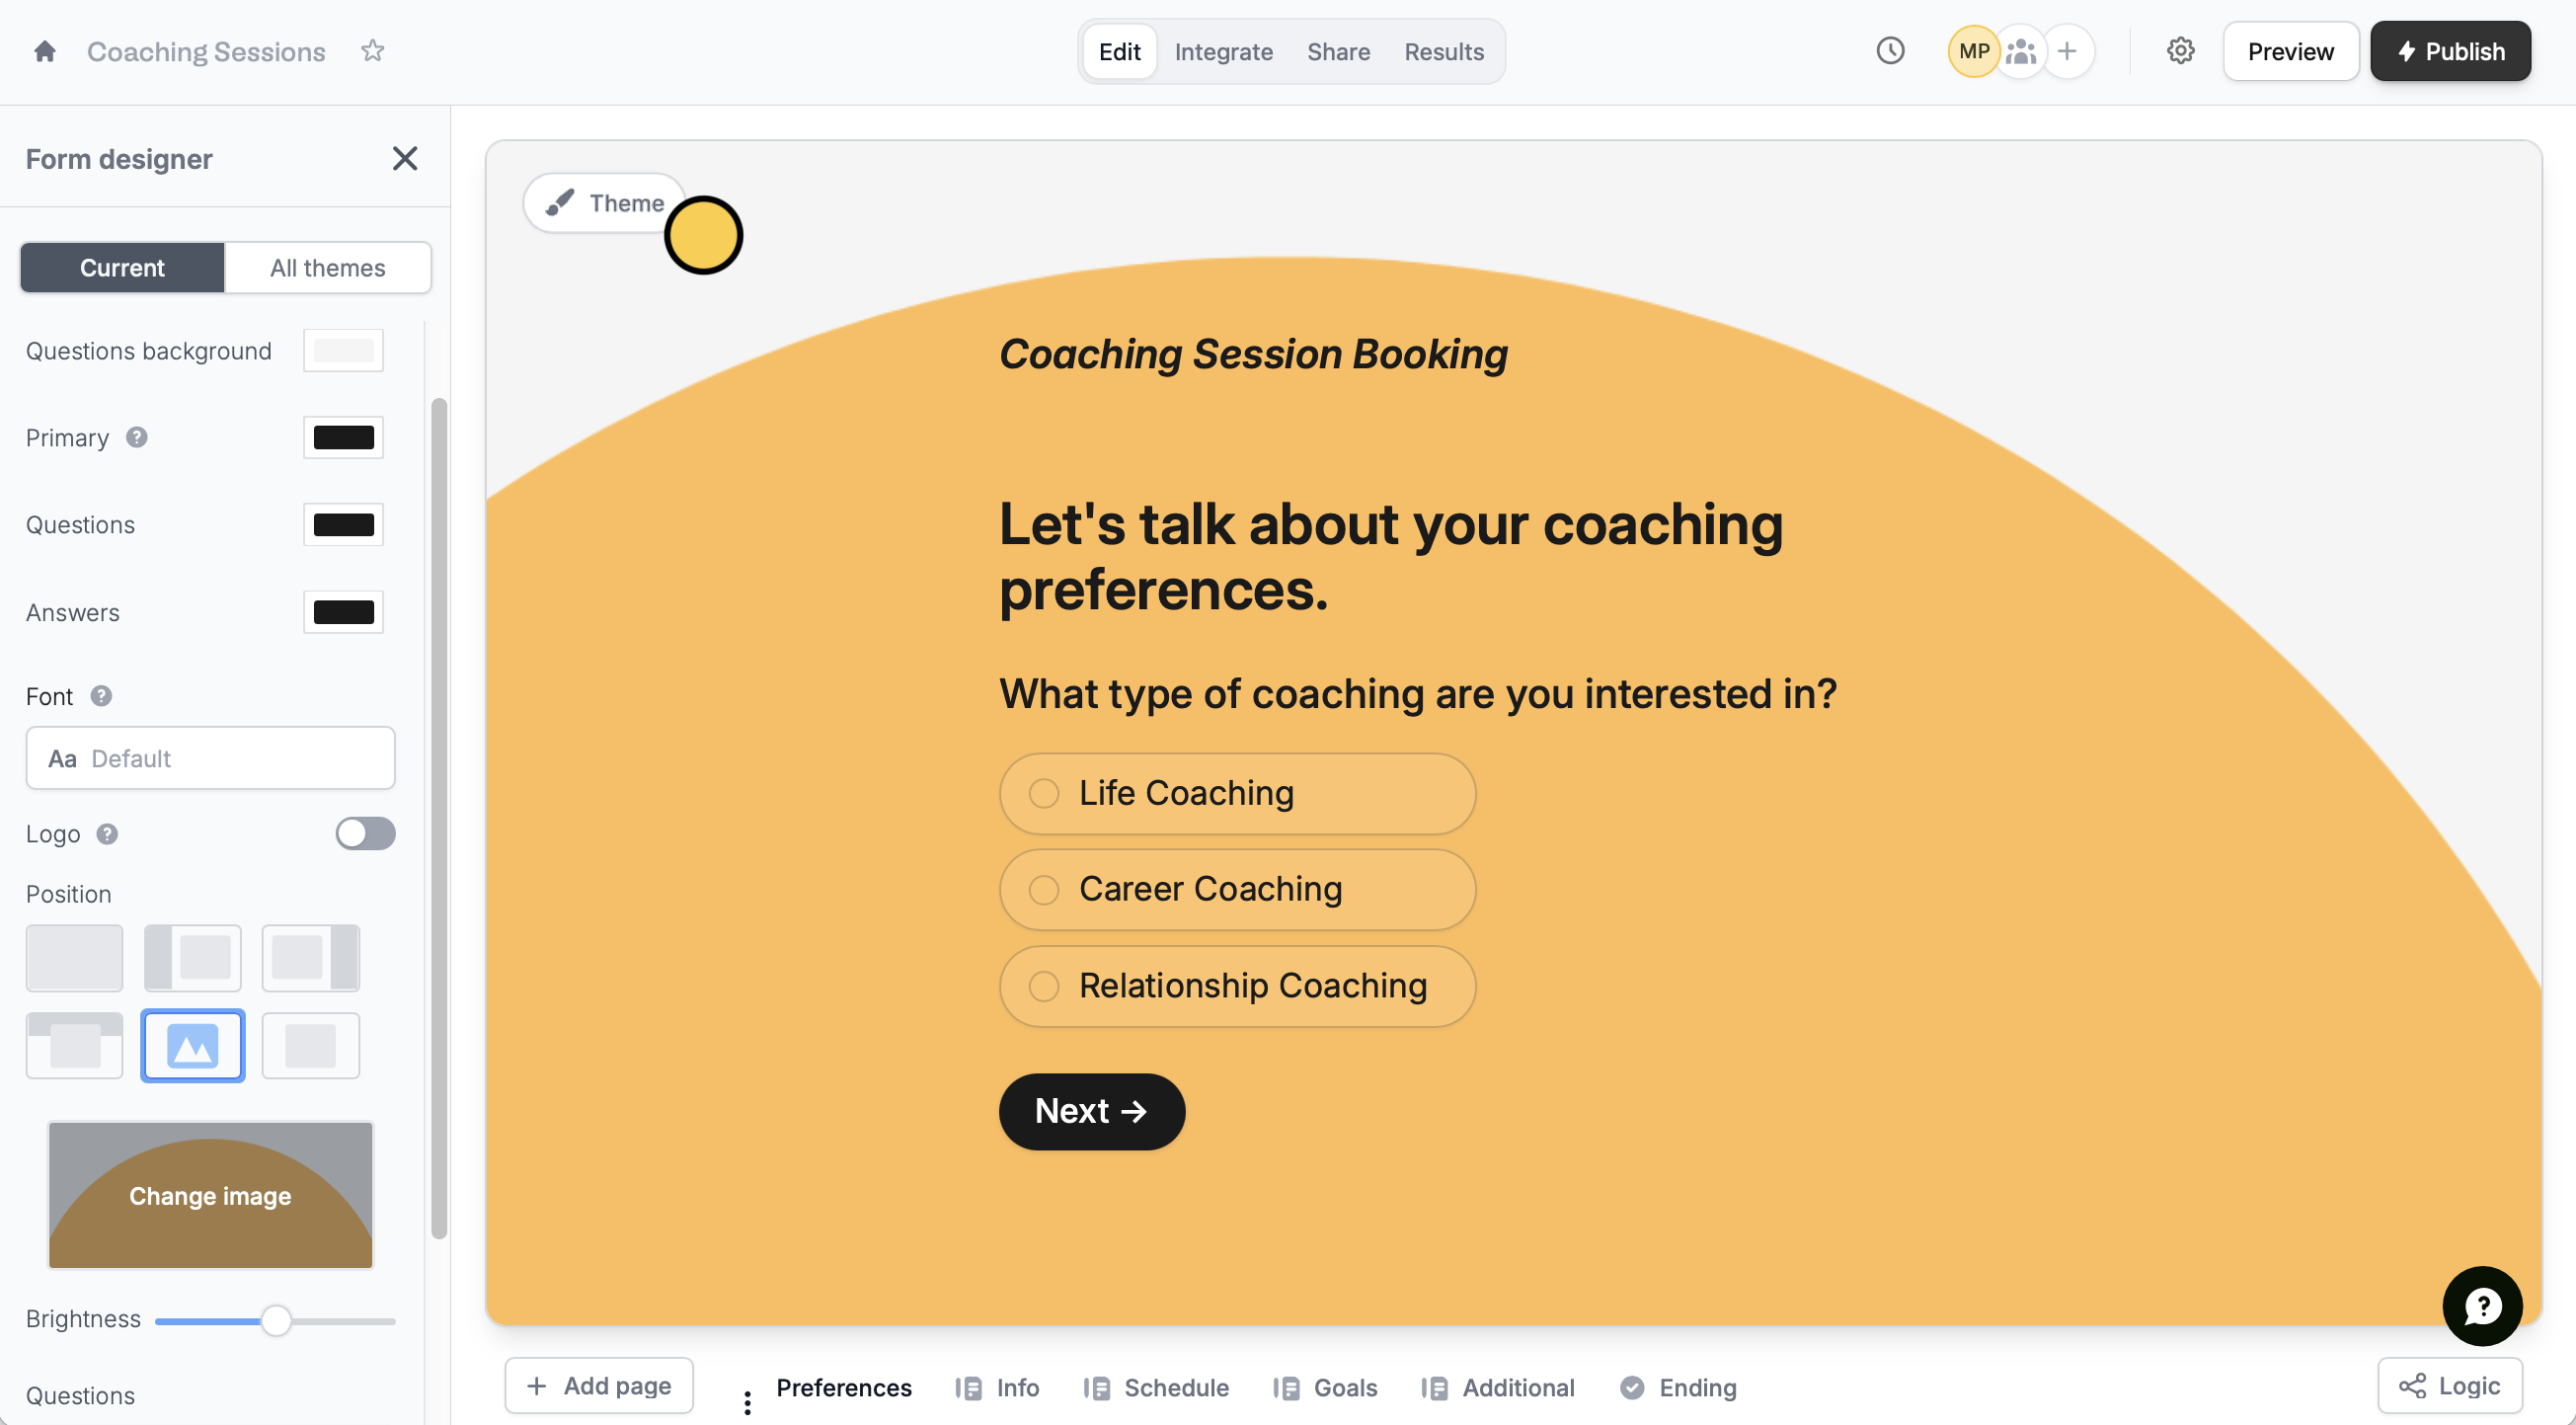 Changing the primary color will also update your button color. If you want your button to stay the same, adjust it directly in its settings. More info [here](https://www.fillout.com/help/button-types#customize-button).
## Use a multi-step progress bar
On the left-hand panel of your form, click `Progress bar`.
Changing the primary color will also update your button color. If you want your button to stay the same, adjust it directly in its settings. More info [here](https://www.fillout.com/help/button-types#customize-button).
## Use a multi-step progress bar
On the left-hand panel of your form, click `Progress bar`.
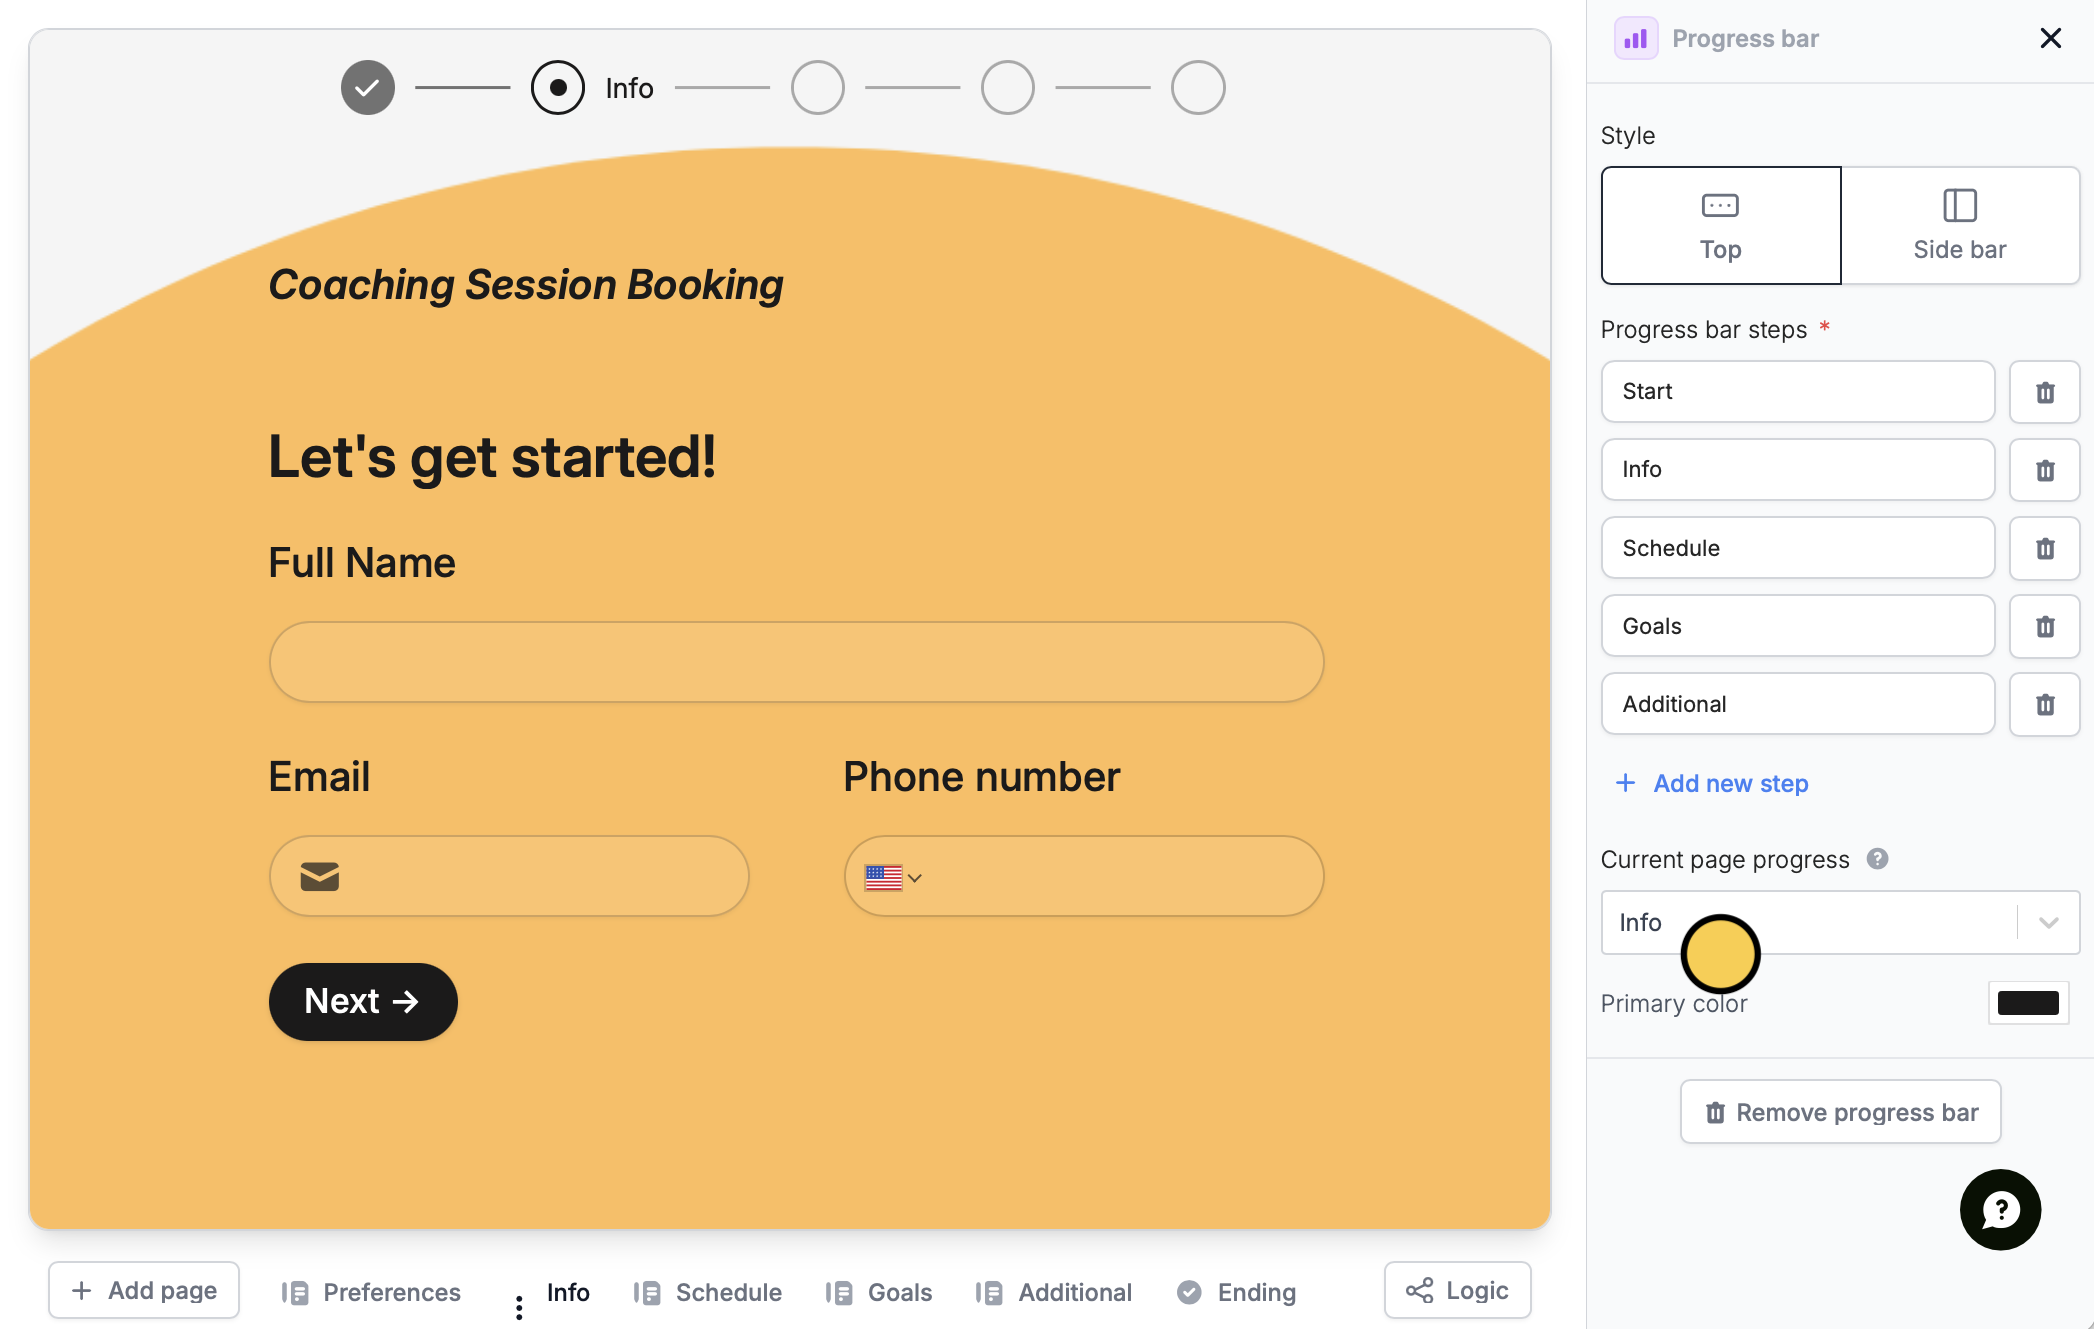
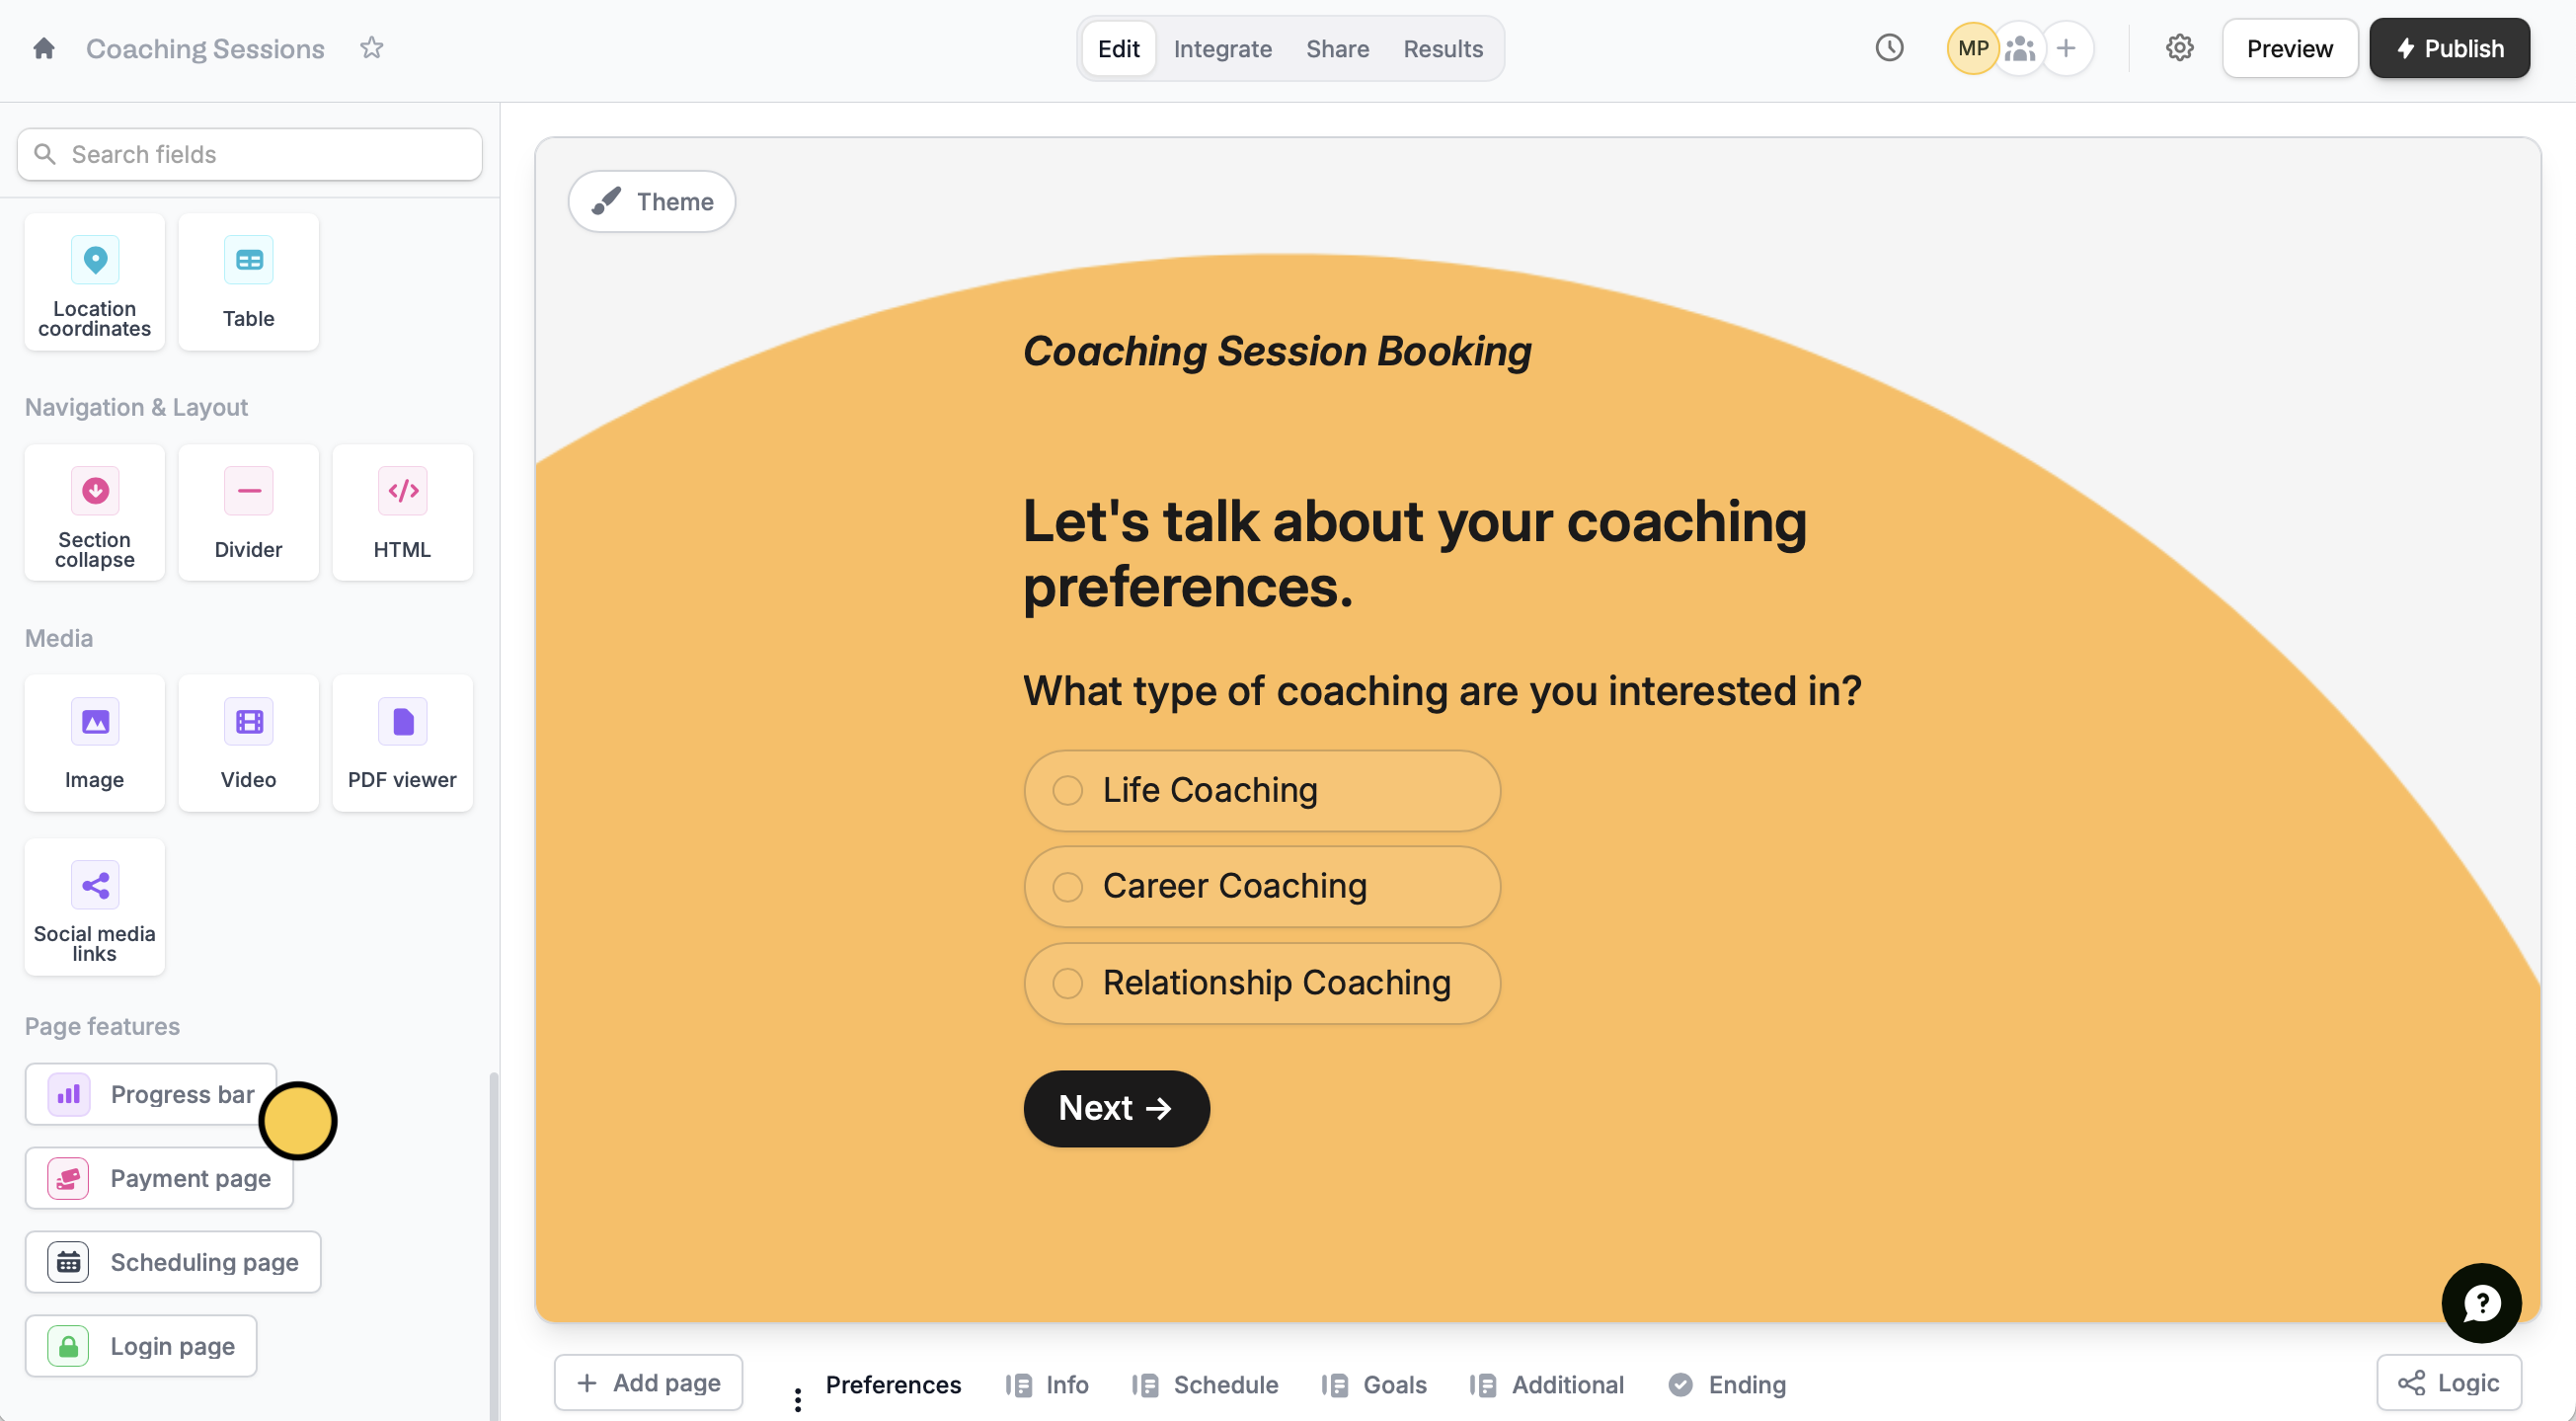 Click the **progress bar** to customize it. This will open the right-hand panel where you can configure its settings.
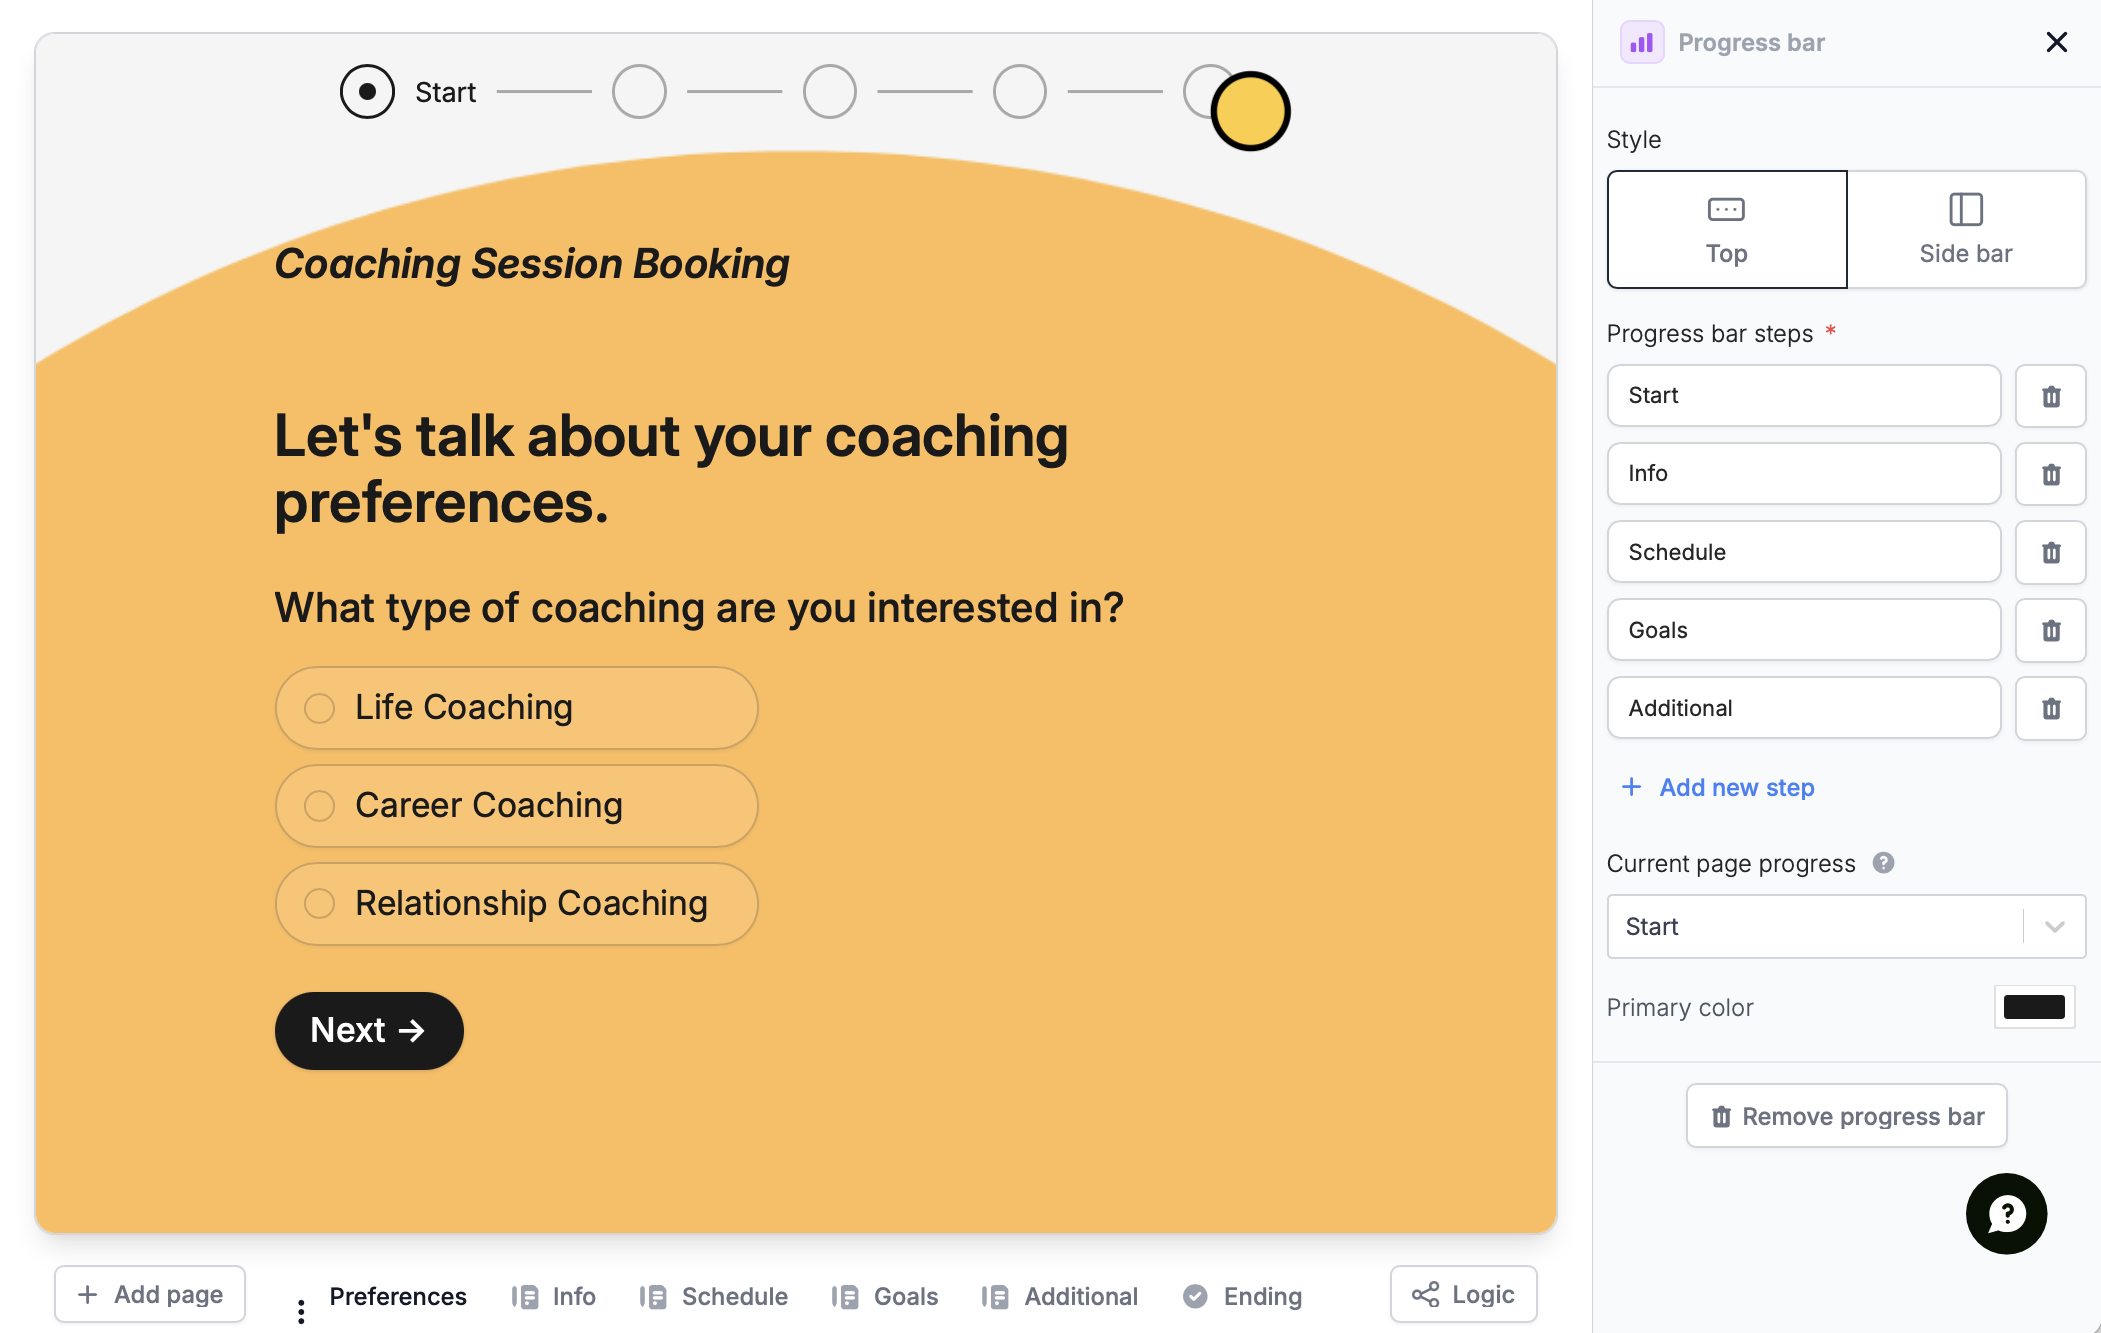 Your progress bar will default to 3 steps. You can edit their names and `+ Add new steps` if needed.
Navigate to each page (except Cover and Ending) and choose which step they should go into in **Current page progress**.
Your progress bar will default to 3 steps. You can edit their names and `+ Add new steps` if needed.
Navigate to each page (except Cover and Ending) and choose which step they should go into in **Current page progress**.
 ## Remove the progress bar
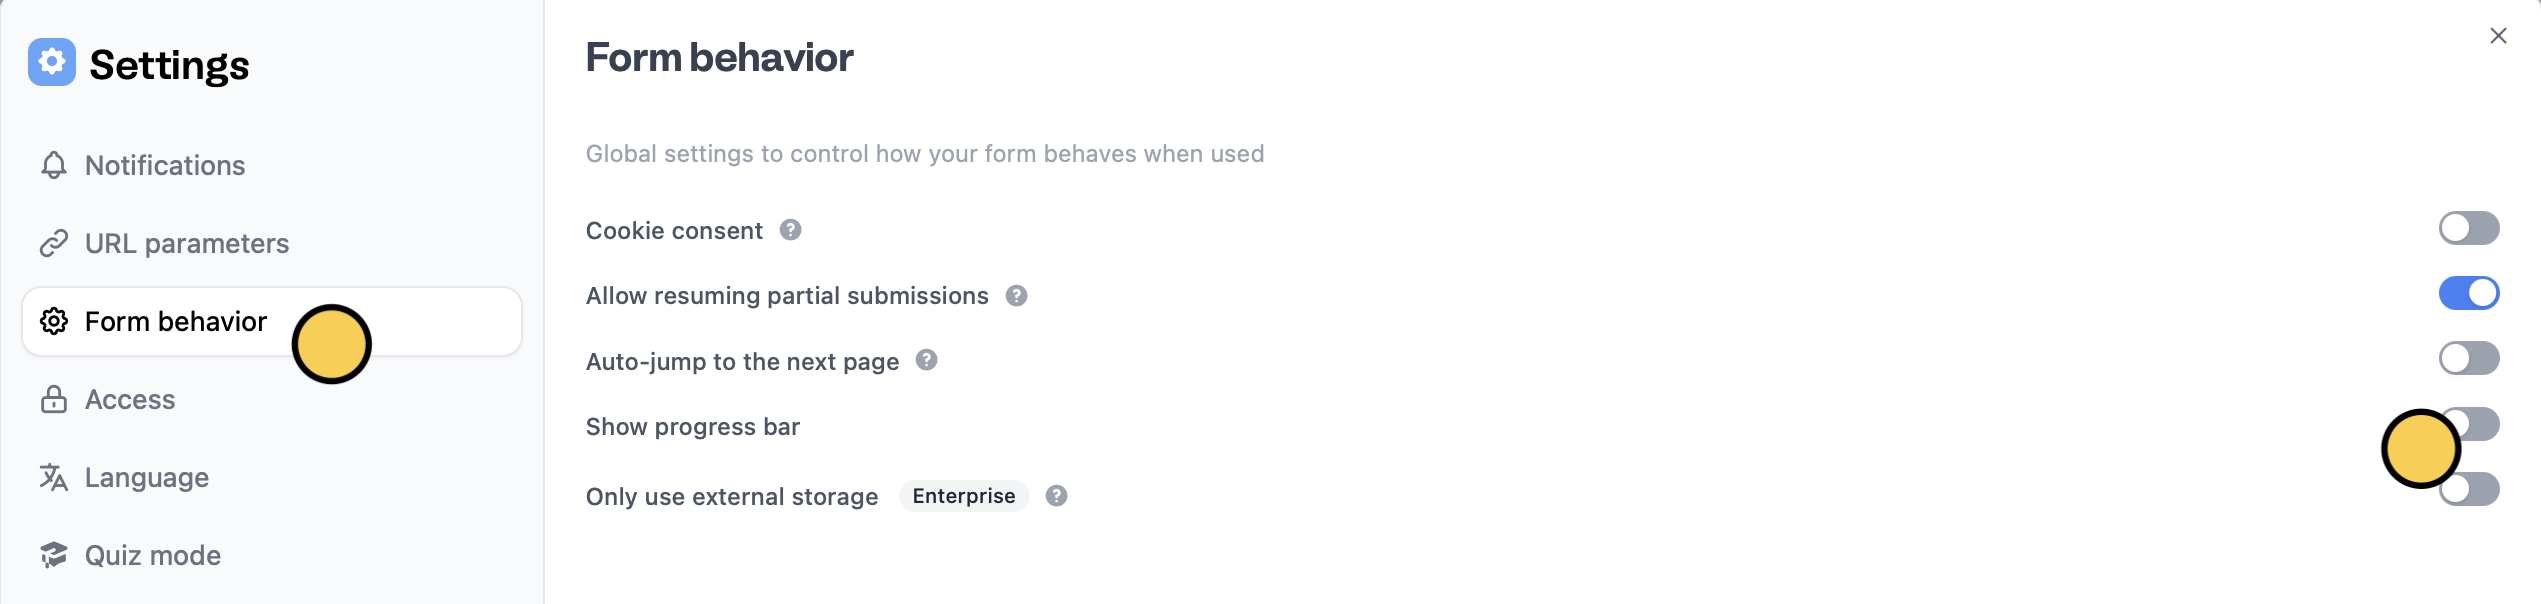
If you used a multi-step progress bar, you remove it in the right-hand panel. Either way, you can click form settings on the upper right area.
## Remove the progress bar
If you used a multi-step progress bar, you remove it in the right-hand panel. Either way, you can click form settings on the upper right area.
 Navigate to `Form behavior` and untoggle the `Show progress bar` switch.
 ## **Related articles**
Select from hundreds of themes or create your own.
Edit the position of your form's fields and background image.
Auto-redirect to the next page after making a selection.
## **Related articles**
Select from hundreds of themes or create your own.
Edit the position of your form's fields and background image.
Auto-redirect to the next page after making a selection.