> ## Documentation Index
> Fetch the complete documentation index at: https://fillout.com/help/llms.txt
> Use this file to discover all available pages before exploring further.
# Working with record pickers
> Set pre-fills or default values, reference fields from the chosen record, and more using a linked record picker with Fillout.
export const SupportBanner = () => {
const titleId = React.useId();
return ;
};
## What is a record picker?
A **record picker** links entries from one database to another, so you can see related information in one place. Think of it like linking two pieces of a puzzle, instead of copying data from one table to another, you just point to it.
For example, you have a Projects database and a Clients database. With a record picker, you can link a project to a client without retyping any client info. Everything stays connected and up-to-date automatically.
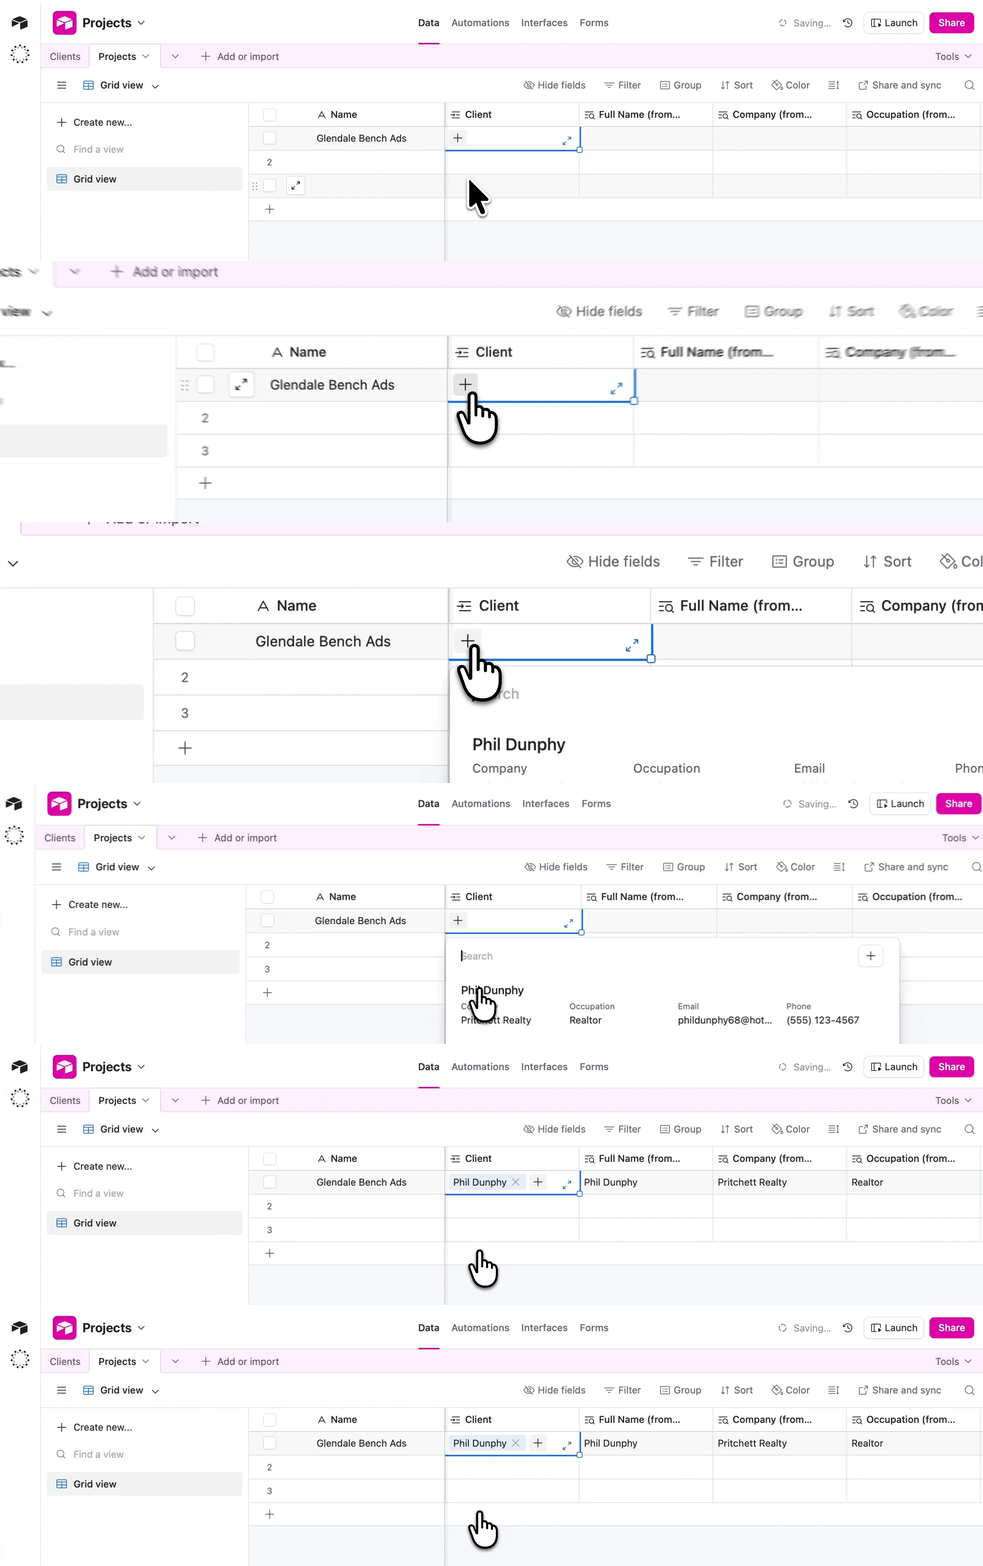 Depending on the database you’re using, this feature may be called differently:
* **Airtable / SmartSuite / Zite** Database → Linked record field
* **Notion** → Relation
* **Monday** → Connected board column
* **Salesforce** → Master-detail relationship
## How it works
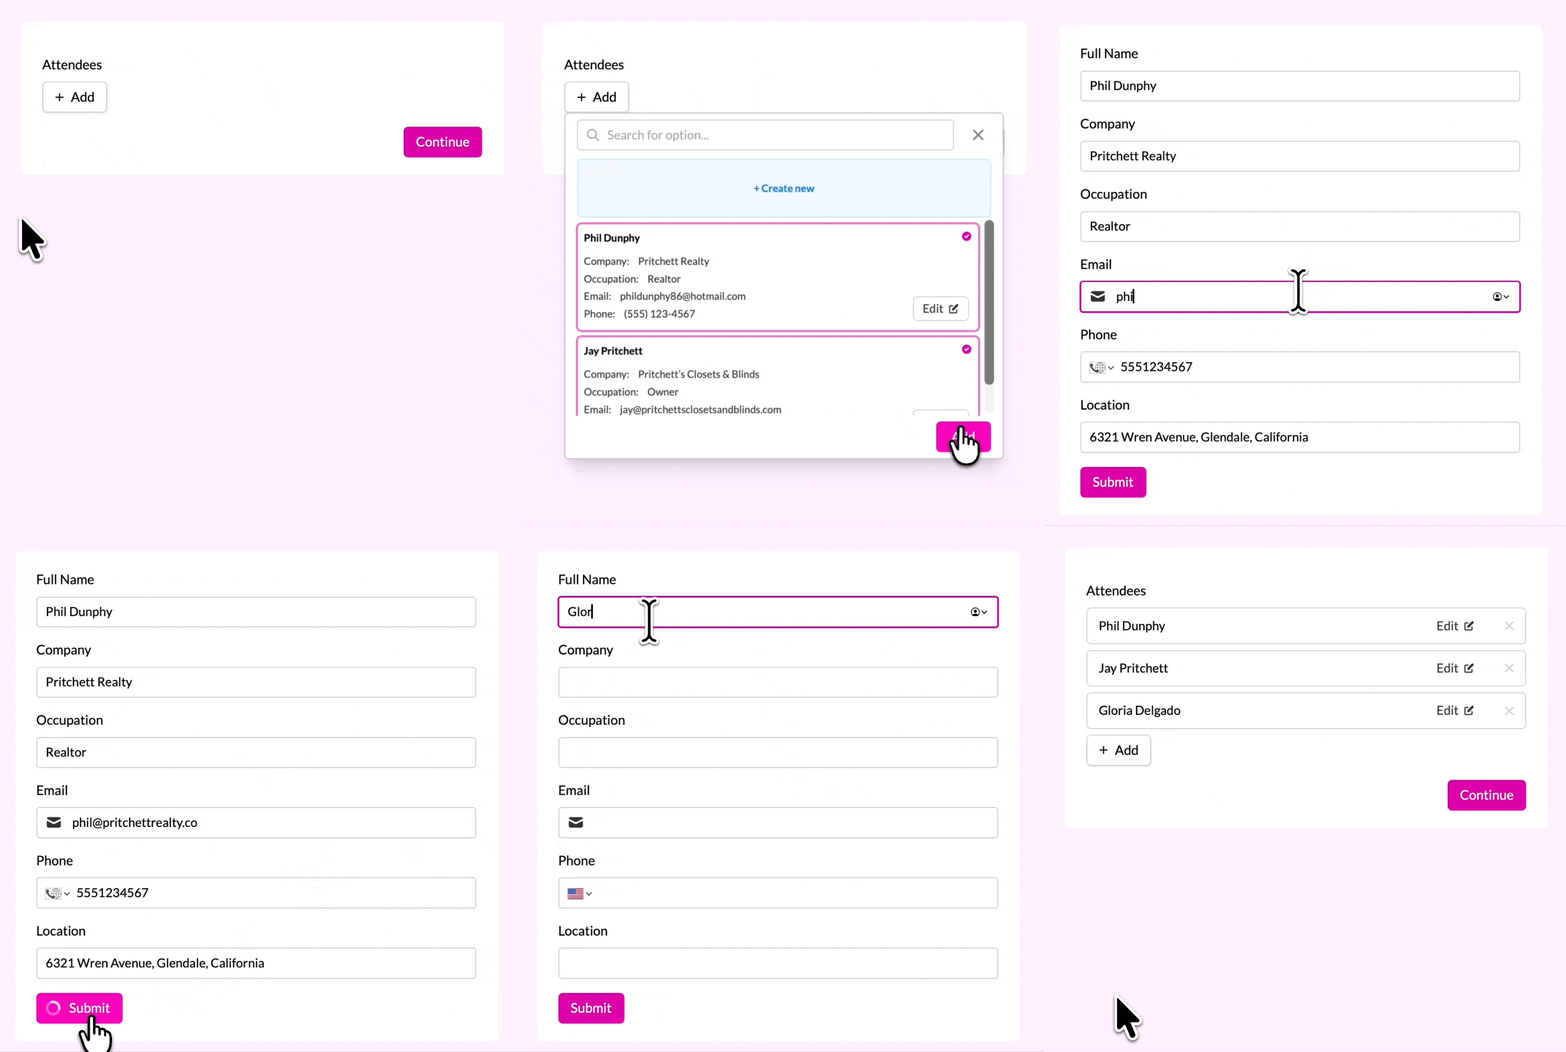
In Fillout, the **record picker field** enables respondents to:
* [Select existing linked records](https://www.fillout.com/help/select-linked-airtable-records)
* [Create new linked records](https://www.fillout.com/help/create-new-linked-records)
* [Edit existing linked records](https://www.fillout.com/help/linked-record-update)
This field is great for avoiding duplicate entries, keeping your data organized and making it easy to navigate between related records.
Depending on the database you’re using, this feature may be called differently:
* **Airtable / SmartSuite / Zite** Database → Linked record field
* **Notion** → Relation
* **Monday** → Connected board column
* **Salesforce** → Master-detail relationship
## How it works
In Fillout, the **record picker field** enables respondents to:
* [Select existing linked records](https://www.fillout.com/help/select-linked-airtable-records)
* [Create new linked records](https://www.fillout.com/help/create-new-linked-records)
* [Edit existing linked records](https://www.fillout.com/help/linked-record-update)
This field is great for avoiding duplicate entries, keeping your data organized and making it easy to navigate between related records.
 ## How to pre-fill a record picker
You can [pre-fill](/help/prefill-fields) a record picker using the record's Airtable **Record ID.** In this video, we show how to pre-fill a record picker using a [URL parameter](/help/url-parameters).
## Prevent respondents from changing the record picker
You can choose to always [conditionally hide](/help/conditional-hiding) the record picker.
## Reference fields from the chosen Airtable record
Personalize your form by referencing fields in your form.
## Advanced customizations
In the right-hand panel, scroll down to **Advanced**. Here, you can customize how records are displayed and selected. You can set:
* **Fields to show** - select which fields are visible in the dropdown
* **Field to search by** - choose a different field to search by other than the primary field
## How to pre-fill a record picker
You can [pre-fill](/help/prefill-fields) a record picker using the record's Airtable **Record ID.** In this video, we show how to pre-fill a record picker using a [URL parameter](/help/url-parameters).
## Prevent respondents from changing the record picker
You can choose to always [conditionally hide](/help/conditional-hiding) the record picker.
## Reference fields from the chosen Airtable record
Personalize your form by referencing fields in your form.
## Advanced customizations
In the right-hand panel, scroll down to **Advanced**. Here, you can customize how records are displayed and selected. You can set:
* **Fields to show** - select which fields are visible in the dropdown
* **Field to search by** - choose a different field to search by other than the primary field
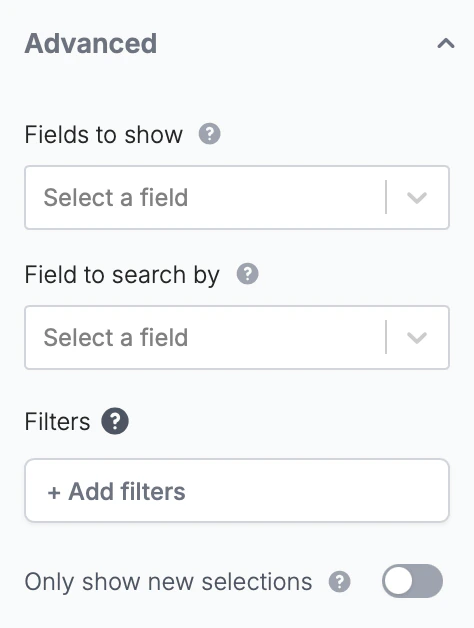 * [**Filters**](https://www.fillout.com/help/select-linked-airtable-records#enable-dropdown-filtering) - to limit which records can be selected in the dropdown
* **Limit to view (if database supports views)** - restrict records to a specific view from your table and keep that view’s sorting order
Records follow your table’s order by default. This cannot be configured in Fillout. To change the sorting, **create a view in your database** with your preferred order.
## Related articles
Pre-populate fields based on previous inputs and more.
Hide or show fields based on answers, URL parameters or data.
* [**Filters**](https://www.fillout.com/help/select-linked-airtable-records#enable-dropdown-filtering) - to limit which records can be selected in the dropdown
* **Limit to view (if database supports views)** - restrict records to a specific view from your table and keep that view’s sorting order
Records follow your table’s order by default. This cannot be configured in Fillout. To change the sorting, **create a view in your database** with your preferred order.
## Related articles
Pre-populate fields based on previous inputs and more.
Hide or show fields based on answers, URL parameters or data.