> ## Documentation Index
> Fetch the complete documentation index at: https://fillout.com/help/llms.txt
> Use this file to discover all available pages before exploring further.
# SSO custom attributes
> Use custom attributes from your SSO identity provider — like department, role, or cost center — to pre-fill fields and add conditional logic to your forms.
## Overview
When your form uses an [SSO login page](/sso-form-login), you can pull in **custom attributes** from your identity provider — such as department, role, or cost center. Use these attributes to pre-fill fields, add conditional logic, or personalize the form experience.
SSO custom attributes require the **Enterprise Plan** with [SSO configured](/saml-sso). Your form must have a [login page](/login-page) set to the **SSO** verification type.
## Enable custom attributes
In the form editor, select your **Login page** step. In the left-hand panel, make sure the **Verification type** is set to `SSO`.
Below the SSO status, expand the **Custom attributes** section. You'll see a list of all discovered attribute names from your identity provider.
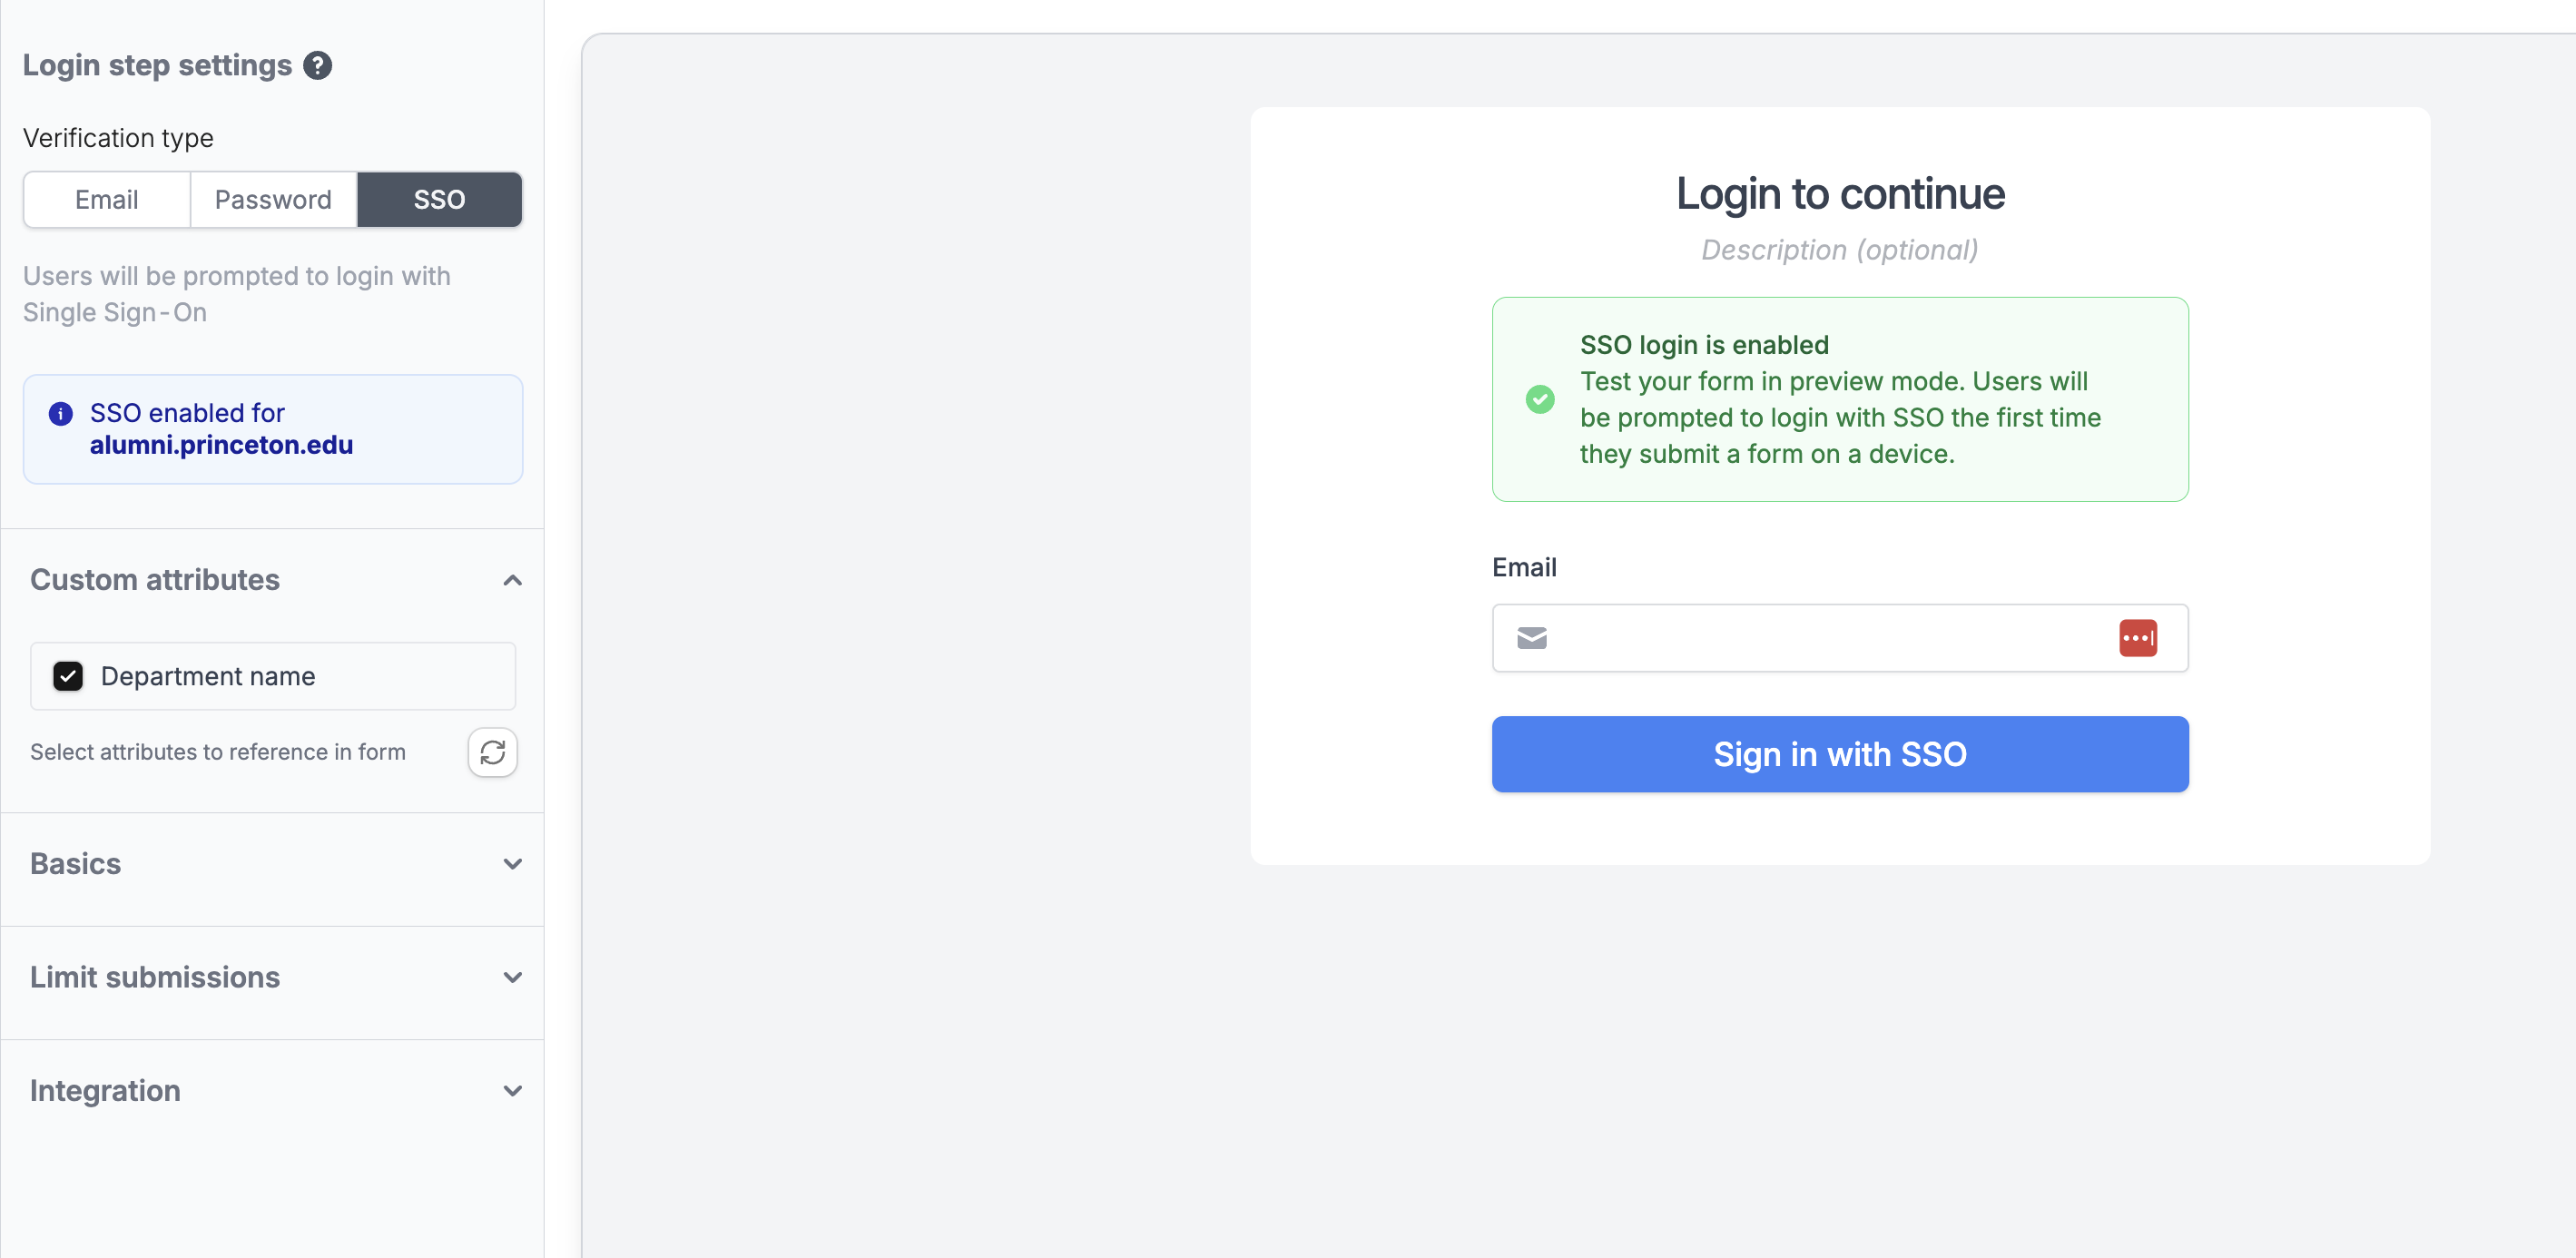 Check the box next to each attribute you want to use in the form (e.g., `departmentName`). Then **save** the form.
Custom attributes are automatically discovered from actual SSO logins. At least one SSO user must have signed in to a form in your organization for attributes to appear. Click the **refresh** button to re-scan after new users have logged in.
## Use custom attributes in your form
Once enabled, custom attributes appear as references under the **Login page** in the reference picker — alongside the standard **Email**, **First Name**, and **Last Name** fields.
You can use them anywhere that supports the reference picker:
* **Pre-fill fields** — Auto-fill a text field with the user's department or role. Learn more about [pre-filling fields](/prefill-fields).
* **Conditional logic** — Show or hide questions based on attribute values, e.g. display a section only for users in the "Engineering" department. Learn more about [page logic](/page-logic).
* **Calculations and answer piping** — Reference attributes in [calculations](/calculations) or [answer piping](/answer-piping).
Attribute values are refreshed every time a user logs in via SSO. If a user's department changes in your identity provider, the updated value will appear the next time they sign in.
## Related articles
Add SSO login to your forms.
Configure your SSO provider with Fillout.
Set default values for form fields.
Check the box next to each attribute you want to use in the form (e.g., `departmentName`). Then **save** the form.
Custom attributes are automatically discovered from actual SSO logins. At least one SSO user must have signed in to a form in your organization for attributes to appear. Click the **refresh** button to re-scan after new users have logged in.
## Use custom attributes in your form
Once enabled, custom attributes appear as references under the **Login page** in the reference picker — alongside the standard **Email**, **First Name**, and **Last Name** fields.
You can use them anywhere that supports the reference picker:
* **Pre-fill fields** — Auto-fill a text field with the user's department or role. Learn more about [pre-filling fields](/prefill-fields).
* **Conditional logic** — Show or hide questions based on attribute values, e.g. display a section only for users in the "Engineering" department. Learn more about [page logic](/page-logic).
* **Calculations and answer piping** — Reference attributes in [calculations](/calculations) or [answer piping](/answer-piping).
Attribute values are refreshed every time a user logs in via SSO. If a user's department changes in your identity provider, the updated value will appear the next time they sign in.
## Related articles
Add SSO login to your forms.
Configure your SSO provider with Fillout.
Set default values for form fields.