> ## Documentation Index
> Fetch the complete documentation index at: https://fillout.com/help/llms.txt
> Use this file to discover all available pages before exploring further.

# Collect payments with Stripe and Airtable

> Create new records in Airtable every time a customer or client makes a purchase. Use Fillout forms to make a Stripe payment page and connect it to Airtable.

## Video tutorial

<iframe class="notion-asset-object-fit" src="https://www.youtube.com/embed/Izty_dqvn3M" title="iframe video" frameborder="0" allowfullscreen loading="lazy" scrolling="auto" width="100%" height="420" />

## How it works

<Steps>
  <Step title="Create a payment form">
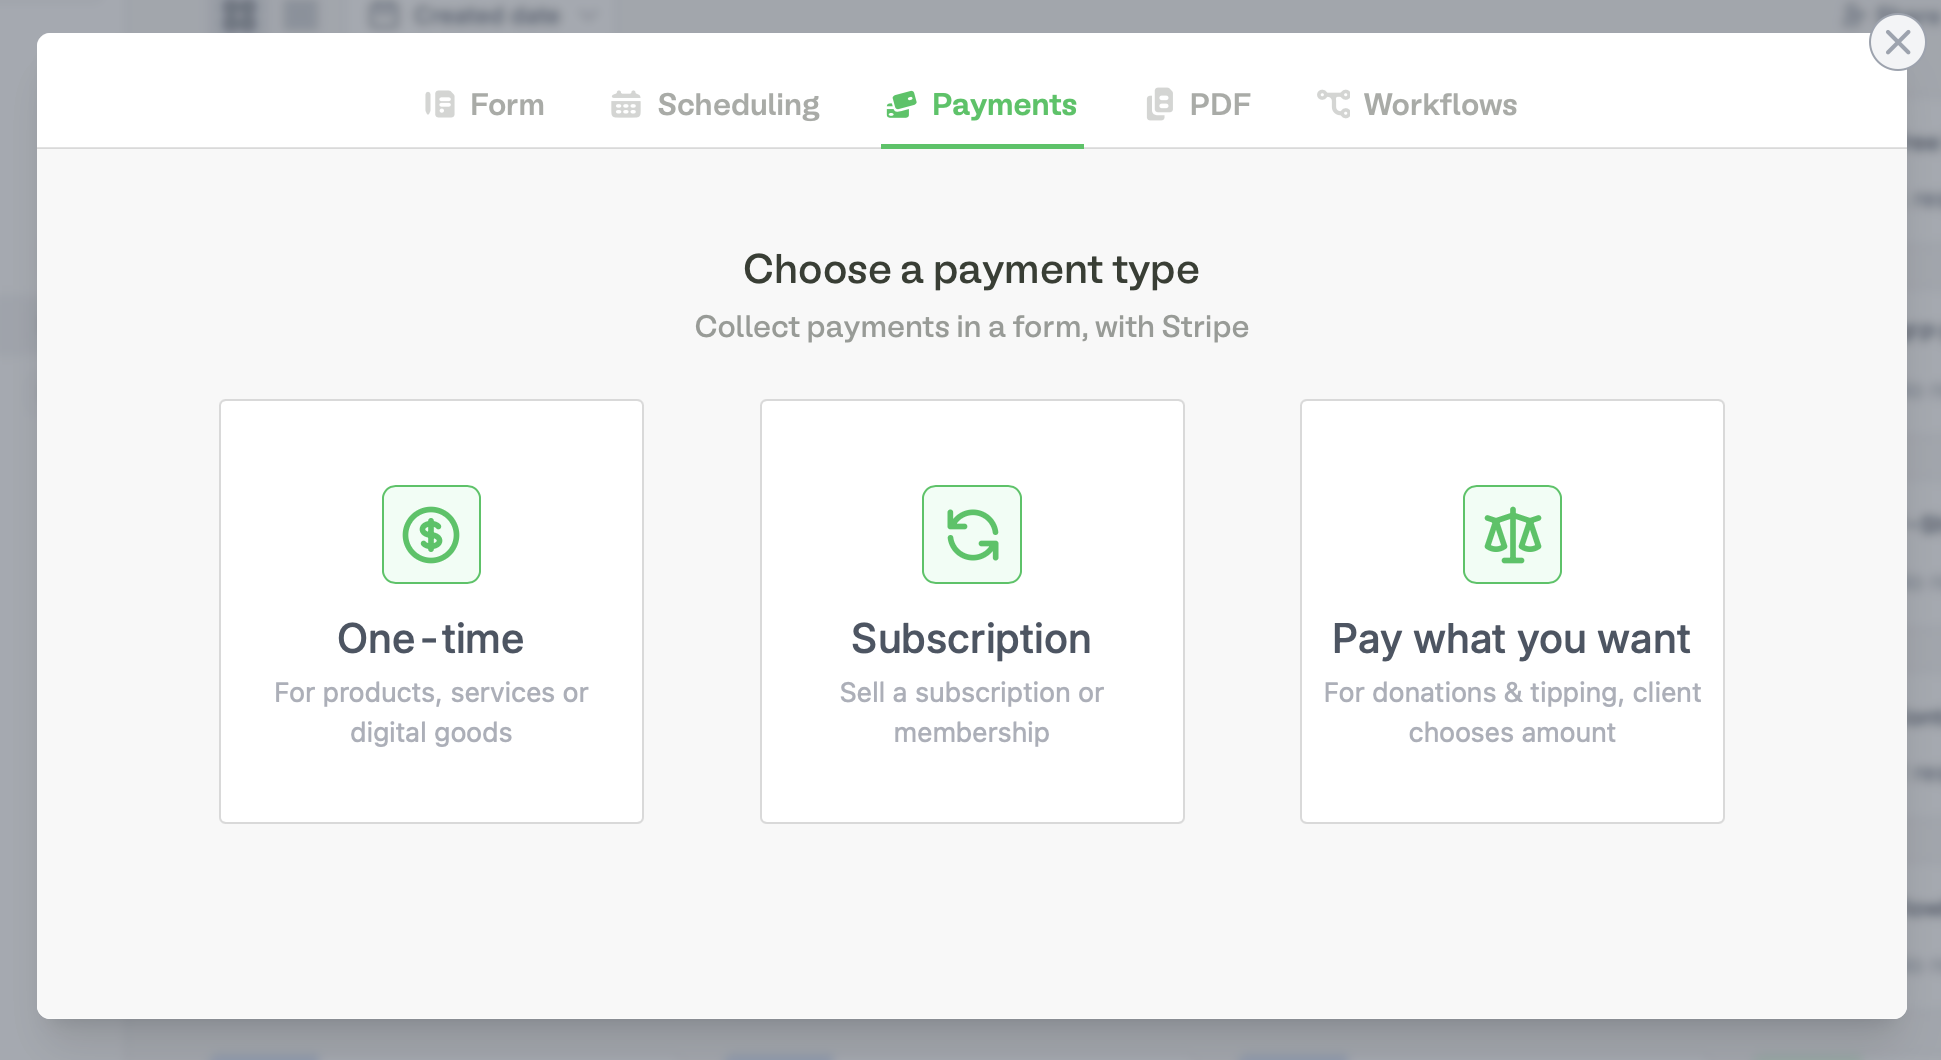
    From the Fillout dashboard, `+ Create` a **form** and choose **Payments**. Next, `Connect to Stripe`.

    <img src="https://mintcdn.com/fillout-005a867b/S51fcTwdhWah2VpJ/images/Screenshot2025-05-16at3.23.32PM.png?fit=max&auto=format&n=S51fcTwdhWah2VpJ&q=85&s=9723783af8a9d440195291f5525fcfa3" alt="Screenshot of the Fillout page" width="1941" height="1060" data-path="images/Screenshot2025-05-16at3.23.32PM.png" />

    Alternatively, you may create a standard form and add a [payment page](https://www.fillout.com/help/payment-page).
  </Step>

  <Step title="Edit the product details">
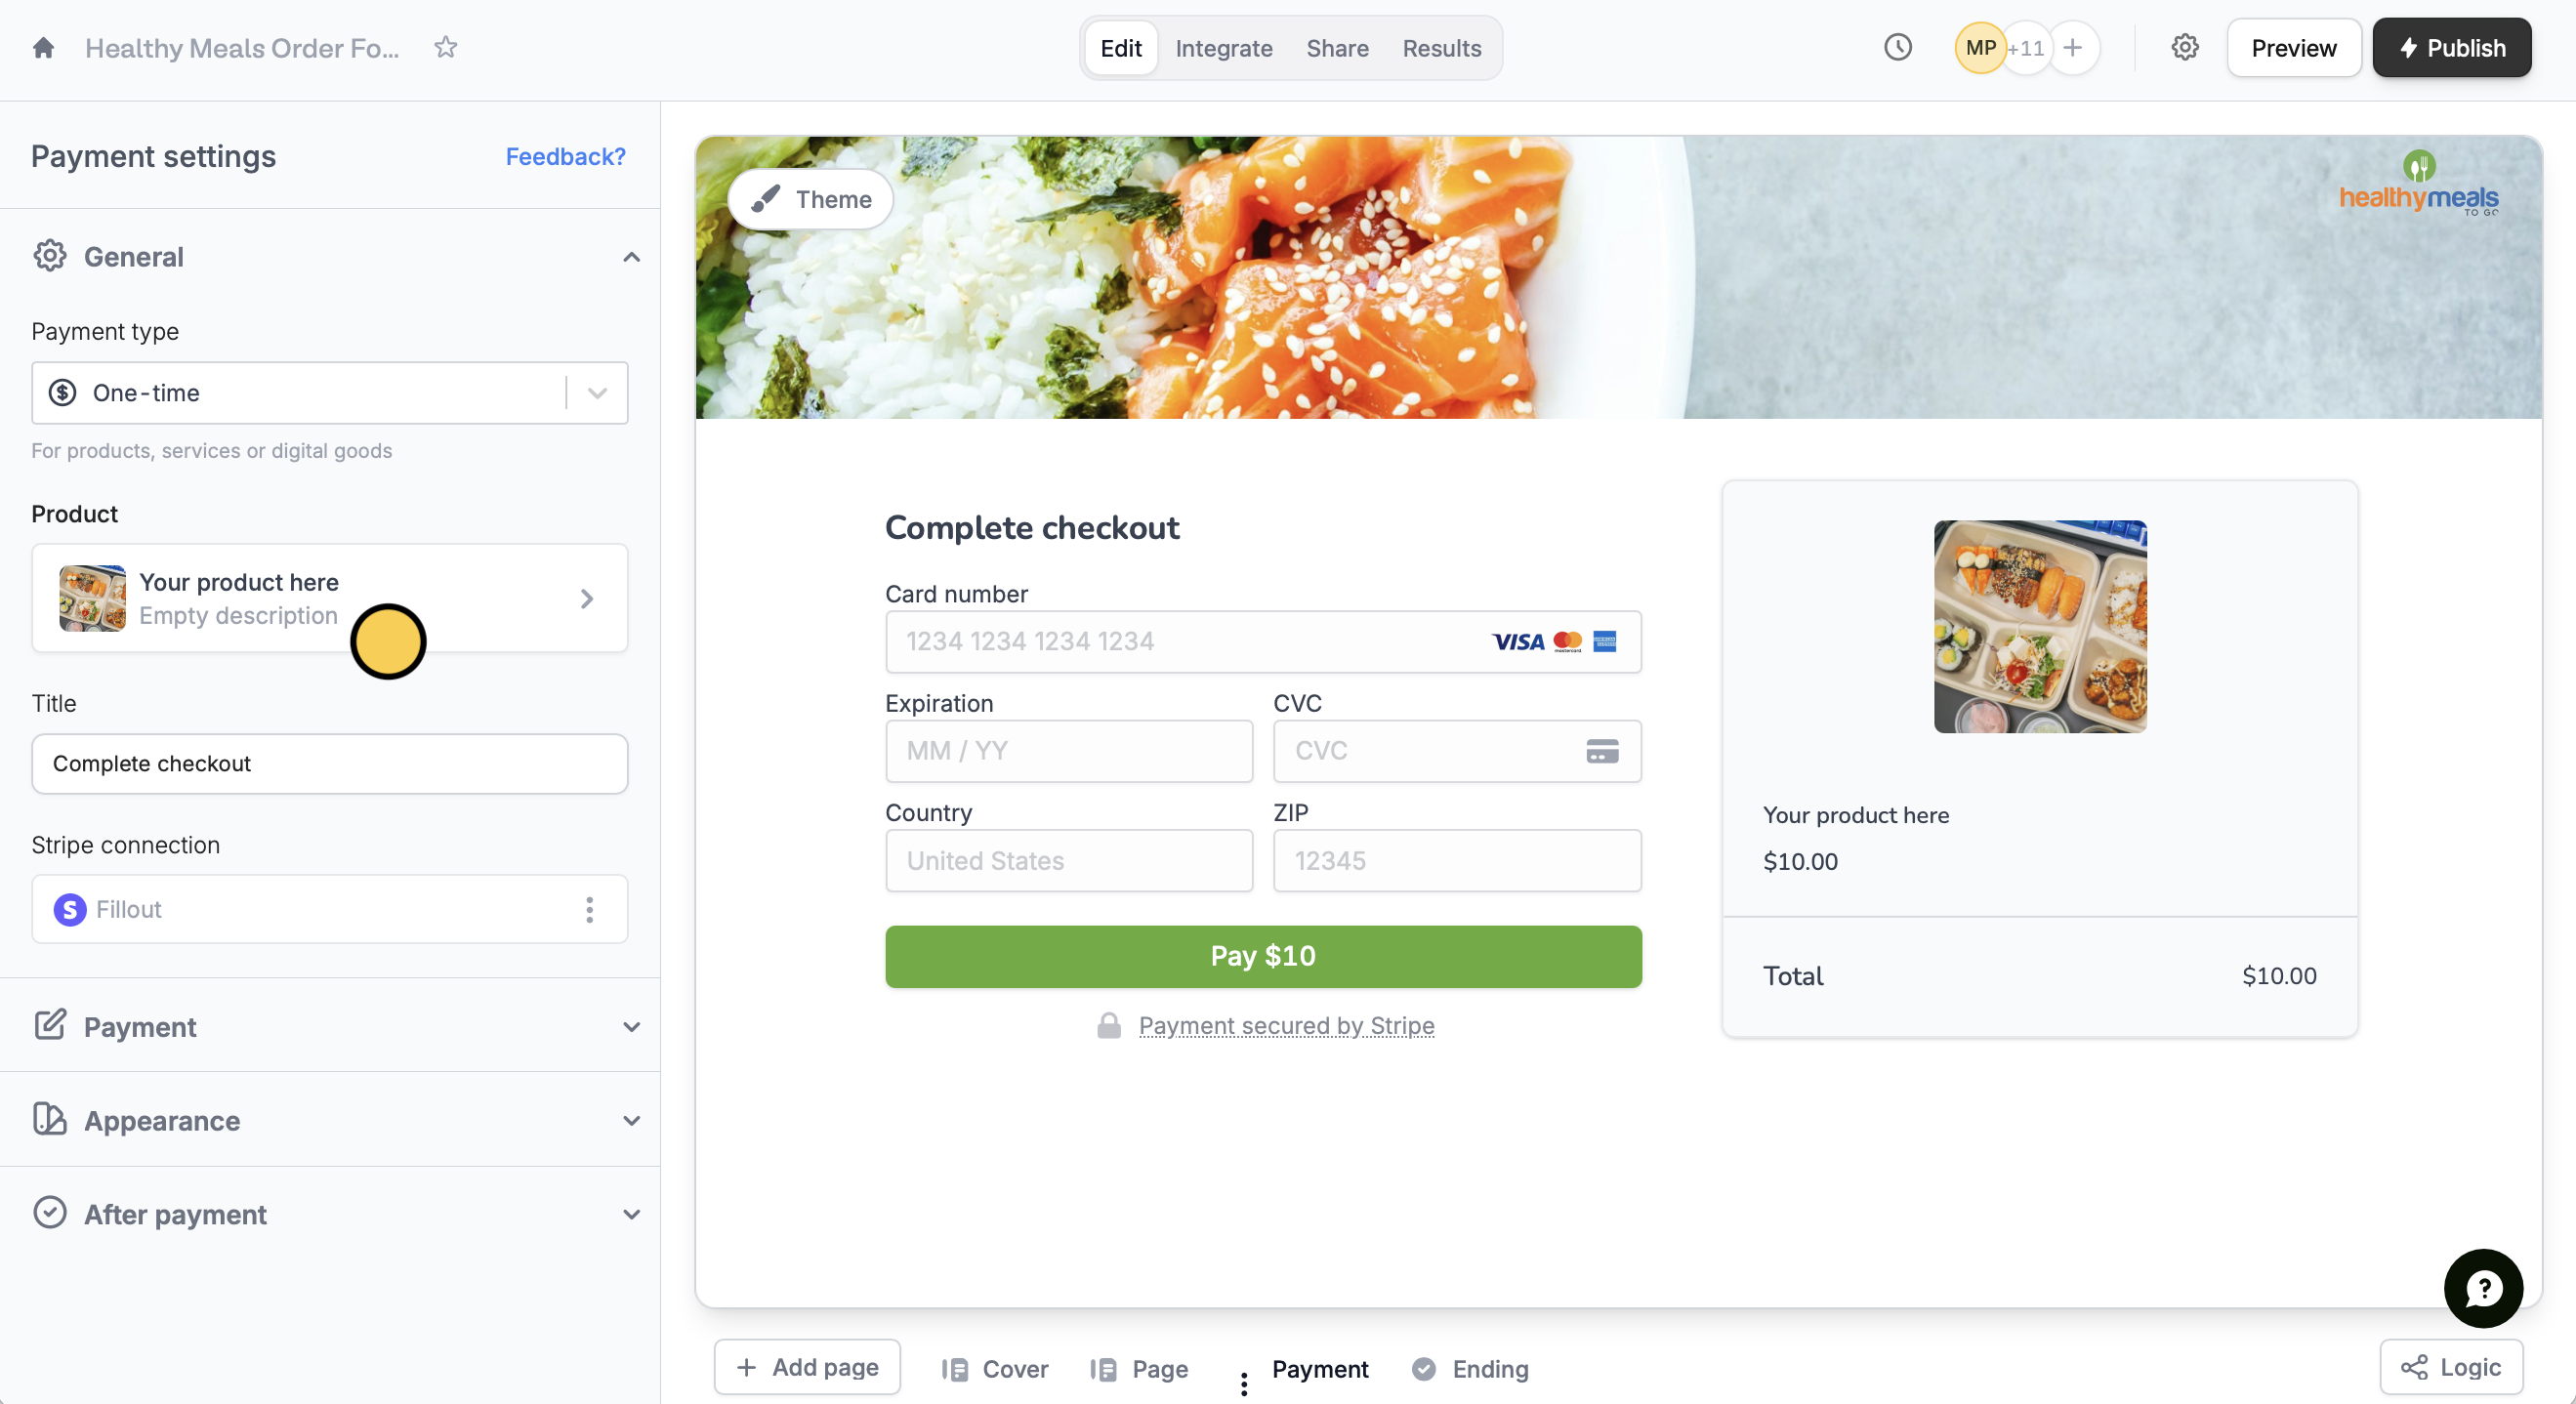
    Click `Product` to change the details as you see fit.

    <img src="https://mintcdn.com/fillout-005a867b/P8BbnII3NLNOfWGb/images/Screenshot2025-11-10at4.34.19PM.png?fit=max&auto=format&n=P8BbnII3NLNOfWGb&q=85&s=91b9308673473fed4a3a2c72f6c7fa8b" alt="Screenshot 2025-11-10 at 4.34.19 PM.png" width="2638" height="1438" data-path="images/Screenshot2025-11-10at4.34.19PM.png" />

    You can also click <Icon icon="square-plus" iconType="solid" /> to reference a selection field in your form where you asked customers to pick a product.

    <img src="https://mintcdn.com/fillout-005a867b/P8BbnII3NLNOfWGb/images/Screenshot2025-11-10at4.35.23PM.png?fit=max&auto=format&n=P8BbnII3NLNOfWGb&q=85&s=bca96e910c372a7aeb9a103ab384fd69" alt="Screenshot 2025-11-10 at 4.35.23 PM.png" title="Screenshot 2025-11-10 at 4.35.23 PM.png" style={{ width:"57%" }} width="1115" height="859" data-path="images/Screenshot2025-11-10at4.35.23PM.png" />
  </Step>

  <Step title="Configure payment settings (Optional)">
    In the left-hand panel, you can switch payment type, add discount codes, add payment methods, and more. Check [this article](https://www.fillout.com/help/payment-page#customize-payment-settings) to learn more.

    <Tip>
      You can test your live form without getting charged. Create a 100% off coupon in Stripe, then enable the "[Discount Codes](https://www.fillout.com/help/payment-page#add-discount-codes)" option to apply it during checkout. Once testing is done, just toggle the discount codes back off.
    </Tip>
  </Step>

  <Step title="Connect the form to an Airtable">
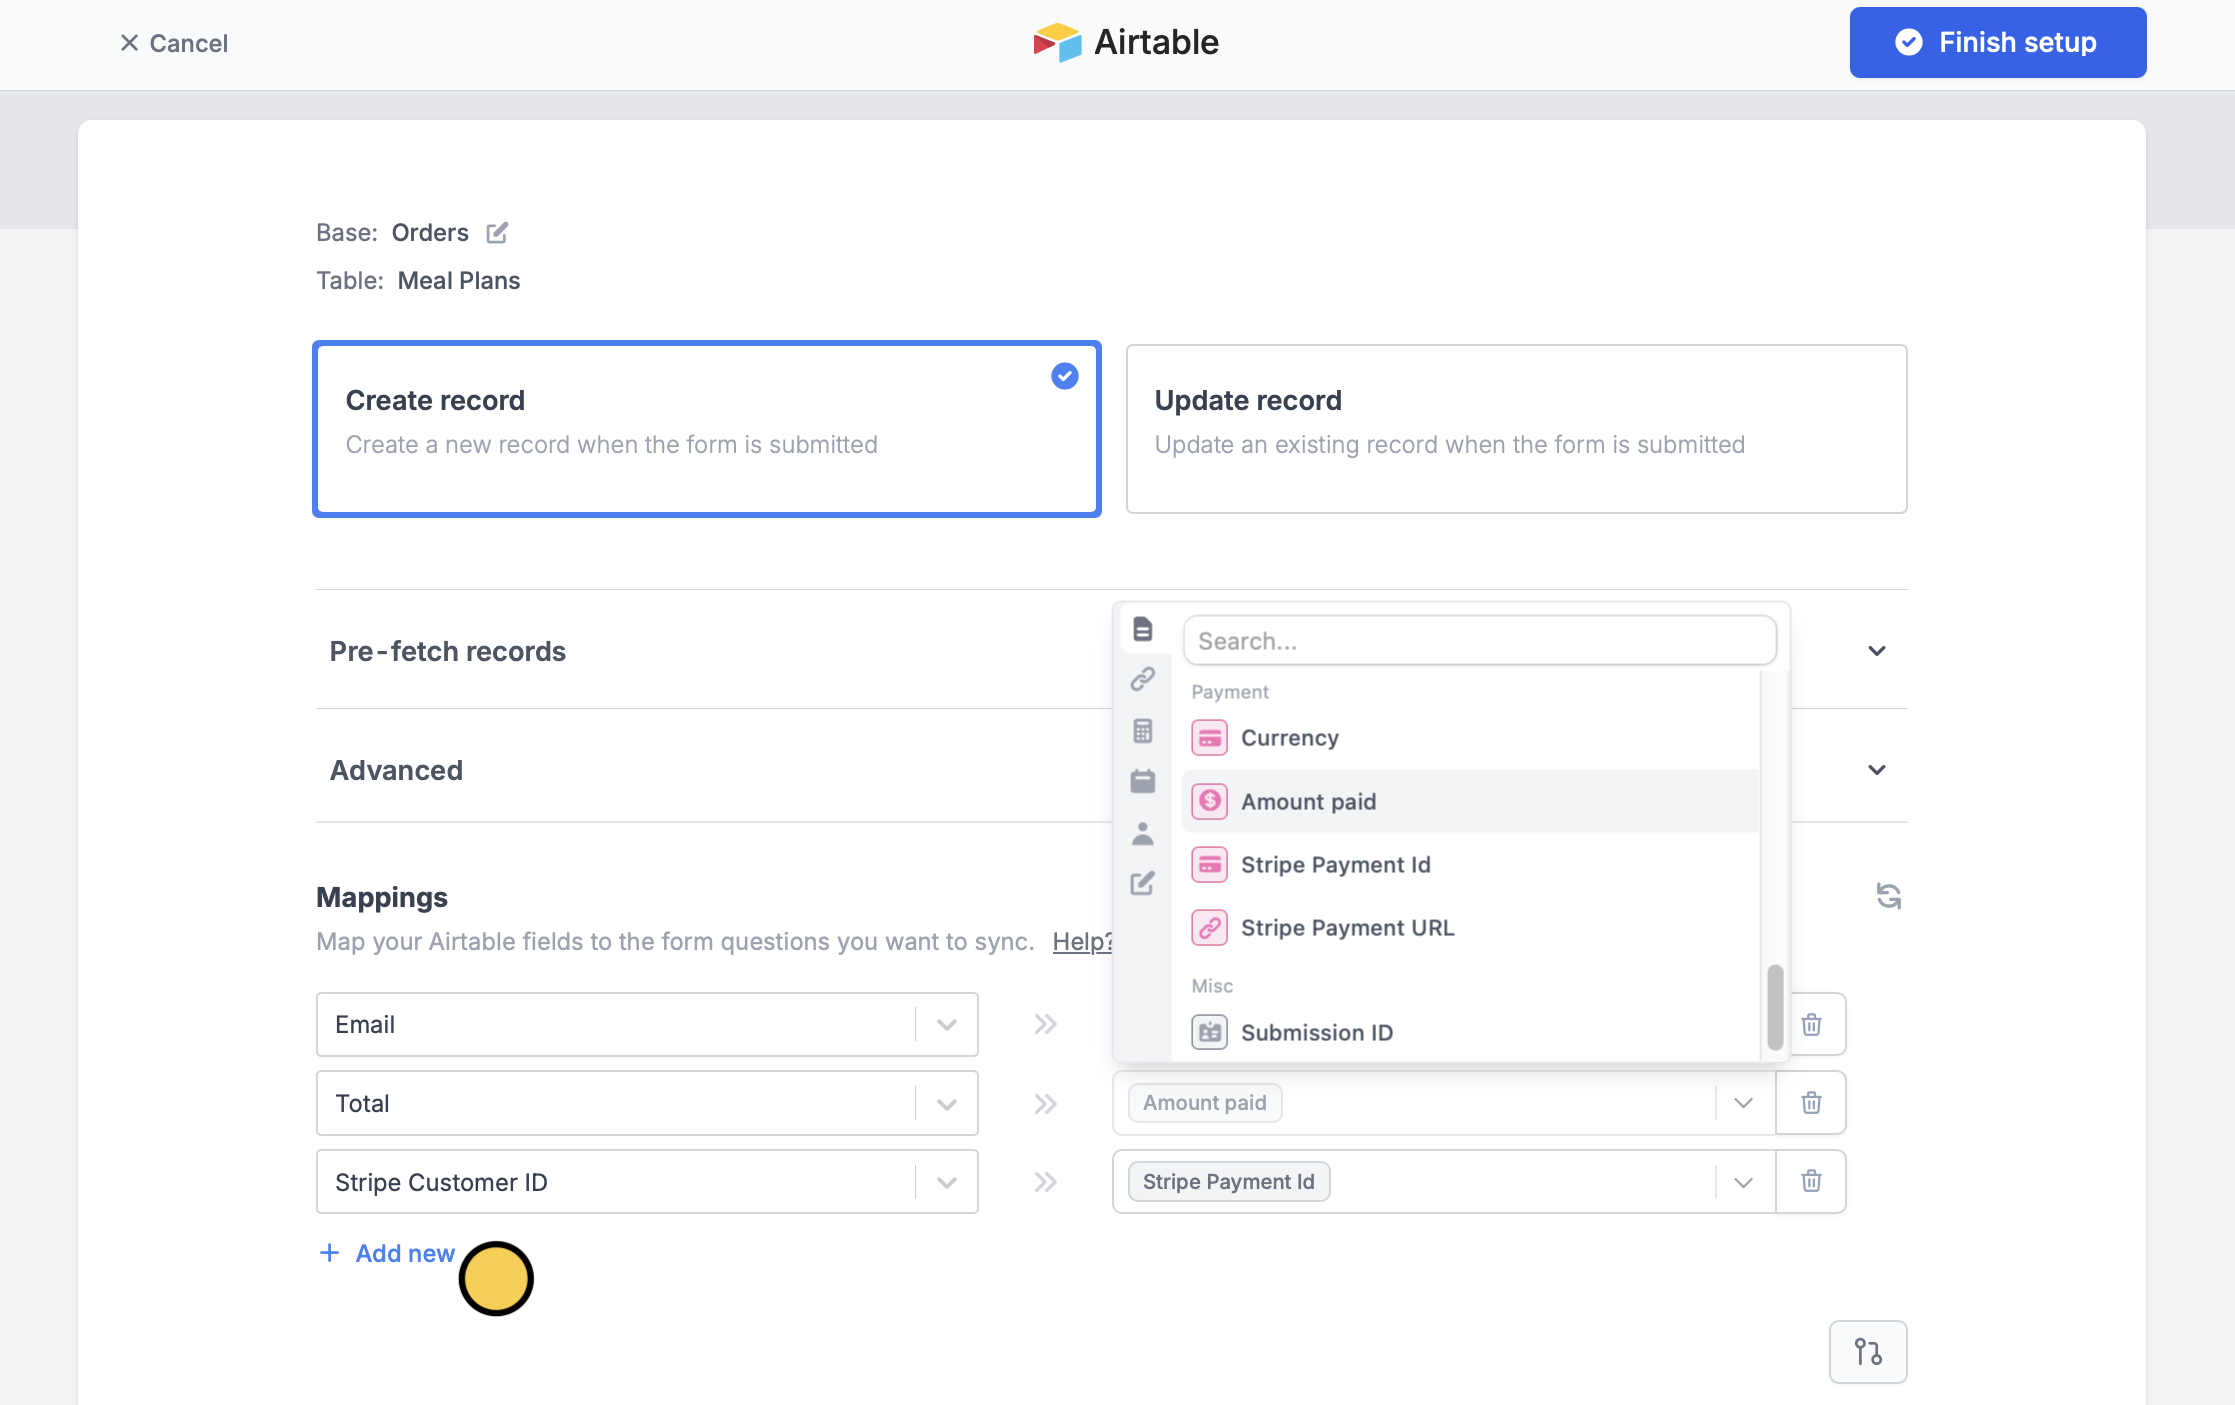
    Click `Integrate` on the top menu to connect to your Airtable account. Then, choose a [base and table](/airtable).
  </Step>

  <Step title="Map Airtable columns to form payment fields">
    Go to your Airtable base, and create one column per payment field.

    Then, `+ Add new` Airtable field on the left and select the corresponding Fillout field on the right.

    <img src="https://mintcdn.com/fillout-005a867b/P8BbnII3NLNOfWGb/images/Screenshot2025-11-10at4.45.46PM.png?fit=max&auto=format&n=P8BbnII3NLNOfWGb&q=85&s=3a4ad99c3083daa615b8e408f75359e5" alt="Screenshot 2025-11-10 at 4.45.46 PM.png" width="2235" height="1405" data-path="images/Screenshot2025-11-10at4.45.46PM.png" />
  </Step>

  <Step title="Publish">
    That’s it! Click `Publish` and share the link or embed it on your website. You’ll now get a new row filled out every time someone completes a purchase.
  </Step>
</Steps>

## Related articles

<CardGroup cols={3}>
  <Card title="Payment page" icon="credit-card" iconType="regular" color="#FFC738" href="/payment-page">
    Collect payments via card, US bank account, and more.
  </Card>

  <Card title="Dynamic payment page" icon="cart-shopping" iconType="regular" color="#FFC738" href="/dynamic-payment">
    Auto-update product and price by order.
  </Card>

  <Card title="Create an Airtable form" icon="table-layout" iconType="regular" color="#FFC738" href="/airtable">
    Use a form to create or update Airtable bases.
  </Card>
</CardGroup>
