> ## Documentation Index
> Fetch the complete documentation index at: https://fillout.com/help/llms.txt
> Use this file to discover all available pages before exploring further.
# Subforms
> Create nested forms and collect repeated data, like multiple individuals or products. Organize and structure long forms by breaking them down into smaller subforms.
## How to use a subform within your form
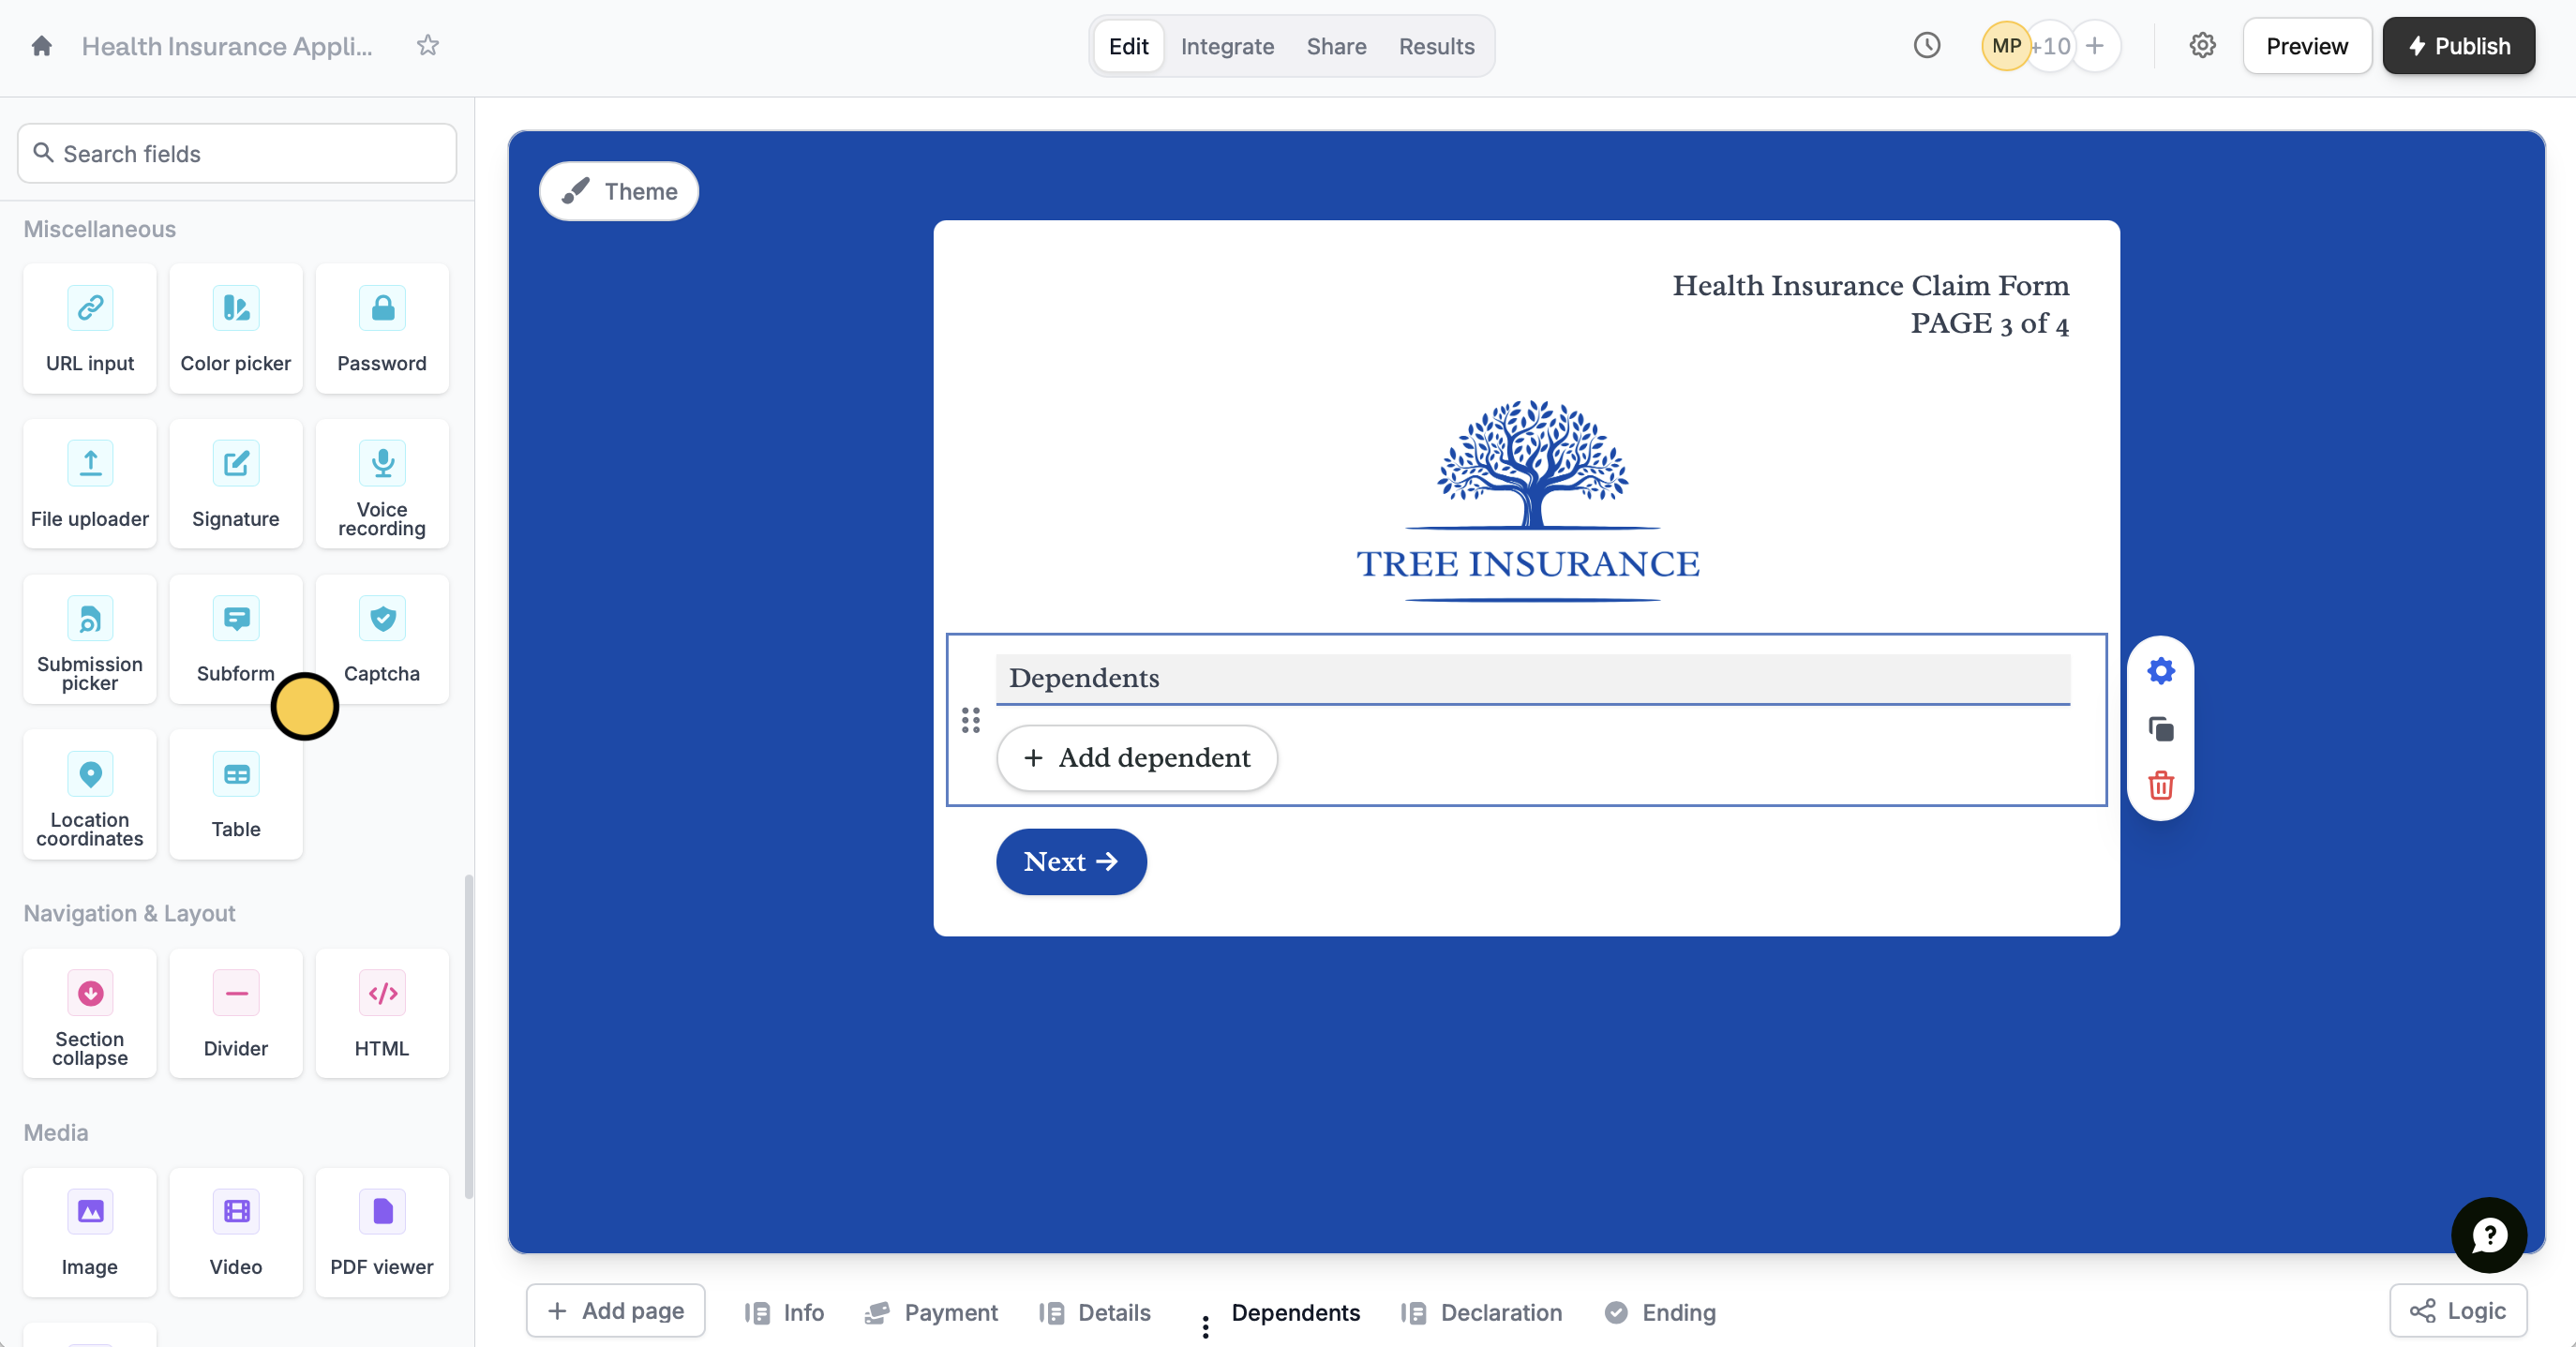
On the left-hand panel of your form, click `Subform`. Then, type the question or information you need from your respondents.
 Click the field's to open the right-hand panel. Choose a **Connected Subform** to link another form, which will open as a popup for respondents. Then, select a submission-picker to label each subform entry.
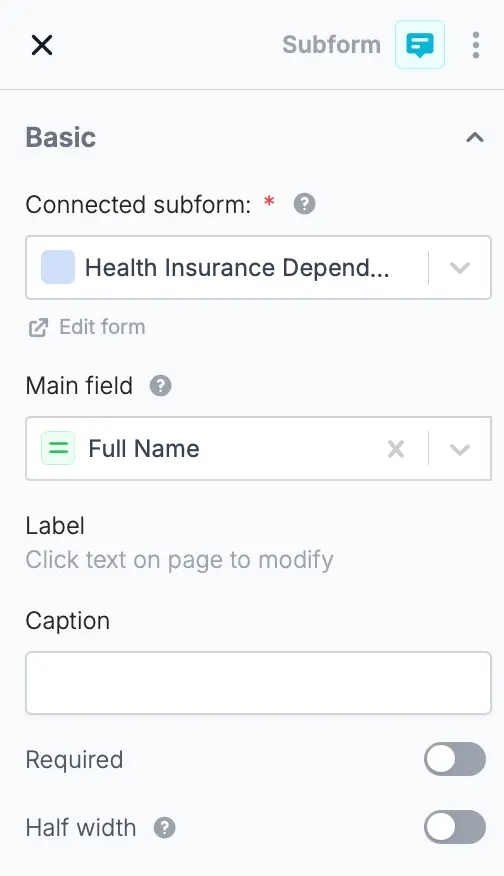 To link a form from the dropdown, make sure the form is published first.
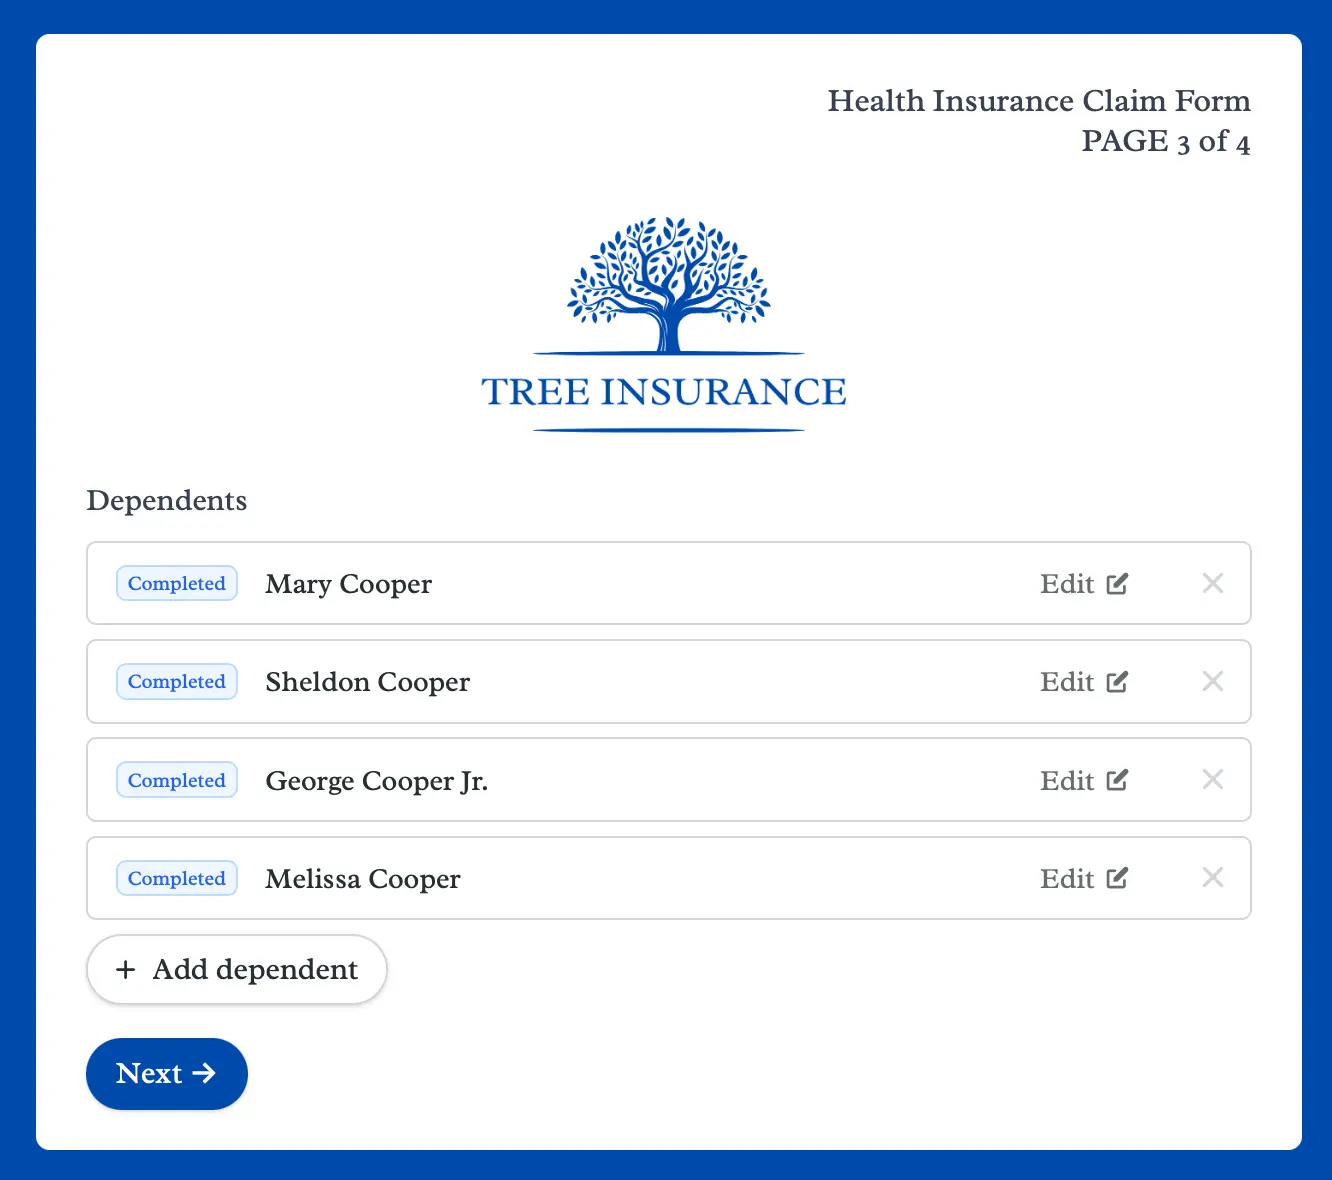
That's it! `Publish` your form and share the link. Subforms allow respondents to edit completed submissions and resume partial ones.
To link a form from the dropdown, make sure the form is published first.
That's it! `Publish` your form and share the link. Subforms allow respondents to edit completed submissions and resume partial ones.
 ## Add subform limits
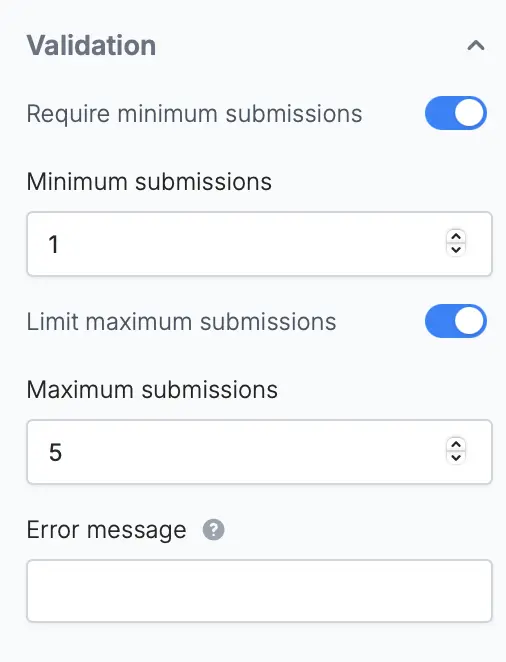
On the right-hand panel, you can:
* Require minimum submissions
* Limit maximum submissions
* Add an error message
## Add subform limits
On the right-hand panel, you can:
* Require minimum submissions
* Limit maximum submissions
* Add an error message
 ## Select from previous submissions
You can also allow respondents to pre-fill form fields with existing form records by adding a `Submission picker` field. View the quick guide [here](/submission-picker).
## Related articles
Let respondents pre-fill forms with answers from existing forms.
Let respondents enter multiple sets of data for one question.
## Select from previous submissions
You can also allow respondents to pre-fill form fields with existing form records by adding a `Submission picker` field. View the quick guide [here](/submission-picker).
## Related articles
Let respondents pre-fill forms with answers from existing forms.
Let respondents enter multiple sets of data for one question.