> ## Documentation Index
> Fetch the complete documentation index at: https://fillout.com/help/llms.txt
> Use this file to discover all available pages before exploring further.
# Send form submissions to a webhook
> Send responses to automation tools (like Make or Zapier), or any other Webhook endpoint you may have.
## What is a webhook?
A **webhook** is a way for one system (like Fillout) to send real-time data to another system (like the 3rd party tools you use) as soon as an event occurs. Under the hood, a webhook is an **HTTP callback** and can be any of these requests:
* **GET** - fetch something
* **POST** - create something new
* **PUT** - update something that already exists
* **DELETE** - remove something
## Connect your form to a webhook
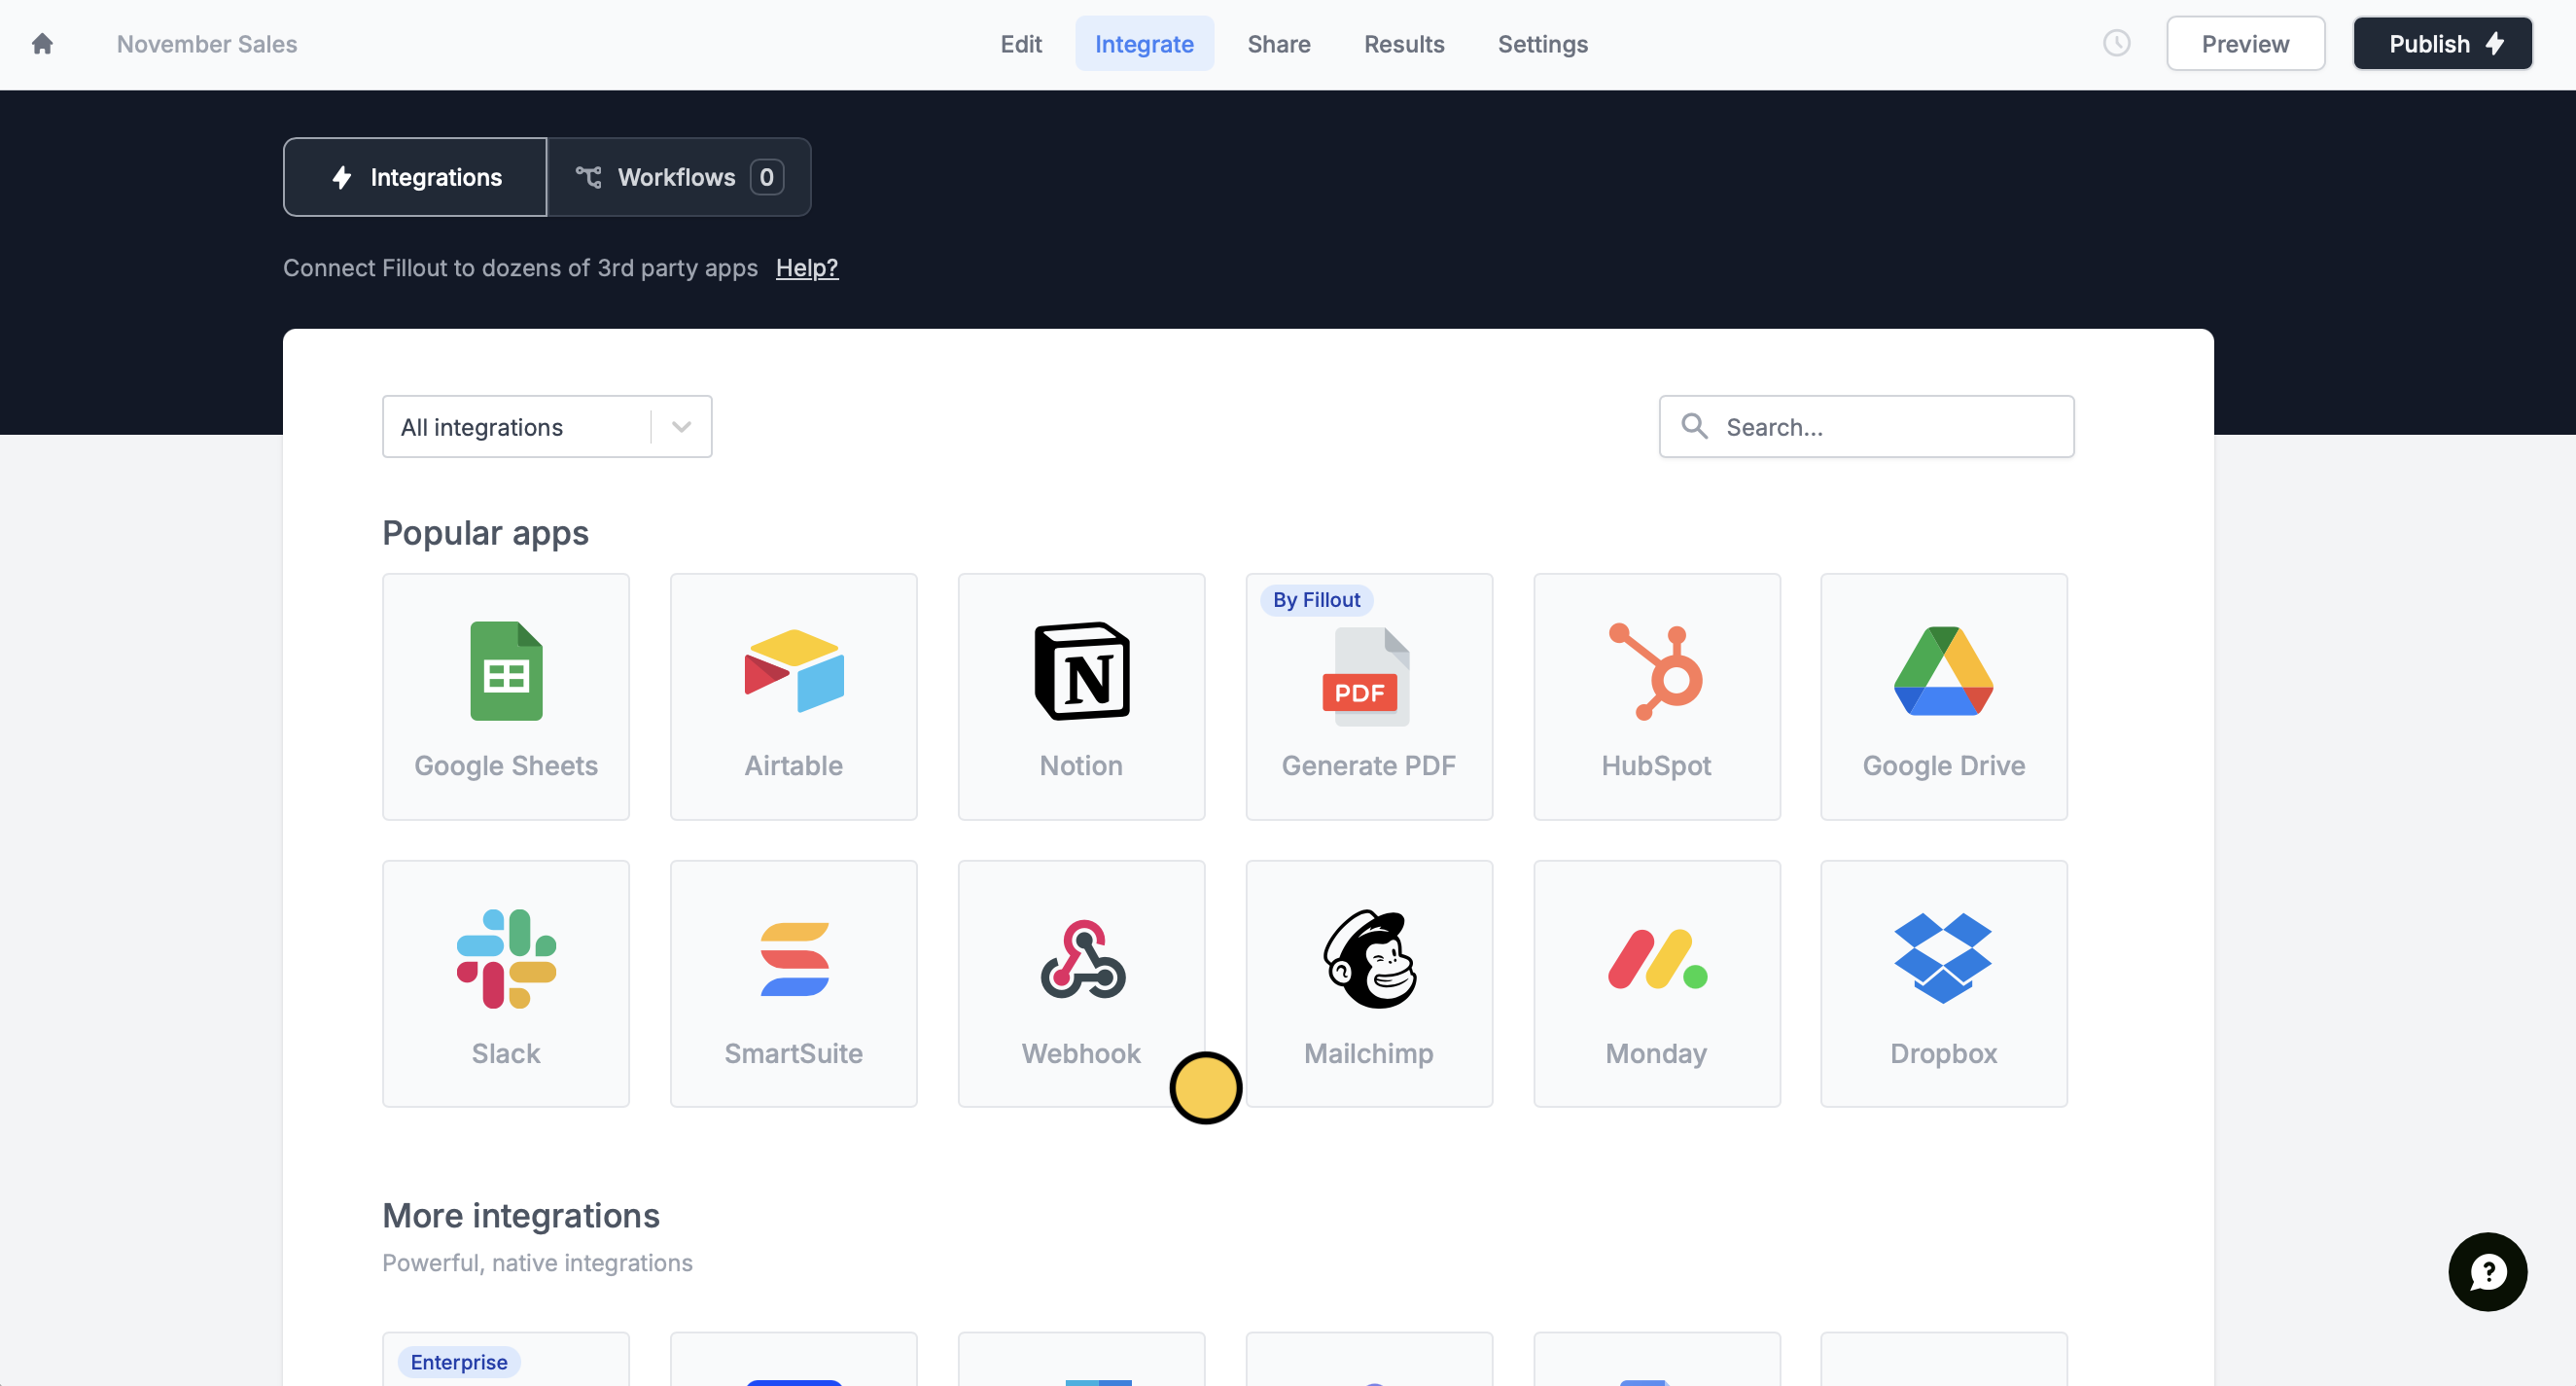
Click `Integrate` on top followed by `Webhook`.
 Enter your **Webhook URL**, and `Test` it. When you're good with it, click `Finish setup`.
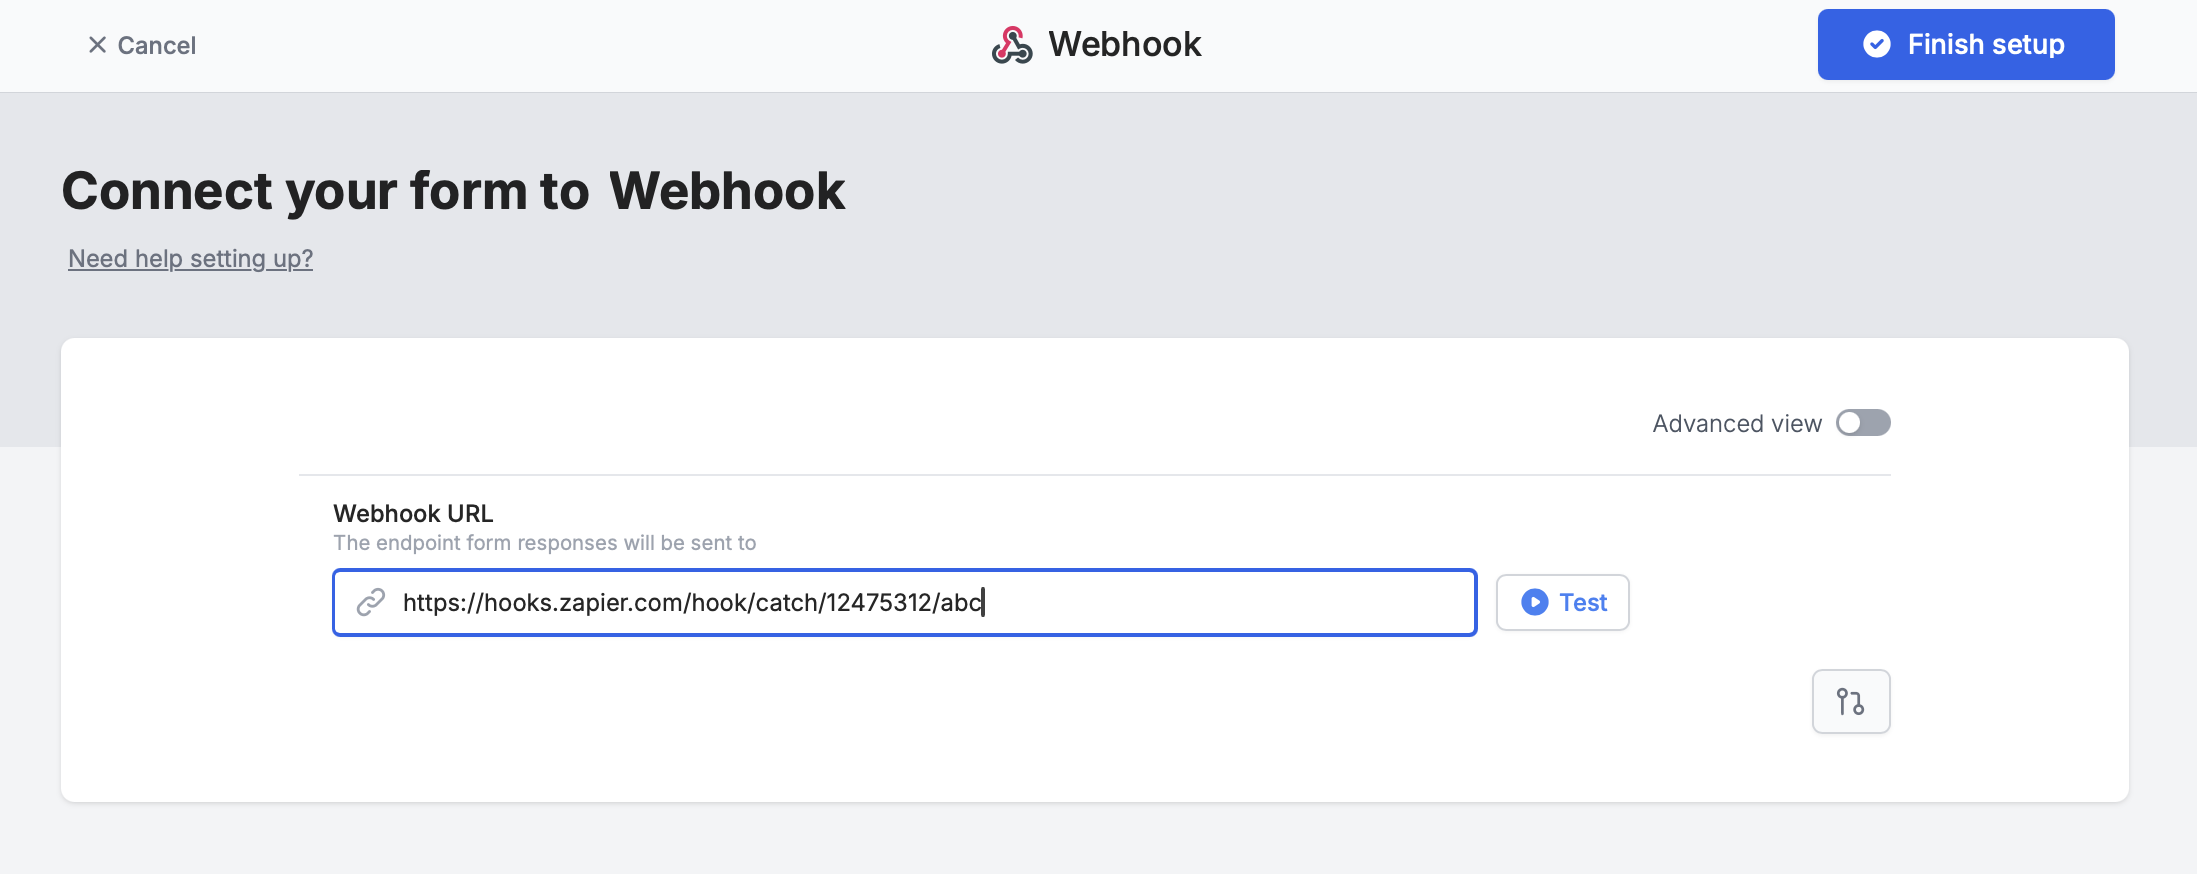 That's it! You have all you need to configure a webhook when the form submits. `Publish` it and share the link.
## Available webhook options
Toggle the `Advanced view` switch to set up your webhook with any of the parameters or arguments you need.
That's it! You have all you need to configure a webhook when the form submits. `Publish` it and share the link.
## Available webhook options
Toggle the `Advanced view` switch to set up your webhook with any of the parameters or arguments you need.
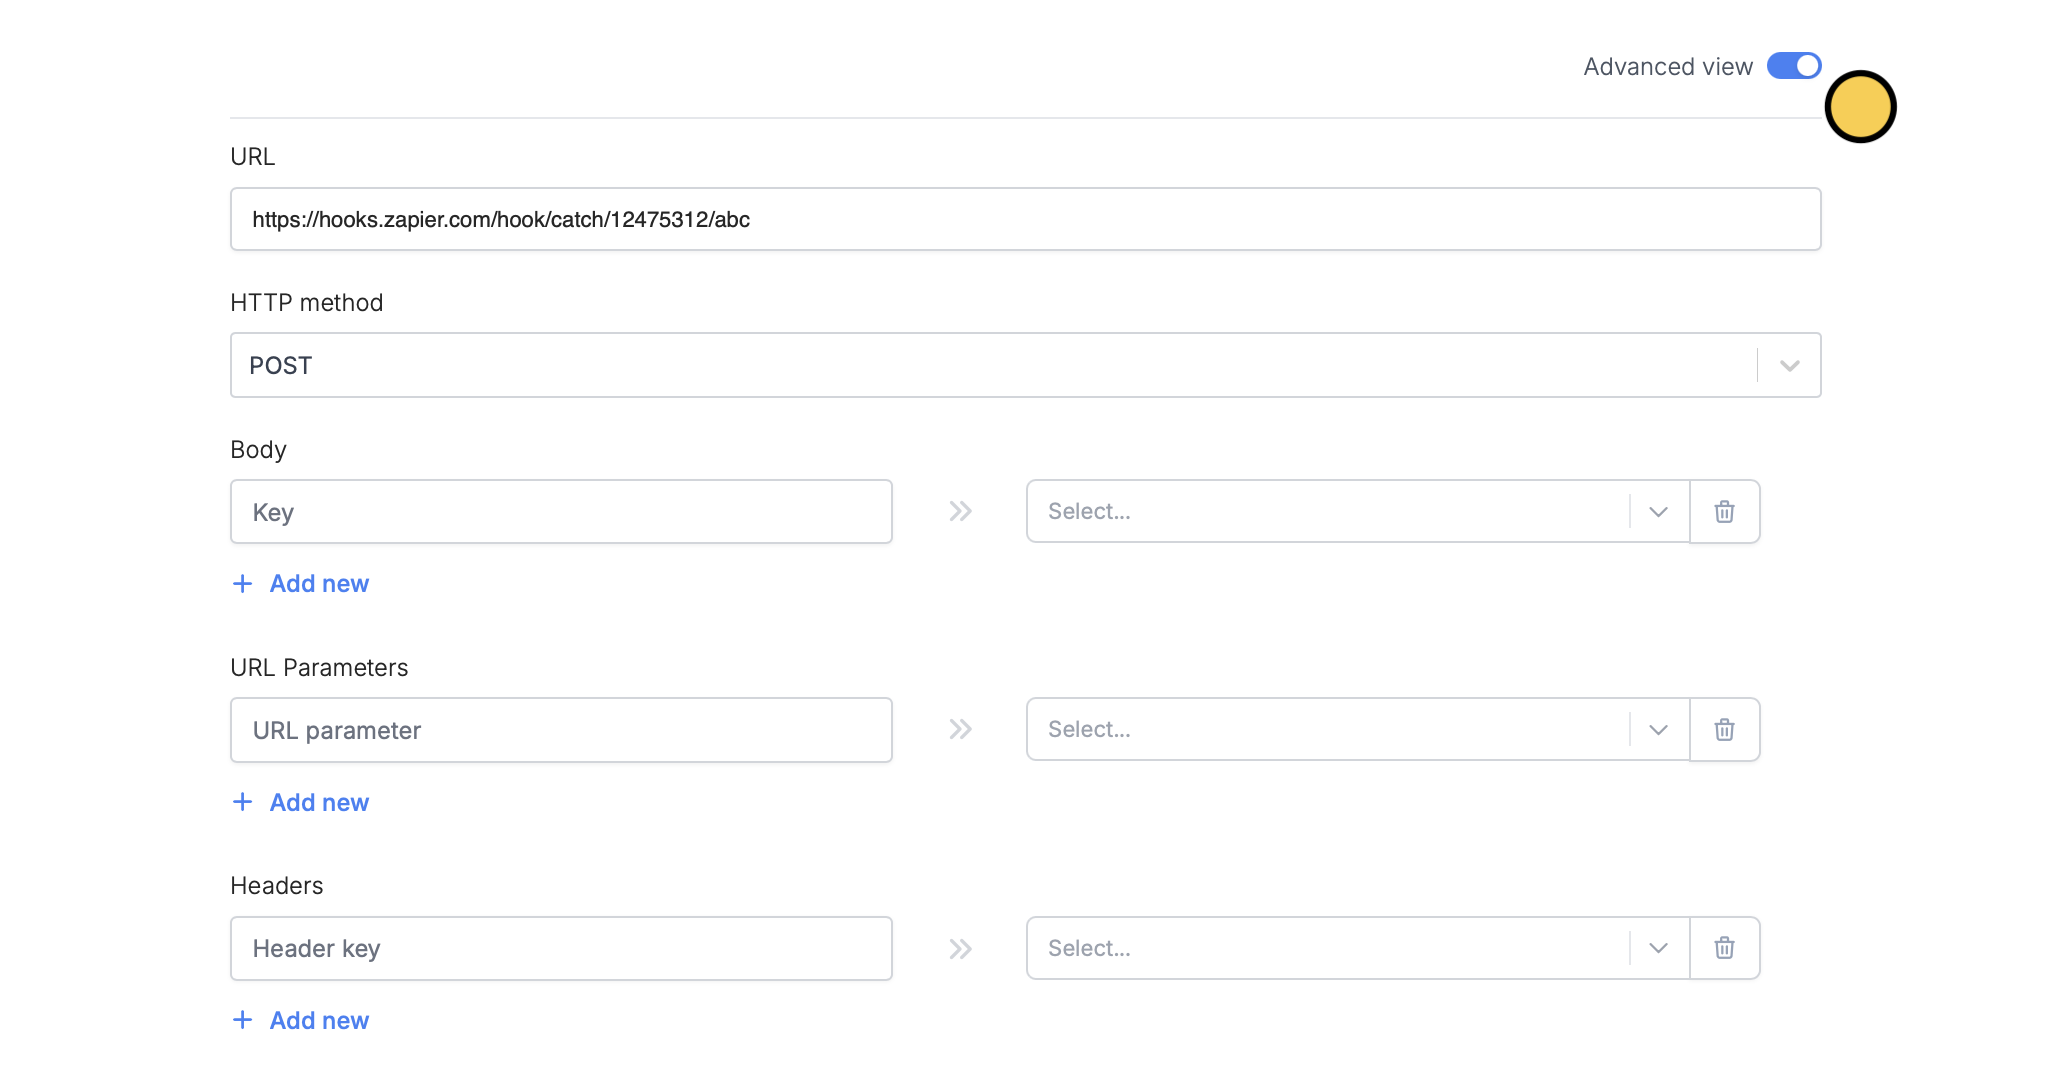 For these examples, let's assume your URL is something like: [https://hooks.zapier.com/hooks/catch/12475312/abc/](https://hooks.zapier.com/hooks/catch/12475312/abc/)
Each of the sections in the Webhook integration do the following:
**Body**
* This is used if you're sending a **POST** request. Most of the time, services like Zapier and Make will accept either **GET** or **POST**, and you can send information in the body of the message if you prefer instead.
* If using fields in the body of the message, make sure to process these correctly in Zapier/Make to make sure that they're coming in the body and not the URL.
**URL parameters**
* These get added to the URL at the end.
* The left-hand side is the **key**, and the right-hand side is the **value** from your form or from anything else you can reference in Fillout.
* For example, if you add, on the left hand side, **source**, and then on the right hand side, **reference** the field or question about this in your form, then your webhook will send:
* [https://hooks.zapier.com/hooks/catch/12475312/abc/?source=answer](https://hooks.zapier.com/hooks/catch/12475312/abc/?source=%3Canswer) to the short answer
* So if someone answered Facebook in the form, you will send: [https://hooks.zapier.com/hooks/catch/12475312/abc/?source=facebook](https://hooks.zapier.com/hooks/catch/12475312/abc/?source=facebook)
**Headers (optional)**
* Most users will not need to use this section. This is typically if you have an advanced webhook setup which requires sending extra headers
* The most typical use case for headers is if you have some verification required for your endpoint, and you have a special key you want to send, which will look something like:
Authorization --> Bearer \
**Cookies (optional)**
* Similar to headers, most users will not need to send any here.
## Related articles
Connect your Fillout form to hundreds of apps.
Load options from a REST API.
For these examples, let's assume your URL is something like: [https://hooks.zapier.com/hooks/catch/12475312/abc/](https://hooks.zapier.com/hooks/catch/12475312/abc/)
Each of the sections in the Webhook integration do the following:
**Body**
* This is used if you're sending a **POST** request. Most of the time, services like Zapier and Make will accept either **GET** or **POST**, and you can send information in the body of the message if you prefer instead.
* If using fields in the body of the message, make sure to process these correctly in Zapier/Make to make sure that they're coming in the body and not the URL.
**URL parameters**
* These get added to the URL at the end.
* The left-hand side is the **key**, and the right-hand side is the **value** from your form or from anything else you can reference in Fillout.
* For example, if you add, on the left hand side, **source**, and then on the right hand side, **reference** the field or question about this in your form, then your webhook will send:
* [https://hooks.zapier.com/hooks/catch/12475312/abc/?source=answer](https://hooks.zapier.com/hooks/catch/12475312/abc/?source=%3Canswer) to the short answer
* So if someone answered Facebook in the form, you will send: [https://hooks.zapier.com/hooks/catch/12475312/abc/?source=facebook](https://hooks.zapier.com/hooks/catch/12475312/abc/?source=facebook)
**Headers (optional)**
* Most users will not need to use this section. This is typically if you have an advanced webhook setup which requires sending extra headers
* The most typical use case for headers is if you have some verification required for your endpoint, and you have a special key you want to send, which will look something like:
Authorization --> Bearer \
**Cookies (optional)**
* Similar to headers, most users will not need to send any here.
## Related articles
Connect your Fillout form to hundreds of apps.
Load options from a REST API.