Table of Contents
Last Edited Time
Sep 19, 2023 04:21 PM
Do not index
Hide CTA
Hide cover
Hide cover
Closing a B2B sale often requires between five and fifteen touchpoints. First, a lead signs up for a product demo. Then, after talking to their team, there might be a call to chat about roadblocks or objections. Next comes the quote presentation, followed by some back-and-forth negotiation, and eventually, the call that closes the deal. It’s a lot to keep track of, before even considering onboarding hand-offs, account management sync-ups, support requests…
Creating a booking page for every step in the process is a start. Appointment scheduling apps like Calendly can connect leads and customers to relevant sales and support calendars, generating a list of available time slots and converting time zones automatically. But it’s how you direct people to booking pages and what you do with the outputs that have the biggest impact on conversion and retention.
Adding Calendly pages to a powerful form app opens up a ton of opportunities to qualify, personalize, track, and automate customer relationship management. Here are a few examples.
Route people to the right booking type with page logic
You don’t want to waste time on leads that are a bad fit for your company. Companies that are only a few months old, decision makers who are only interested in finding the cheapest service, these are red flags you can weed out with your client intake form when you pair Calendly with a form app like Fillout.
Instead of linking directly to a booking page from your website or email signature, send new leads to a form with a handful of qualifying questions on the first page. You might ask for some basic contact information along with details about job title, industry, and company size or history. If the answers match your ideal customer, use your form’s logic options to send them to your Calendly page. When they don’t align with what you’re looking for, skip the appointment picker and go straight to a “Thanks, we’ll follow up!” page.
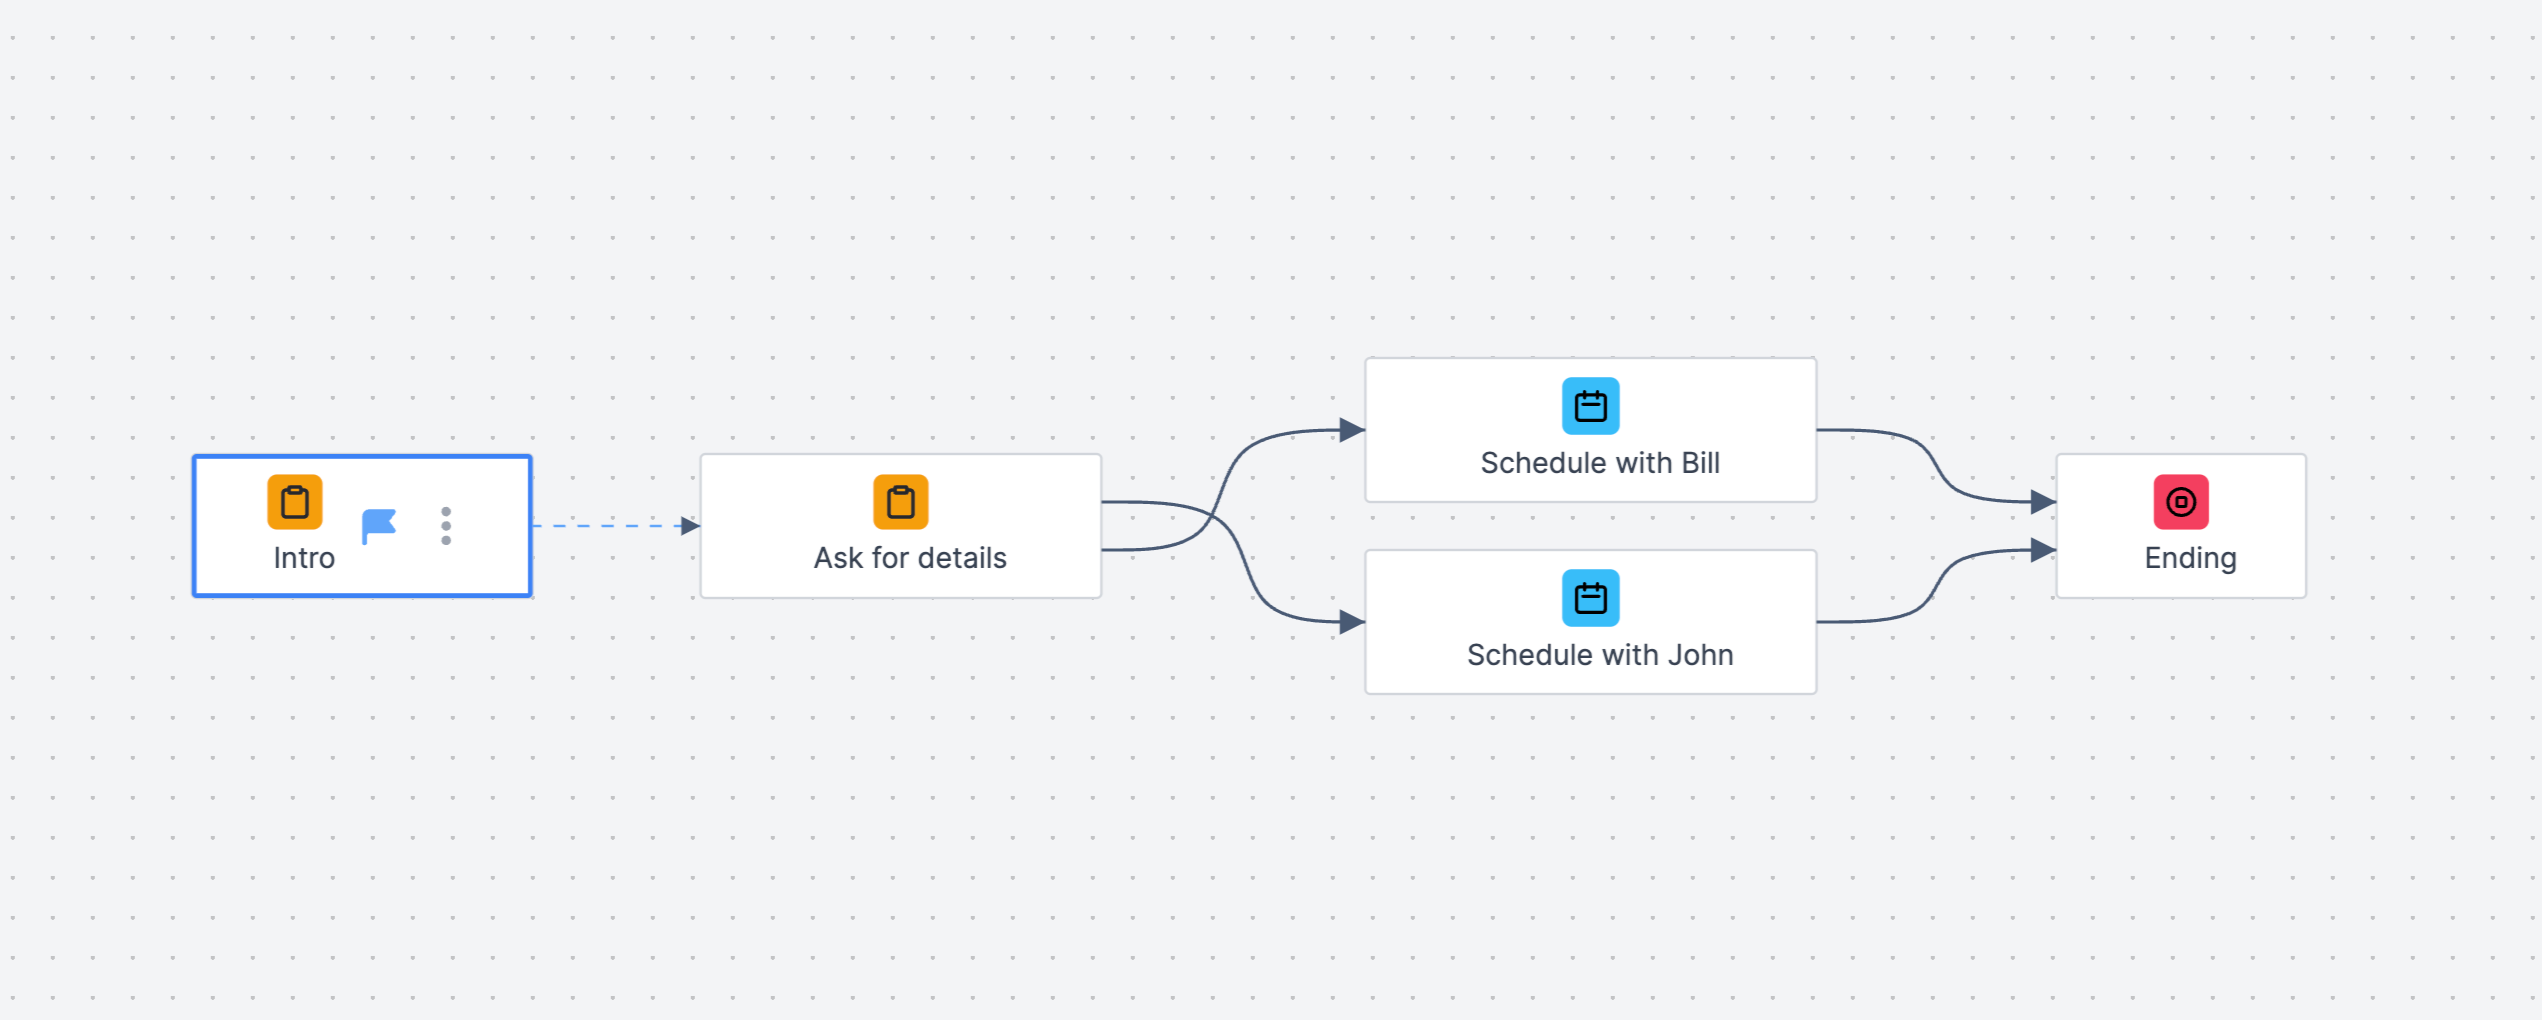
Or, maybe, you want leads to see different Calendly views based on their answers. Prospects coming from the financial services sector can book an appointment with one salesperson, while those coming from the retail industry see someone else’s Calendly page. All you’d have to do is set up some basic page logic that says, “When the answer to the industry question equals Financial Services, go to Jane’s Calendly; when it’s Retail, go to John’s page.”
Connect Airtable to your Calendly form, and you can do even more. For instance, you could add a record picker field that shows leads a list of choices from your database. Maybe you want to ask them which webinar they attended and automatically route them to the Calendly page of the person who hosted it. Whenever you add webinar details to Airtable, they’ll immediately show up as choices in your form’s record picker.
Once you’ve finished setting up your appointment booking form with dynamic data and conditional logic, it’s time to send booking details to a new or existing database.
Sync Calendly appointments to a database for better reporting and analysis
Even the best salespeople, account managers, and support reps can overlook recurring trends. With a bird’s-eye view of Calendly data, you can help them notice that companies with more than 100 employees require twice as many sales calls than those with fewer than 50 or that account managers see a surge in call requests from healthcare clients in January.

To set up a call history dashboard, you just need a form that can sync responses and booking details as a single record. In Fillout, you’d add questions for each variable you want to analyze (fixed-input questions like multiple choice, dropdowns, and scales are best for revealing trends), embed Calendly in a Scheduling page, and then open the Integrations tab to map each form field to a column in your database.
In Airtable, the Interfaces view would let you chart the number of bookings for each industry, broken down by month. Or, if your Calendly form syncs responses to a Notion database, you could calculate the number of calls based on company size.
Another thing to consider is linking your Call History table to a Leads/Customers table so all of an individual’s or a company’s appointments can be stored in a broader, more detailed relationship record. That would get you 90% of the way to a custom Airtable or Notion CRM.

One final thing worth mentioning on the syncing front is that while you can only add Fillout responses to one database at a time, you can sync a single form response to multiple apps. For example, it would be possible to send the same Calendly booking details to a contact database and to a MailChimp newsletter.
Automate personalized follow-ups based on booking data
Sending appointment reminders and follow-ups is an excellent way to keep leads and clients engaged in ongoing conversations. Imagine that someone who isn’t in your CRM books a product demo. Sending a basic confirmation email with appointment details is fine, but there’s so much more you could do to personalize the journey by embedding Calendly into a form.
For instance, you might automatically merge responses into a PDF template and attach that to a booking confirmation. If your database can estimate current capacity or turnaround times, that would probably be worth including in an automated email, possibly with conditional statements like “We’re not currently as busy as we normally are…” or “If we can hammer out the details this week, your project might be finished as early as…”
Then, include a link where leads can reschedule the call. To get that, sync the Calendly UUID to your database and add it to the end of this URL: ‘https://calendly.com/app/scheduled_events/user/me?period=upcoming&uuid=’.

Anything that’s in your Calendly form or database is fodder for personalizing follow-ups. Adding an invisible short answer field with a default value would be one way to tag stages in the sales cycle and trigger relevant automations. Any time someone picks a date on the Product Demo page, it would add an Interest Stage tag to your database and your MailChimp contact.
There are so many personalization options for follow-up automations that it can feel overwhelming. Start by writing the message entirely by hand, manually grabbing data from your CRM, Calendly, and past emails. Any info that you wish you had but you don’t add that to your scheduling form. Finally, turn your carefully crafted follow-up into a template, connecting each variable to the appropriate field in your Call History database.
Consolidate all of your Calendly data to simplify user journeys
Suddenly, 15 customer touchpoints don’t seem so overwhelming. You can control which booking pages people see with qualifying questions, see past and future appointment details in a single view, and use all of that data to hone your messaging and engagement efforts.
If you want to get even more advanced, you could add a login page to your form or a Stripe payment page for consultation and membership services tied to Calendly bookings. Sign up for a Starter plan today to get started!

Written by
Ryan Farley is a writer and co-founder of Pith and Pip. He lives in Bangkok, Thailand where he previously managed the editorial team of a web marketing agency.