What are workflows?
Workflows are the backend logic that powers your Zite apps. They let you:- Connect to databases: Read and write data from Zite Database, Airtable, Google Sheets, and more
- Send messages: Trigger Slack notifications or send emails (coming soon)
- Run AI operations: Generate text, images, or structured data with OpenAI
- Process data: Transform, filter, and combine data from multiple sources
- Call external APIs: Connect to third-party services
Workflows are sometimes called endpoints or API routes.
Create workflows
Connect integrations
If the workflow needs access to a service (like Slack or Airtable), Zite will prompt you to 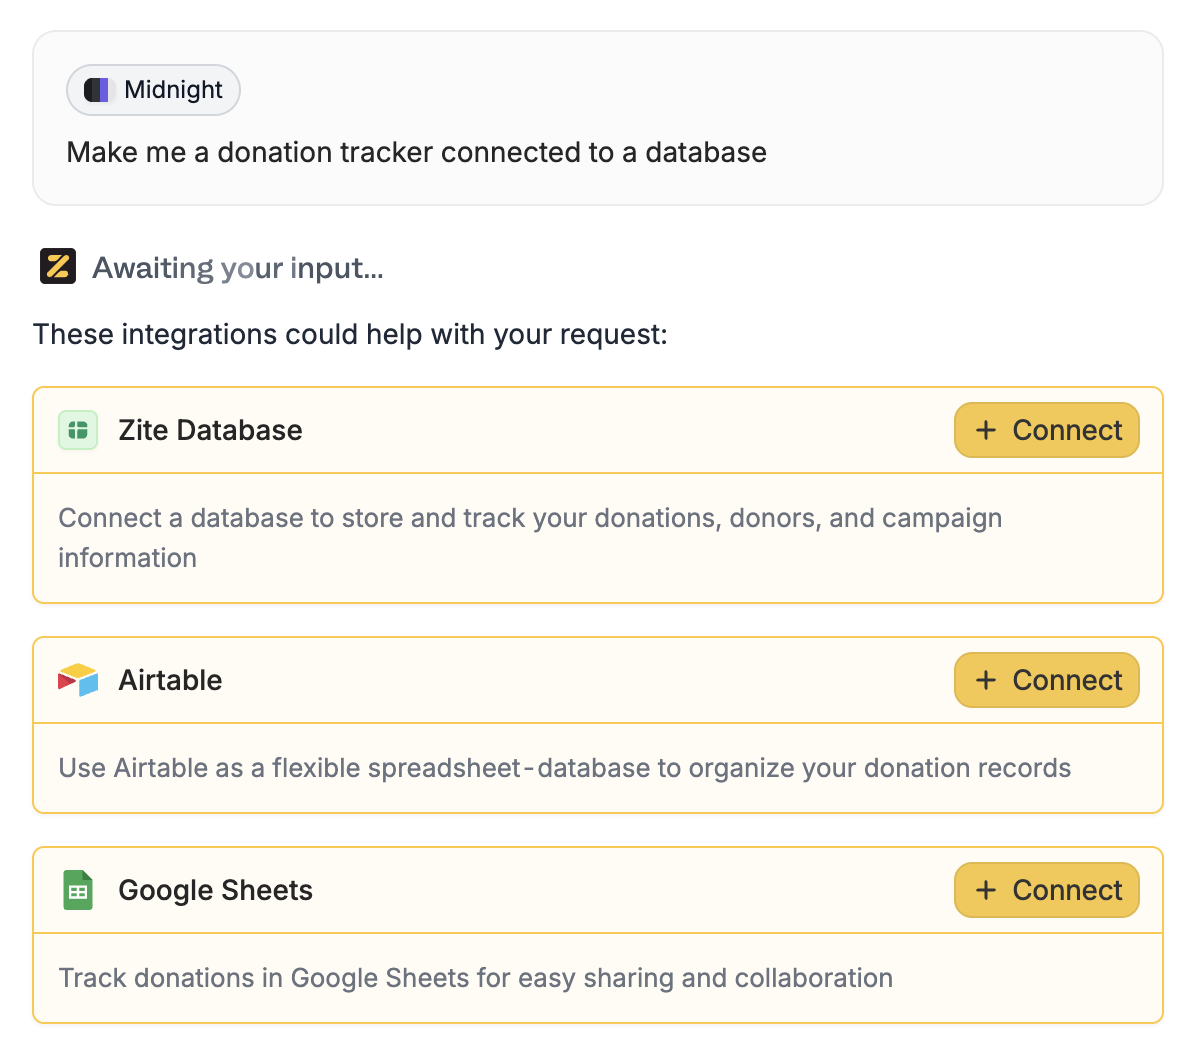
+ Connect it.Review and test
Zite generates the workflow and shows you a visual preview of what it does. Use 
Test run to verify it works as expected. More info here.For authenticated workflows, choose which user context to test withAvailable integrations
Workflows can connect to all Zite integrations. Browse integrations at zite.com/integrations. Learn how to link your accounts and use integrations in your app here.View workflows
ClickWorkflows see all workflows in your app. Each workflow shows a name, its description, apps it uses (Database, Slack, OpenAI, etc.), and who has access.

- Name – The workflow’s identifier
- Description – What the workflow does
- Integration icons – Which services the workflow uses
Authentication
Workflows can require users to be logged in. When authentication is enabled:- Only logged-in users can trigger the workflow
- The workflow has access to the current user’s info (ID, email, profile data)
- Requests from non-logged-in users are automatically rejected
Authentication
Set up authentication for your app.
Workflow editor
The workflow editor has three tabs:| Tab | Description |
|---|---|
| Preview | Visual diagram showing the workflow’s steps |
| Code | The TypeScript code powering the workflow |
| History | Execution logs for debugging (learn more) |

Streaming workflows
For real-time AI chat experiences, workflows can stream responses back to the user as they’re generated—just like ChatGPT. Ask Zite to “create a chat interface” or “add an AI assistant,” and it will set up a streaming workflow automatically.Example prompts
Here are some prompts to help you get started:Database operations
Database operations
- “Create a workflow to fetch all orders from the past 7 days”
- “Add a workflow that creates a new contact when the form is submitted”
- “Update the task status to ‘completed’ when the user clicks done”
Notifications
Notifications
- “Send a Slack message to #sales when a new lead is created”
- “Notify the team in Slack when a new order is placed”
- “Post to #support when a ticket is marked urgent”
AI operations
AI operations
- “Add an AI chat assistant that answers questions about our products”
- “Generate a summary of the customer’s order history”
- “Create a workflow that categorizes support tickets using AI”
Data processing
Data processing
- “Fetch data from Airtable and sync it to Google Sheets”
- “Calculate the total revenue from all orders this month”
- “Filter contacts by status and return only active ones”
Best practices
- Keep workflows focused.Each workflow should do one thing well. Break complex logic into multiple workflows.
- Test before publishing.Use the live app preview and test your app to verify your workflows work correctly.
- Check the run history. When something goes wrong, the run history shows exactly what happened.
- Let AI debug for you. Ask Zite “why is my workflow failing?” and it can analyze the logs to help.
Need help? Contact our support team at support@fillout.com.
Related articles
Workflow run history
View logs, filter, debug issues, and replay runs.
Link to an integration
Integrate your Zite with native and external apps.
Authentication
Add sign-in to your shared app.