Approvals
Automate project approvals, HR requests, job applications, and other workflow types. Easily track and manage submissions in one place, assign tasks, and request approvals via email or Slack.
How to automate approvals
On your Fillout dashboard, navigate to Workflows in the top menu, and select a template under Approvals.
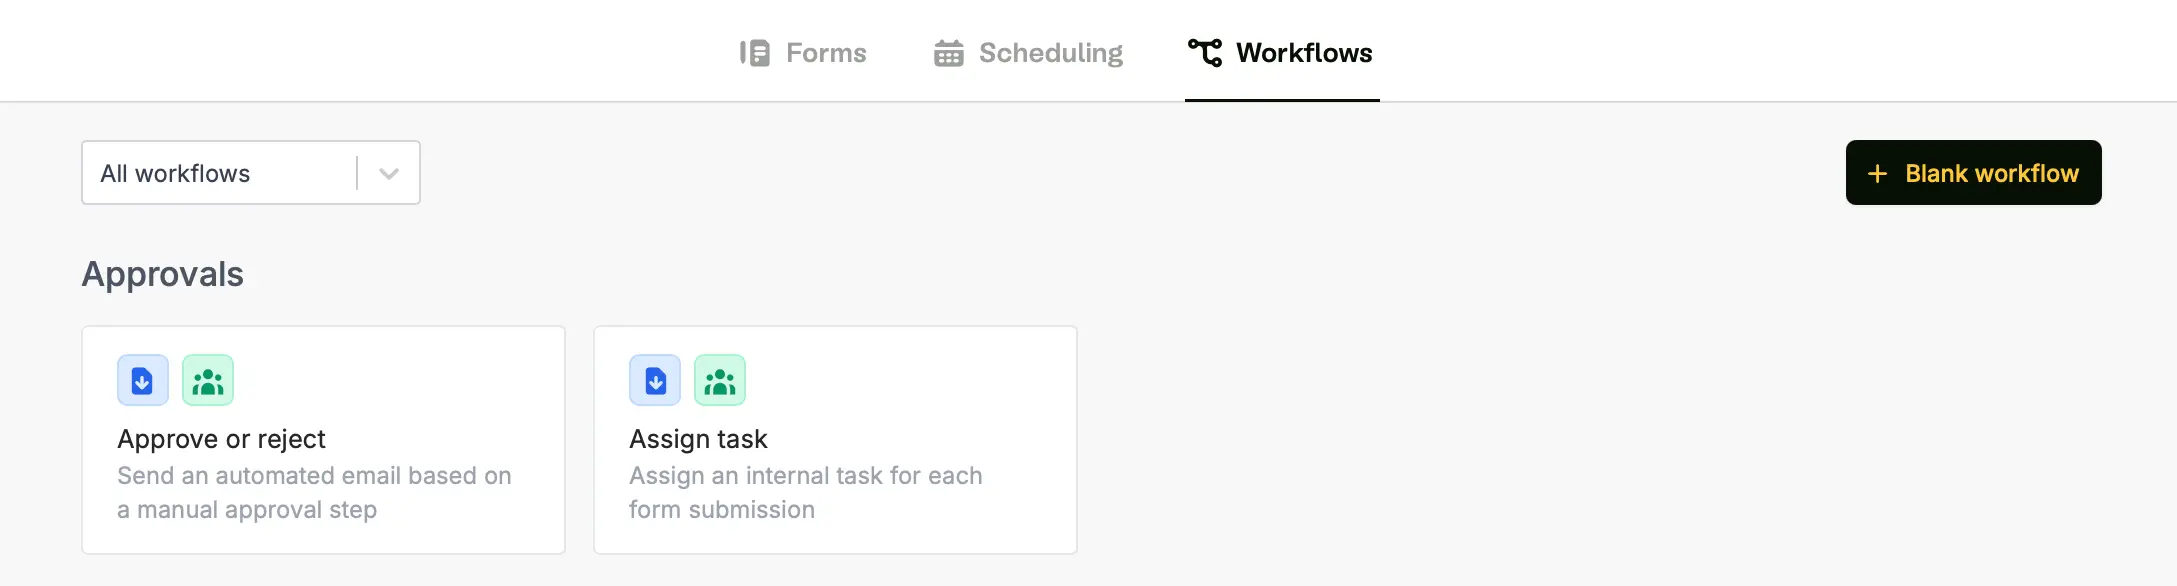
Choose to Approve or reject form submissions or Assign task.
Create workflow and choose the form you’d like to automate. Alternatively, you may open an existing form and do the same in the Integrate page.
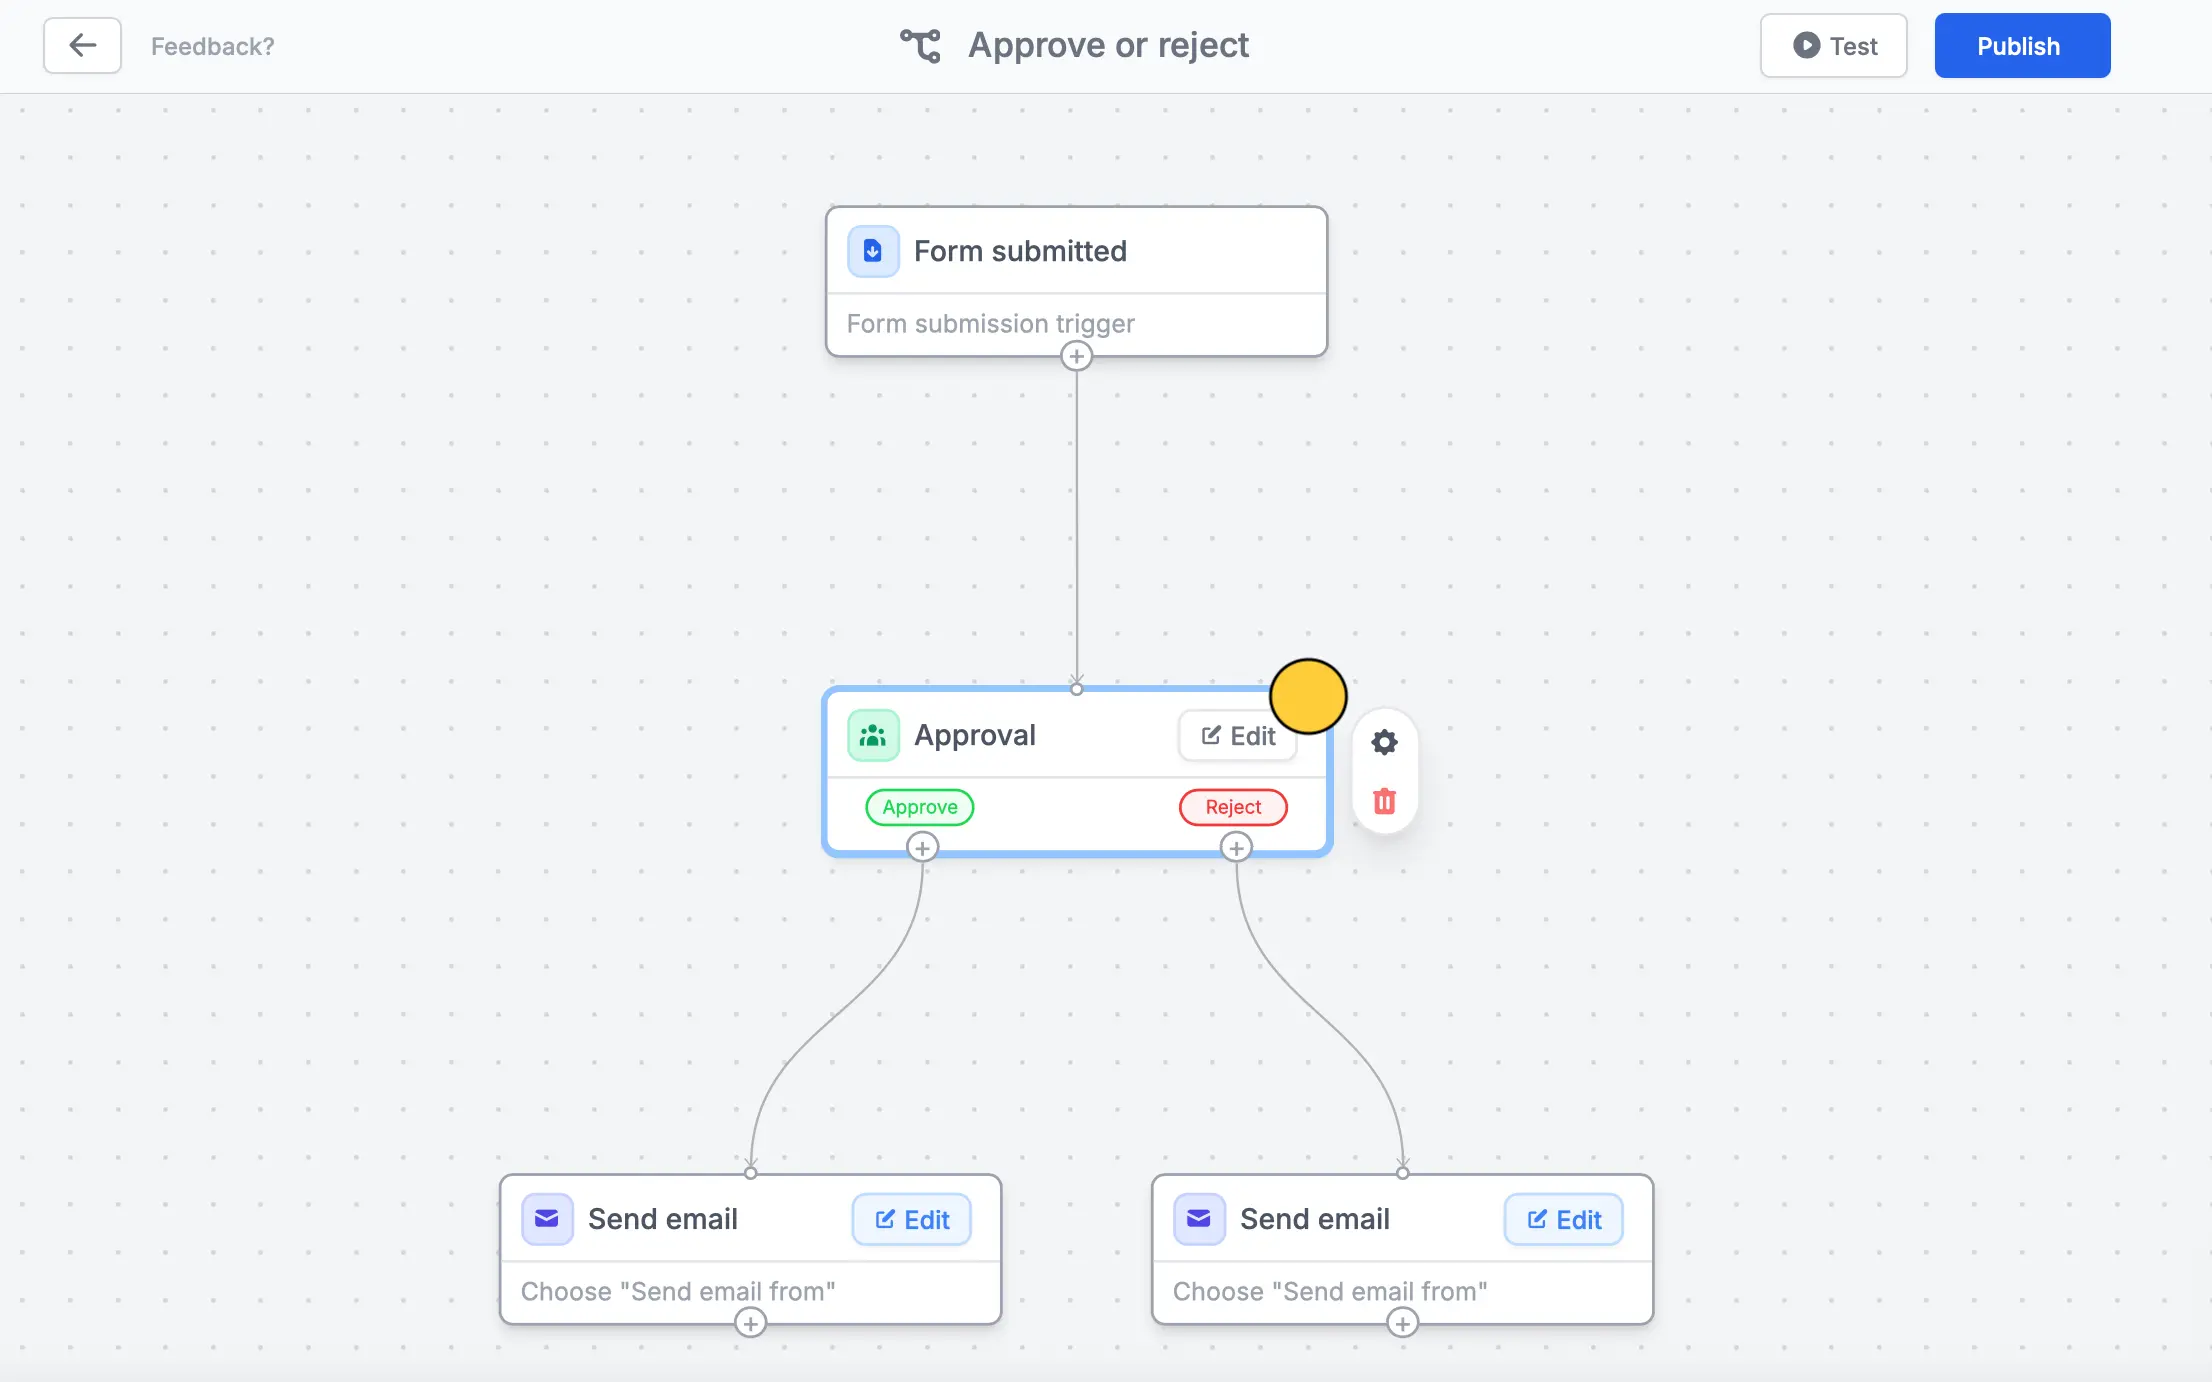
Approve or reject submissions
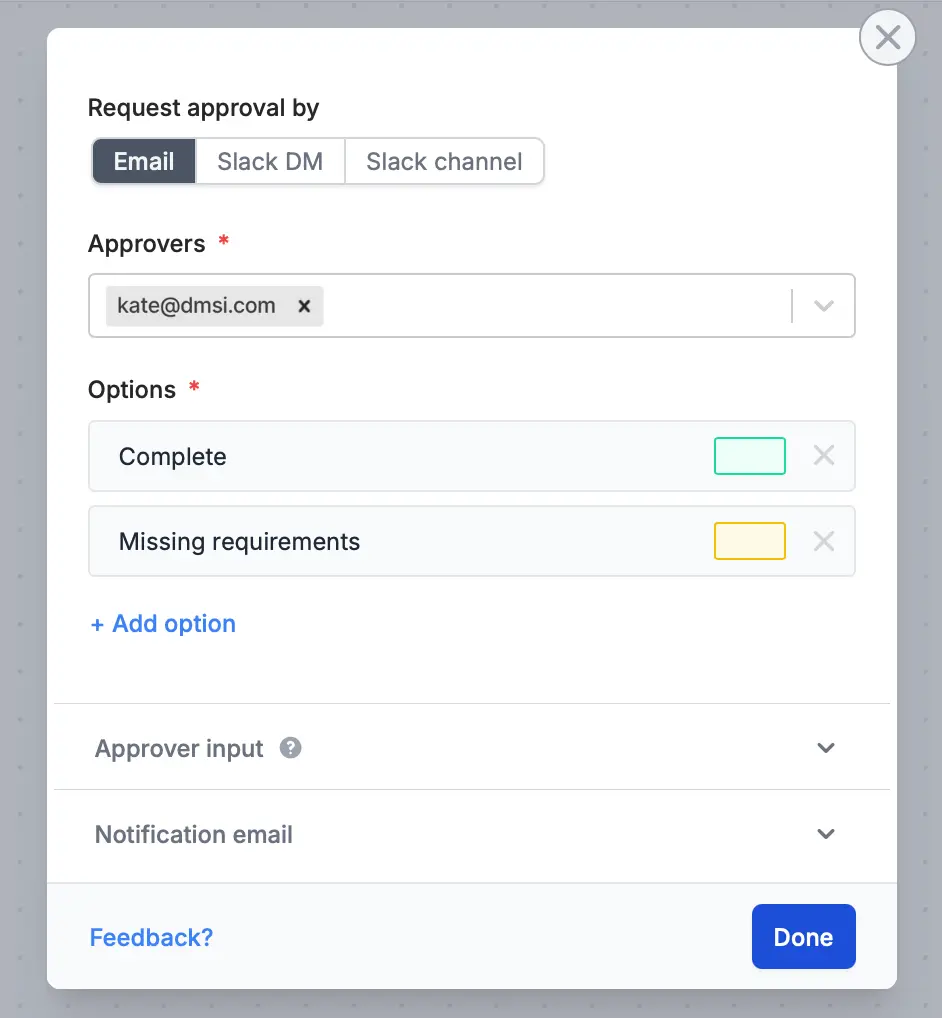
By default, the form owner is the Approver. You can Edit this to choose another member of the workspace or add more approvers.
You can also opt to Request approval by Slack DM or Slack channel other than through Email. If necessary, add options like escalate or follow up, request for Approver input like reason and comments, and edit the default Notification email.
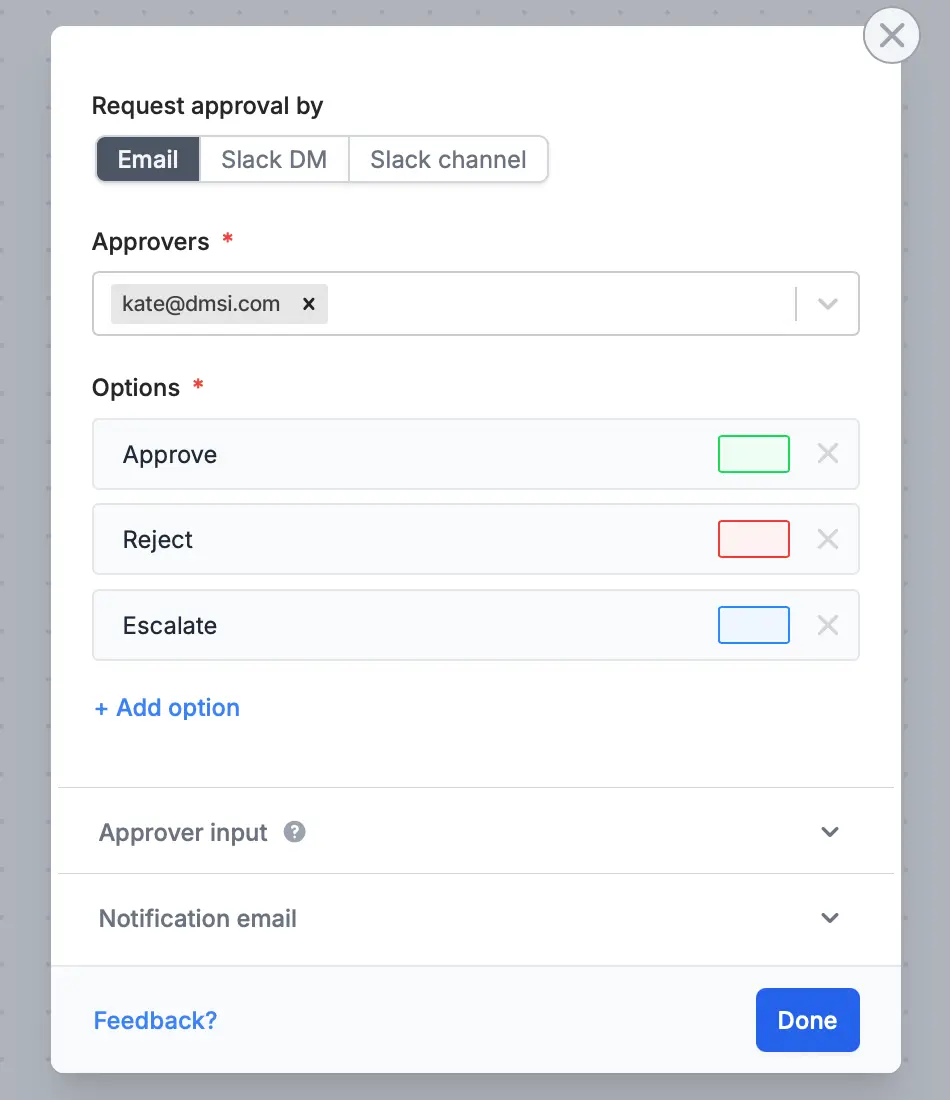
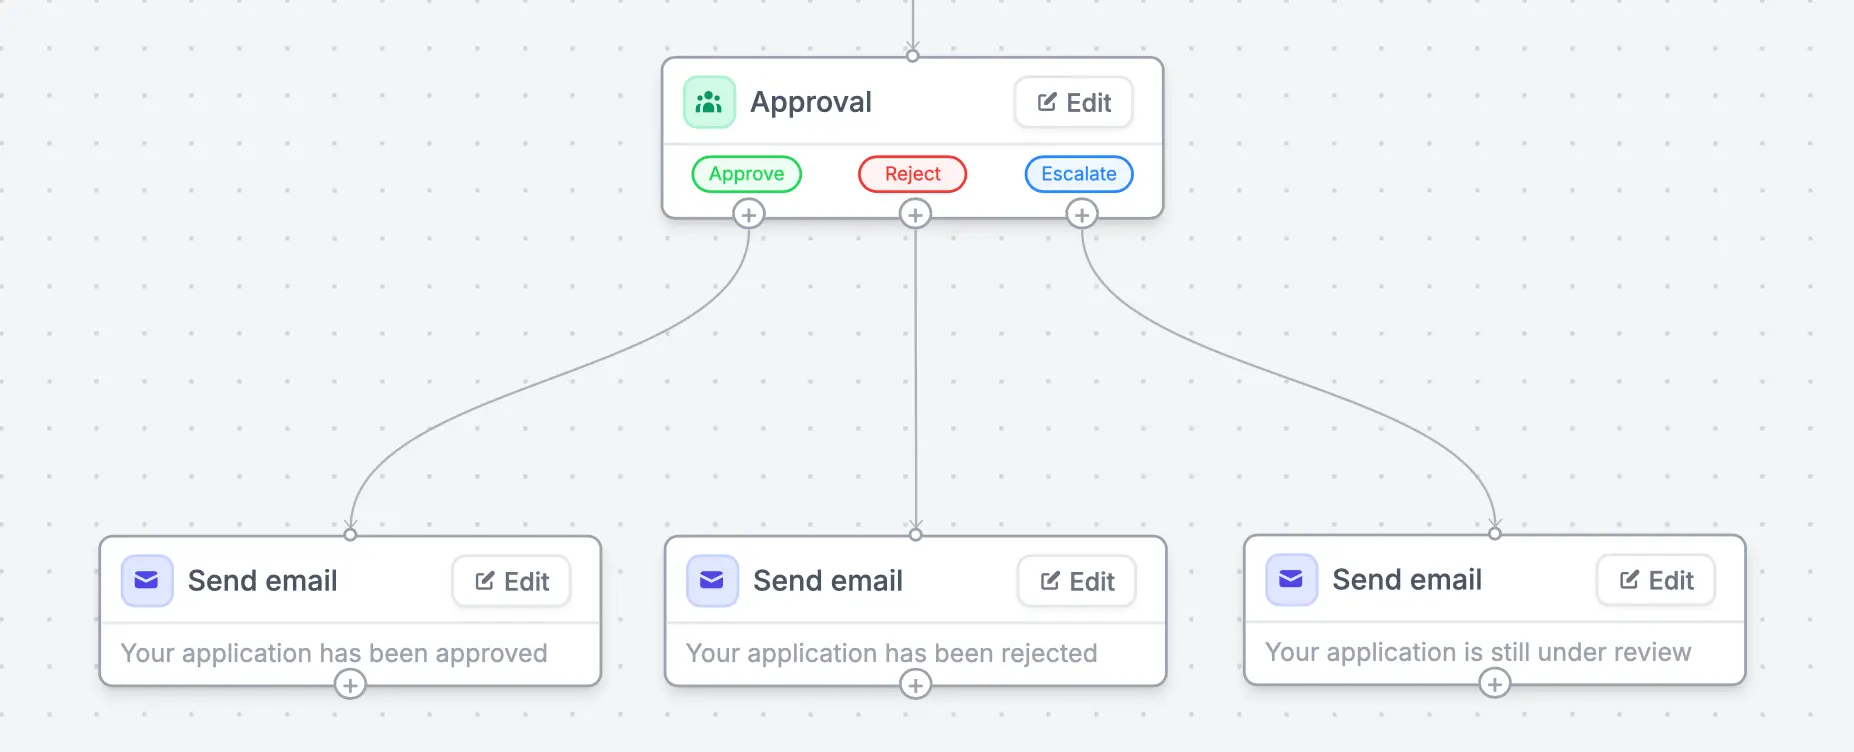
A different email will be sent depending on the option the approver will choose. You can opt to Edit the contents of each email and format its style. When you have set your workflow, Test this before clicking Publish.
Assign task for submissions
Delegate a task to your team after receiving submissions. The default workflow template, sends a summary of form responses in a Slack channel to notify members.
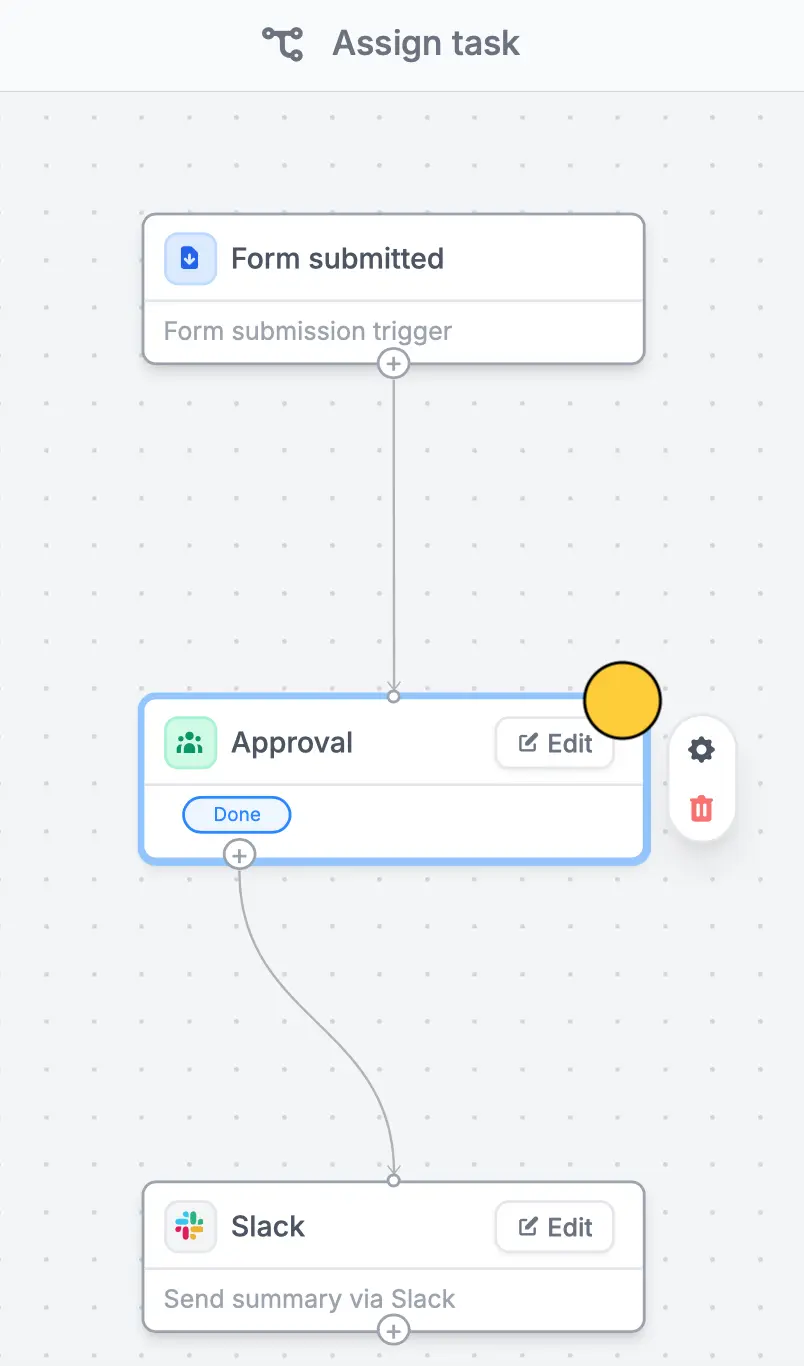
Besides notifying, you can enhance this workflow. For example, add a step for reviewing submissions. Customize it by clicking Edit in Approval and adding Options.
You can opt to edit the Custom message in Slack and reference form fields. More info here.
Manage approvals in one dashboard
When you receive an approval request, it will redirect to the Results page of your form where you can take the necessary Action needed.
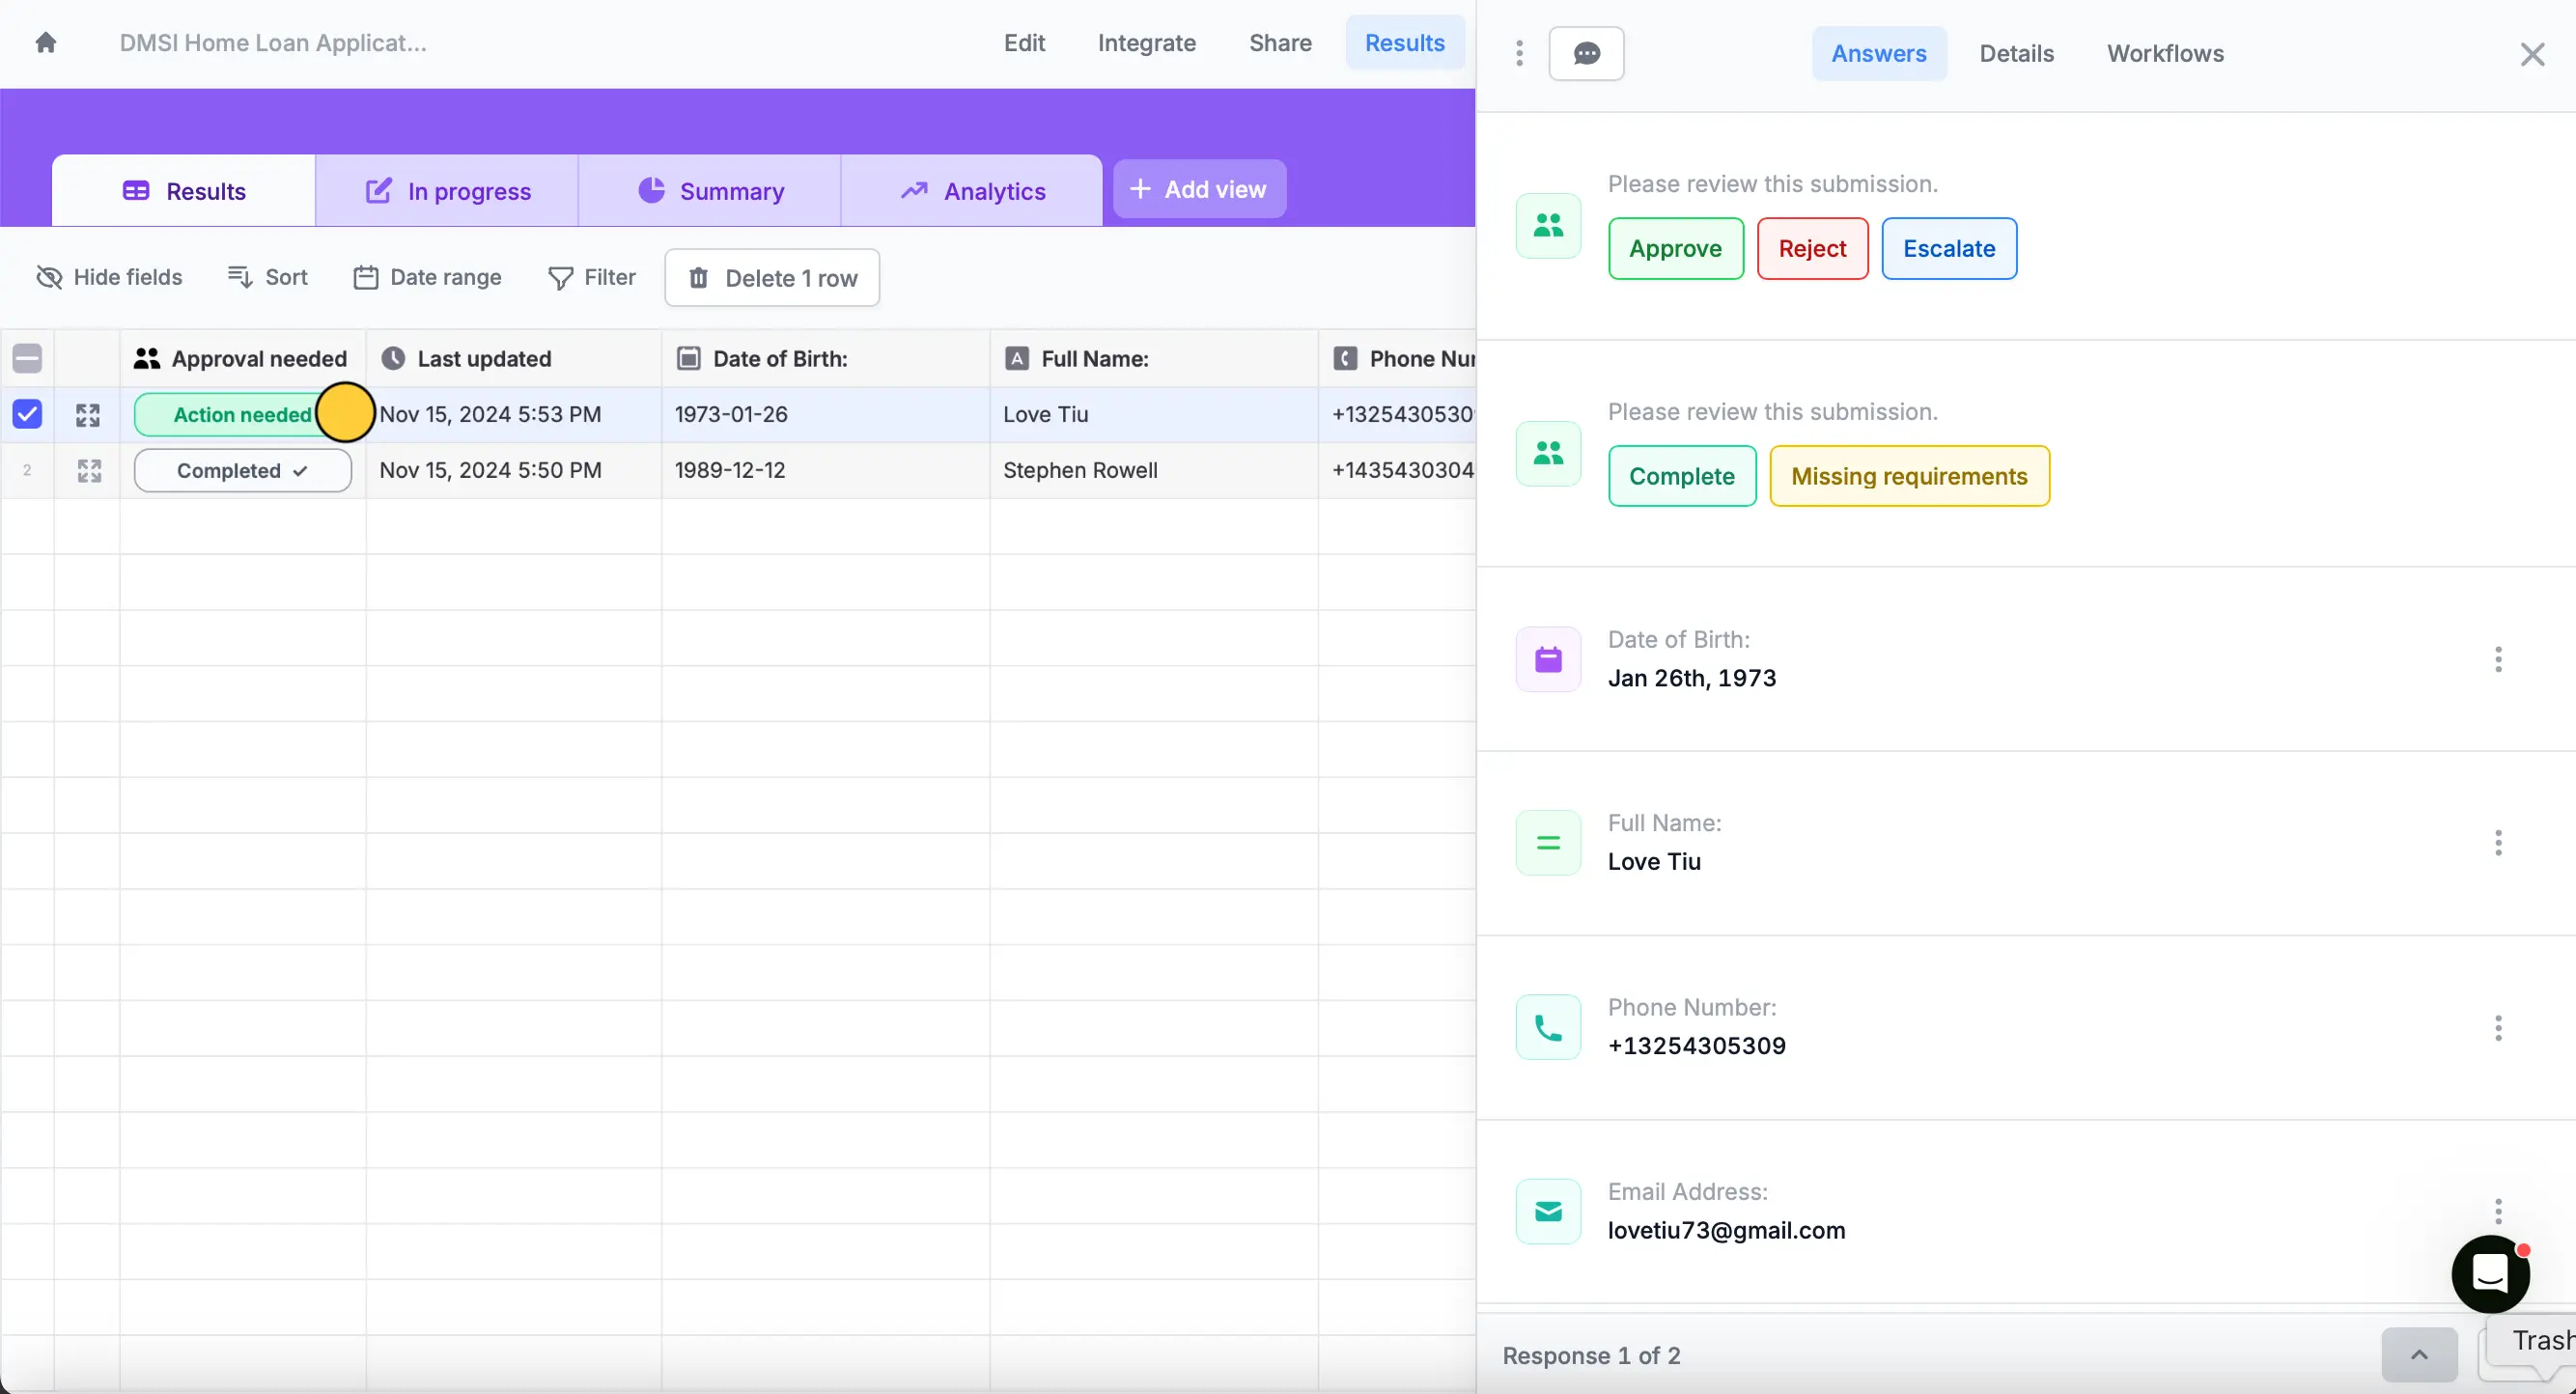
You can view comments by clicking the messaging icon beside Answers.
Related articles
Workflows
Simplify task flows with native multi-step automations, triggered by forms.
Custom email notifications
Automate sending, pipe previous answers, and style your email.
Answer piping
Insert respondents’ input into fields for a personalized experience.