Getting Started
Styling & Branding
Integrations
- Overview
- Update Existing Items on Monday with a Form
- Update Existing Salesforce Records with a Form
- Embed Fillout Forms on Notion
- Create Google Docs with a Form
- Sync Form Responses to Microsoft Excel
- Track Data with Google Tag Manager
- Connect Your Form to ClickUp
- Connect Your Form to Trello
- Send Messages with Twilio
- Sync New Deals and Leads to Pipedrive
- Create New Contacts in Brevo (formerly Sendinblue)
- Connect Fillout to Hundreds of Apps with Relay.app
- Send Messages to Discord Channels
- Generate PDFs with Form Responses
- How to Create an Airtable Form
- How to Create a HubSpot Form
- How to Create a Notion Form
- How to create a Google Sheets form
- How to Create a SmartSuite Form
- Connect Your Form to Slack
- How to Create an Attio Form
- How to Create a Salesforce Form
- Sync Form Responses to Monday
- Use Dynamic Data in a Form
- Send Form Submissions to a Webhook
- Upload Files to Google Drive with a Form
- Update Fields After Changing Your Database Schema (in Airtable, Notion, etc.)
- Map Fillout Fields to Integrations
- Sync Files to OneDrive with a Form
- Update a Database Record with Pre-Filled Form
- Working with Form Submission IDs
- Write a Static Value to an Integration
- Pre-fetch Dynamic Data for Your Form
- Sync File Uploads to Amazon S3
- Sync File Uploads to Dropbox with a Form
- Send Email Notifications with SendGrid
- Connect Your Form to ActiveCampaign
- Track Form Submissions with Meta Pixels
- Connect Your Form to Linear
- Connect Your Form to Zoom
- Connect Your Form to Mailchimp
- Connect Your Form to Klaviyo
- Connect Fillout to Hundreds of Apps with Zapier
- Connect Fillout to Thousands of Apps with Make
- Send Notifications to Microsoft Teams
- Connect Your Form to Intercom
- Connect Your Form to Zendesk
- Collect Payments with Stripe and Airtable
Logic
Sharing & Embedding
- Overview
- Use URL Parameters in Embeds
- Embed Fillout Forms in Squarespace
- Embed Fillout Forms on Shopify
- Embed Fillout Forms on WordPress
- Embed Fillout Forms on Webflow
- Share Your Form with a QR Code
- Manage & Limit Form Access
- Embed Fillout Forms in Wix
- Embed Fillout Forms in React
- Customize Form Share Link
- Import & Export Forms
Fillout Scheduling
- Overview
- Collective Scheduling
- Add Custom Emails to Fillout Scheduling
- Reschedule Fillout Scheduling Meetings
- Set Your Availability in Fillout Scheduling
- Monitor Scheduling Conflicts
- Customize Fillout Scheduling Form Branding
- Getting Started with Fillout Scheduling
- Create a Fillout Scheduling Form
- Limit Bookings
- Round Robin Scheduling
- Send an Email Reminder to Invitees
- Event Types
- Group Meeting
Fillout Workflows
Conversion Kit
Account
Guides
- Overview
- Embed PDFs on Your Forms
- Email Your Form
- Edit Form Submissions
- Let Users Edit Their Form Submissions
- Add a CAPTCHA Field on Your Form
- Add a Rating Scale on Your Form
- Ask for Location Coordinates on Your Form
- Add a Banner Within Your Form
- Collect a Ranking on Your Form
- Add e-Signatures to Your Form
- Use Skip Logic for Questions with Multiple Answers
- Create a Dynamic Payment Page
- Enable Auto Jump on Your Form
- Create a lead quiz
- Add a Table to Your Form
- Watch Partner-made Guides & Resources
- Make a Quiz with Fillout
- Copy & Paste a Question
- Restore Previous Version
- Duplicate a Form
- Delete Submission
- Duplicate Existing Questions
- Embed Fillout forms on Softr
- Change Your Form’s Language
- Improve the Accessibility of Your Forms
- Reorder with Drag & Drop
- Concierge Program
Security & Legal
Advanced
- Overview
- Collaborative Forms with Multiple Respondents
- URL Parameters/Hidden Fields
- Pre-fill Dates
- Single Sign-On (SSO) Form Login
- Custom CSS
- Custom Code
- Respondent Notification Email
- Right to Left Forms
- View External Form Dependencies
- Add Custom Values to Answer Options
- Populate Dropdown Options with a Webhook
- Add Links & External URLs
- Pre-fill Fields
- HTML & CSS Form Fields
- Create Fillout 3rd Party Apps
Styling & Branding
Disable the confetti effect
Remove the default confetti effect on the Ending page of your Fillout forms.
How to remove the confetti display
By default, when respondents reach the end of their form submission, confetti will be displayed.
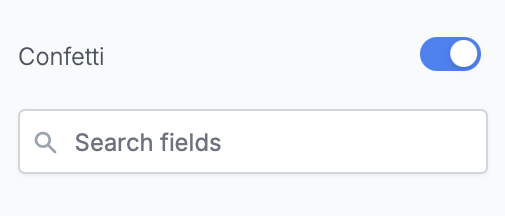
To disable, click the Ending page (bottom of the screen) and then untoggle the Confetti
switch.
Related articles
Ending page
Show users a thank you page, redirect them to another site or form, or let them fill the form again.
Page logic
Hide or show certain pages or custom endings based on respondents’ previous input.
Progress bar
Customize the default progress bar that shows up when respondents answer your Fillout form.
Assistant
Responses are generated using AI and may contain mistakes.