

What is a subform?
A subform is a form within a main form that lets you collect related information in a structured way. Subforms are useful when you need to add multiple entries or records while keeping everything connected in one place. Common use cases include:- Collecting multiple products in an order
- Adding a list of expenses to a report
- Creating a list of tasks for a project
How to use a subform within your form
1
Create the form for your subform
A subform is a separate form that opens as a popup in your main form. First, create a form with the questions you want to ask for each entry, like any other form. Then click Publish.
You can’t create the subform from inside the main form. Only published forms show up when you link one.
2
Add a subform field
In the left-hand panel of your form, click Subform. Then type the question or information you need from your respondents.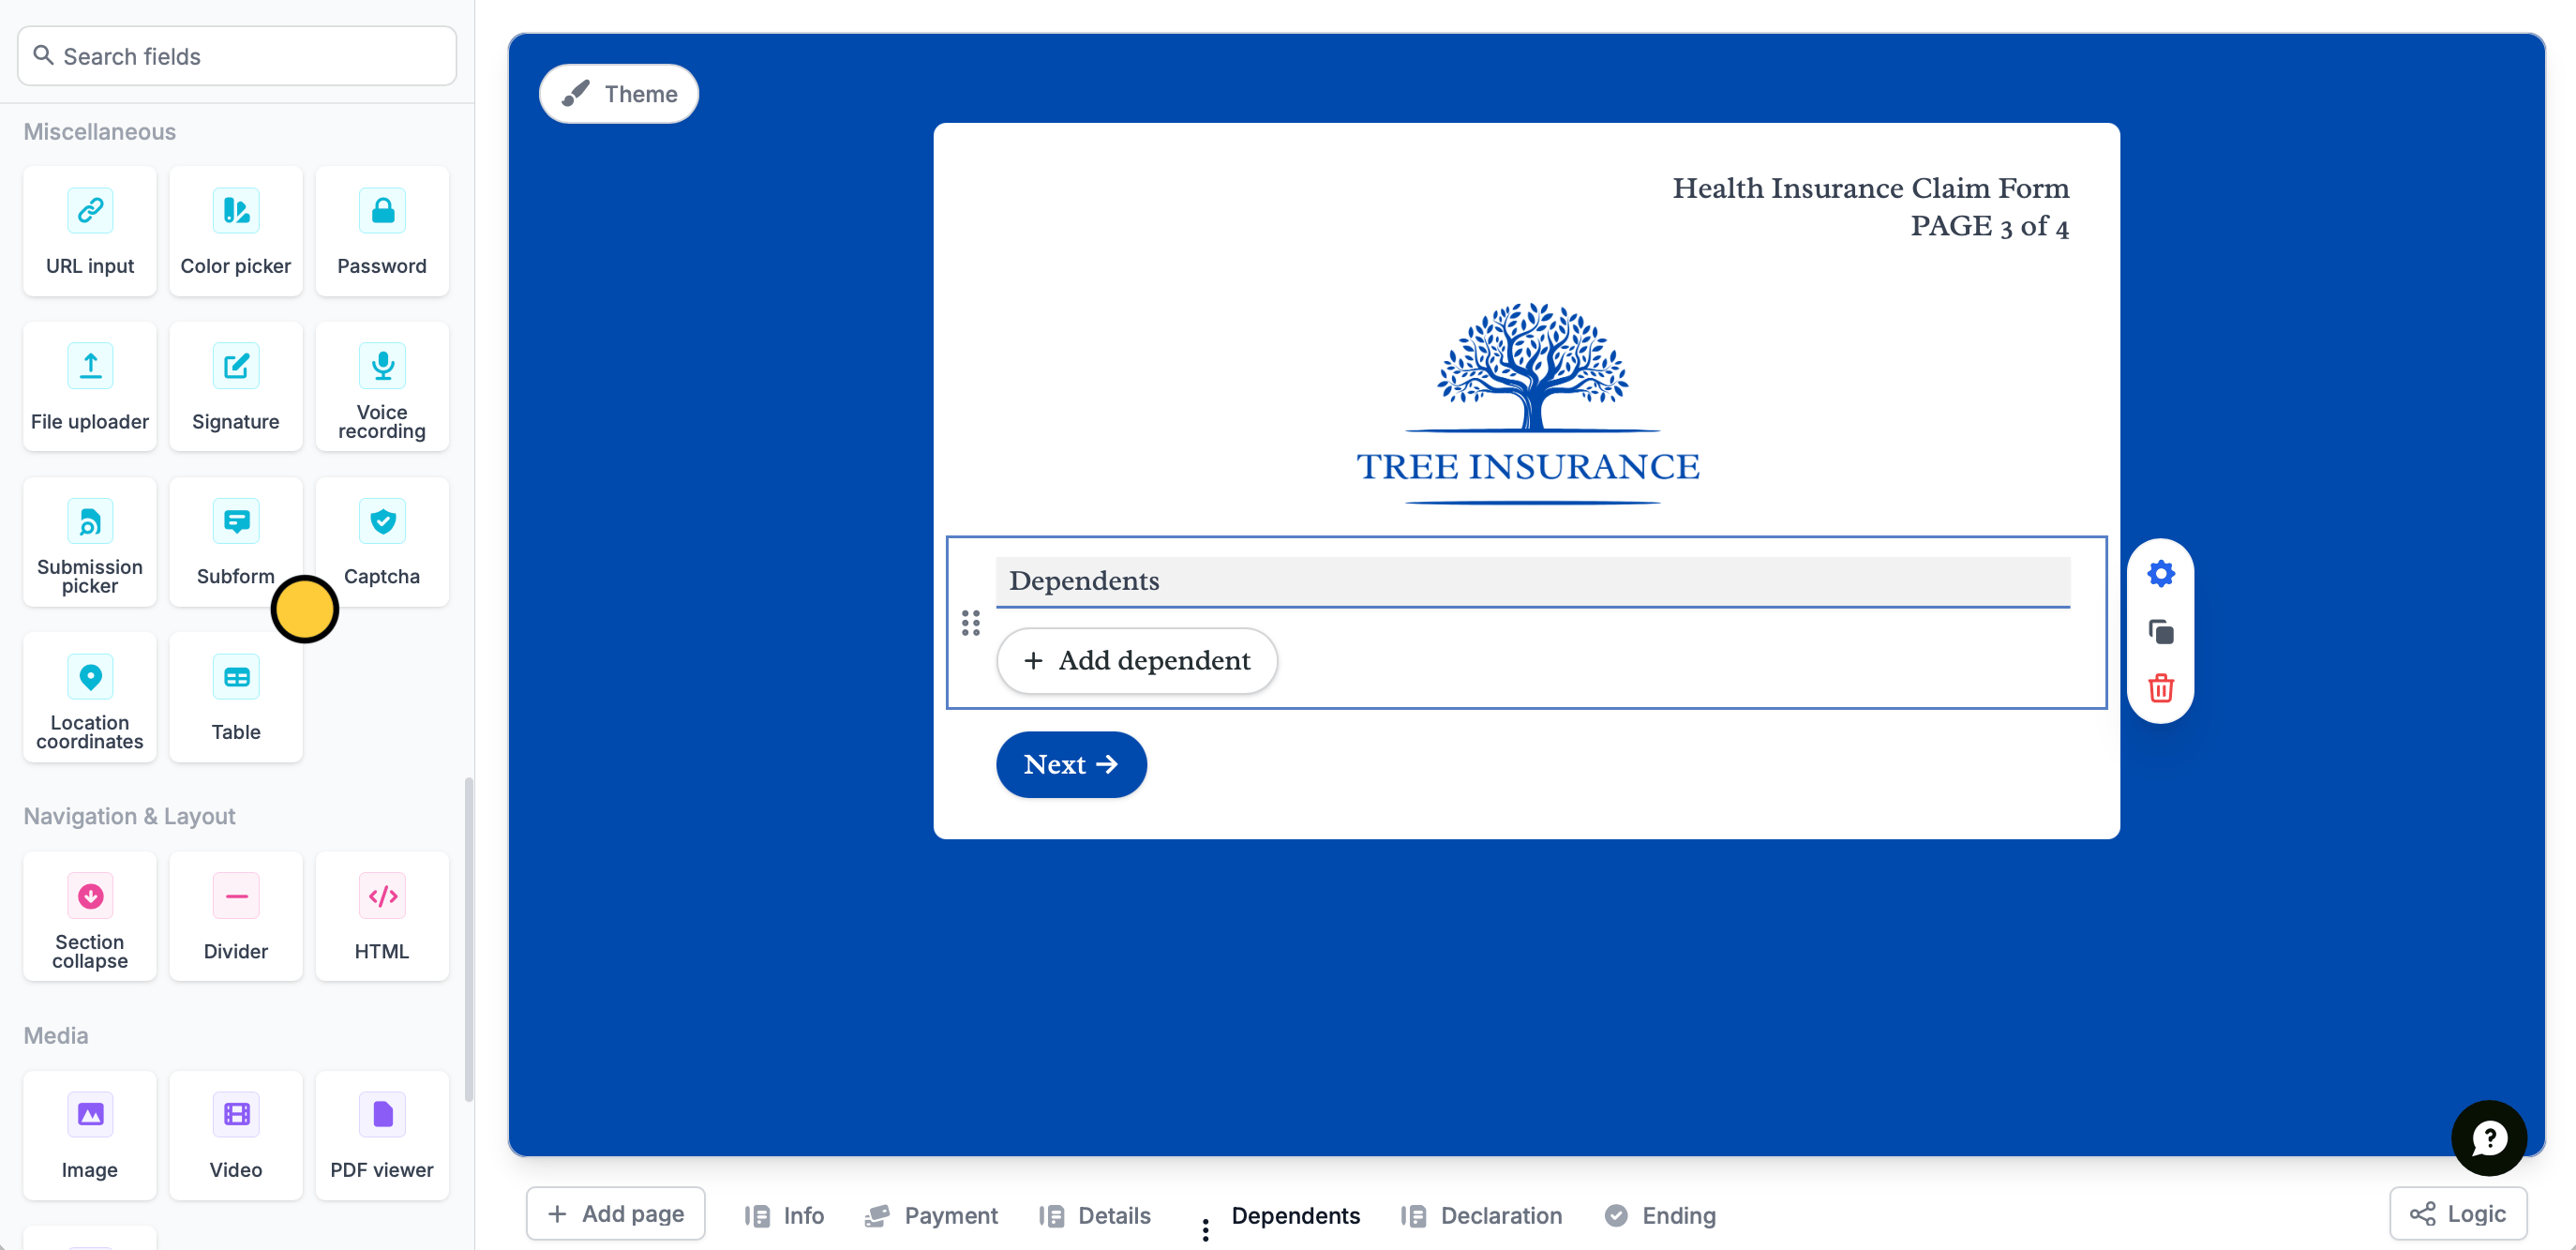
3
Link forms
Click the field’s settings icon to open the right-hand panel. Under Connected subform, choose the form you created. The list shows published forms you can edit.Then, pick a Main field: the subform question whose answer labels each entry. If you don’t pick one, each entry shows the Submission text from the Appearance settings.To change the subform’s questions later, click Edit form under Connected subform. Then publish the subform itself. Publishing the main form doesn’t update it.If you duplicate the main form, the subform field in the copy isn’t linked to any form. Open the copy, choose the subform again under Connected subform, then choose its Main field.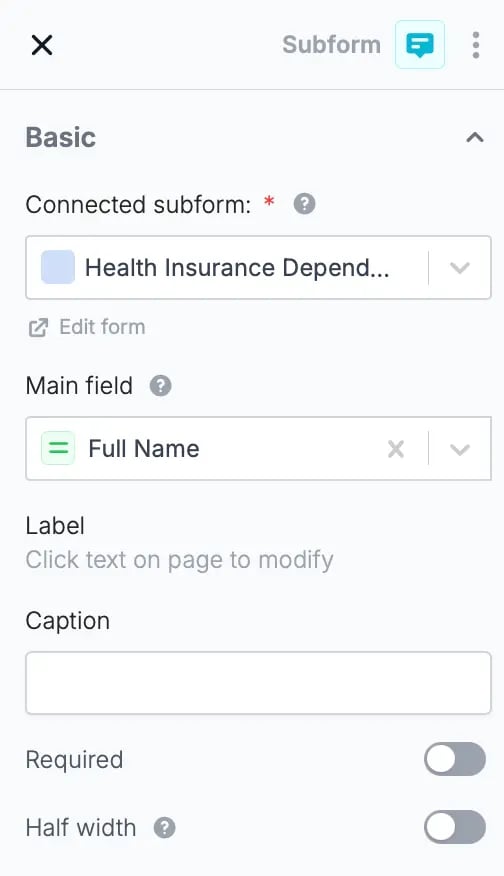
Forms in the Trash aren’t listed. An existing subform whose linked form was moved to the Trash will show Select form until that form is restored.
4
Publish and share
Publish your form and share the link. Subforms allow respondents to edit completed submissions and resume partial ones.A subform only lists the entries the respondent created during their current visit, and they can edit those. Entries from other visits or other respondents don’t show.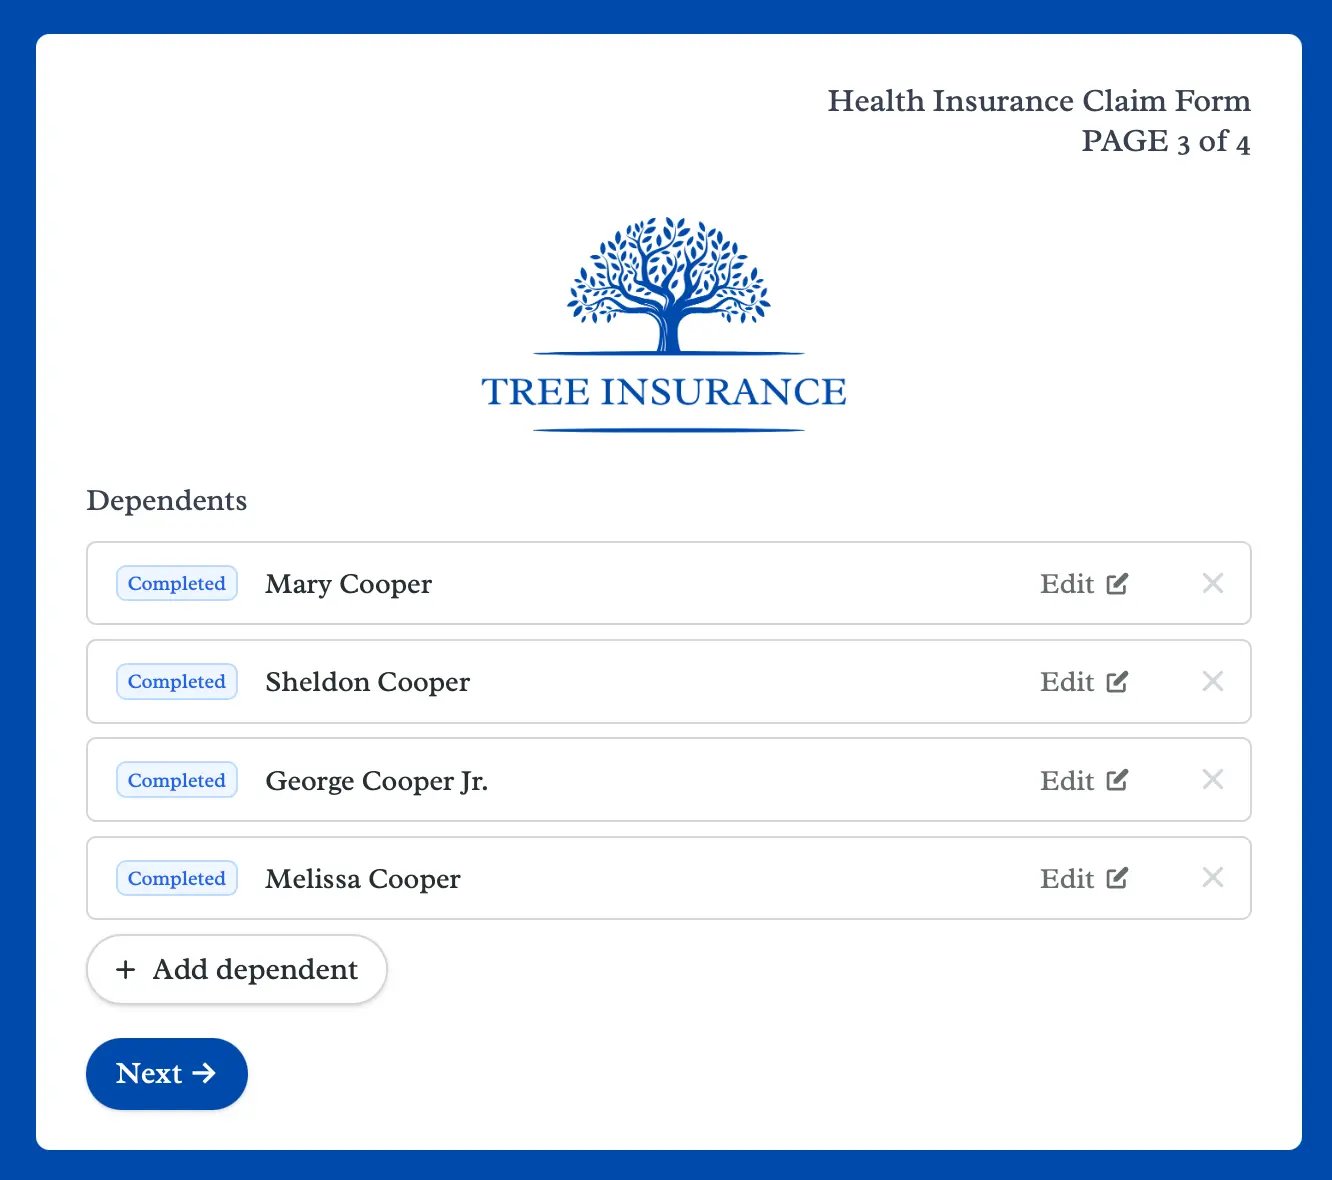
How subform entries are saved
Each entry is a submission of the subform’s own form:- When a respondent submits an entry in the popup, it’s saved right away in the subform’s Results, even if they never submit the main form.
- If they close the popup before submitting, the entry is saved as in progress.
- Subforms the respondent never opens save nothing.
Use subform answers in the main form
Type @ in the main form to reference answers from the subform, like in a calculation or an email. You can reference most question types, including text, email, phone, number, choice, rating, date and address fields. You can’t reference signatures, file uploads or tables. Webhooks and the Fillout REST API send each subform entry as a full submission inside the main submission, with up to 50 entries per subform field. Older forms may send subform entries in a simpler format. In a generated PDF, you can’t place the subform question as a whole. When you connect a PDF field to the subform question, pick one of the subform’s fields instead. That field’s answers from every entry print in one place, separated by commas, for example “Alex Rivera, Sam Lee”. Signature, file upload and table fields inside a subform can’t be connected to a PDF.Add subform limits
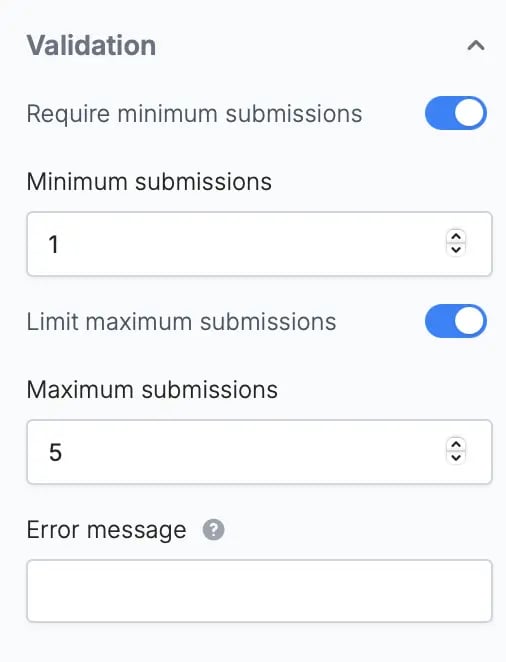
Under Validation in the right-hand panel, you can:- Turn on Require minimum submissions and set Minimum submissions
- Turn on Limit maximum submissions and set Maximum submissions
- Add an Error message
Subform field vs record picker subform
Fillout has two kinds of subform. A Subform field adds entries to another Fillout form. A record picker subform creates or edits linked records in your database.
To add repeated entries that live in another Fillout form, use a Subform field. To create or edit linked records in your database, or show existing ones, use a record picker.
Link Subform field entries to the main record in Airtable
A Subform field doesn’t link the main form’s Airtable record to the records its subform creates. Airtable’s linked record fields only accept Airtable records, and the Subform field holds Fillout submissions. If you want the records linked as soon as the form is submitted, use a record picker subform instead. If you want to keep a Subform field, for example to reuse the same subform in several main forms, you can link the records in Airtable after each submission:- In the subform’s Airtable integration, map Submission ID to a text field in its table. See Send the submission ID to your integration.
- In the main form, add a Short answer question. Set its default value to the subform’s Submission ID, and turn on Hide always so respondents don’t see it. With several entries, it holds each entry’s Submission ID, separated by commas.
- Map that question to a text field in the main form’s table.
- In Airtable, create an automation that finds the subform records whose Submission ID is in that field, and links them to the main record.
Select from previous submissions
You can also allow respondents to pre-fill form fields with existing form records by adding a Submission picker field. Learn how in Submission picker.Related articles
Submission picker
Let respondents pre-fill forms with answers from existing forms.
Get multiple answers
Let respondents enter multiple sets of data for one question.