Collect payments with Stripe and Airtable
Create new records in Airtable every time a customer or client makes a purchase. Use Fillout forms to make a Stripe payment page and connect it to Airtable.
Video tutorial
![Video preview](https://i.ytimg.com/vi/Izty_dqvn3M/hqdefault.jpg)
How it works
1. Create a payment form
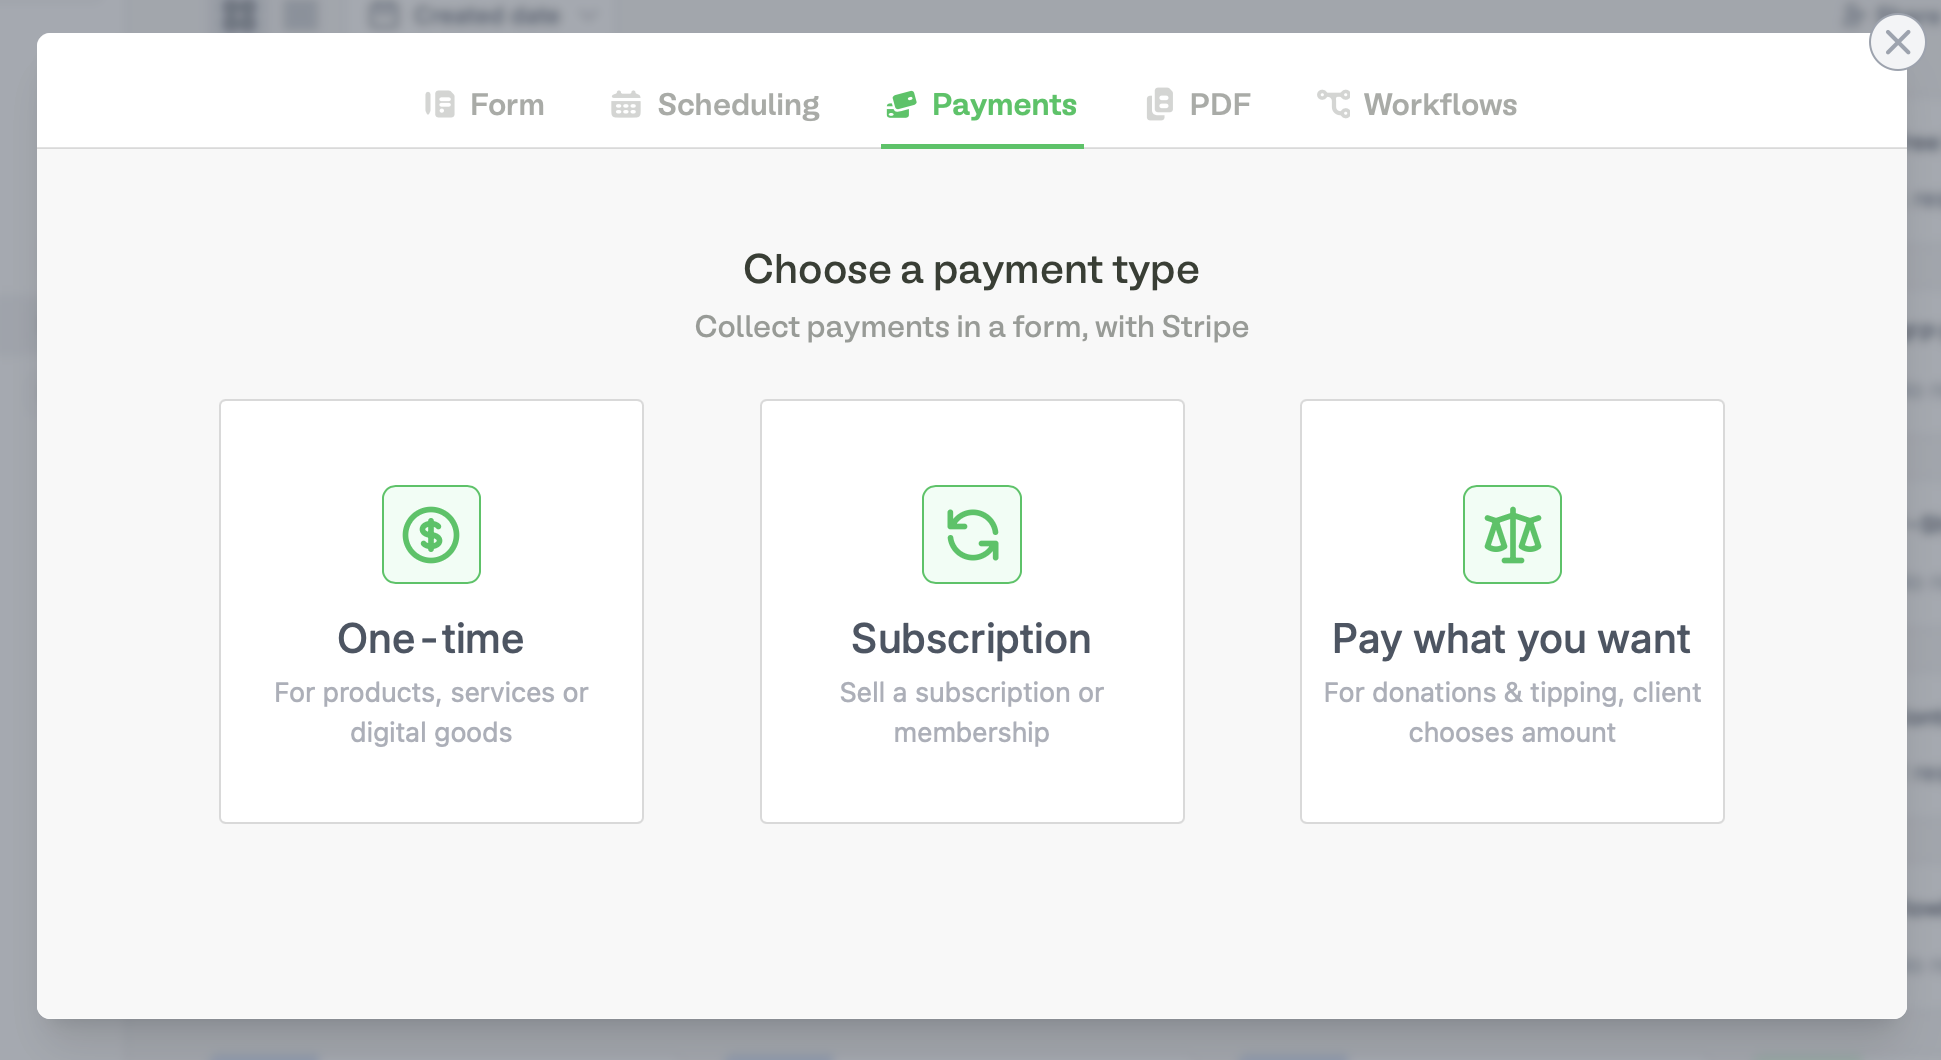
Click
Make a Fillout
on your home page followed by Payment
. Next, Connect to Stripe
.![notion image](/_next/image?url=https%3A%2F%2Fwww.notion.so%2Fimage%2Fhttps%253A%252F%252Fprod-files-secure.s3.us-west-2.amazonaws.com%252F2a7ed980-5add-4b51-82ab-889415f57134%252Ff9f45a84-7a6a-4124-9b6a-e263eb58fbf2%252FScreenshot_2024-06-21_at_4.18.42_PM.png%3Ftable%3Dblock%26id%3Dd4d00a35-b8ab-457c-a7b6-300fa9b63db1%26cache%3Dv2&w=3840&q=75)
Good to know: You can still add other types of pages to your payment form.
Alternatively, you may create a
Form
, and add a Payment
page in it. See this guide for more information.2. Edit the product details
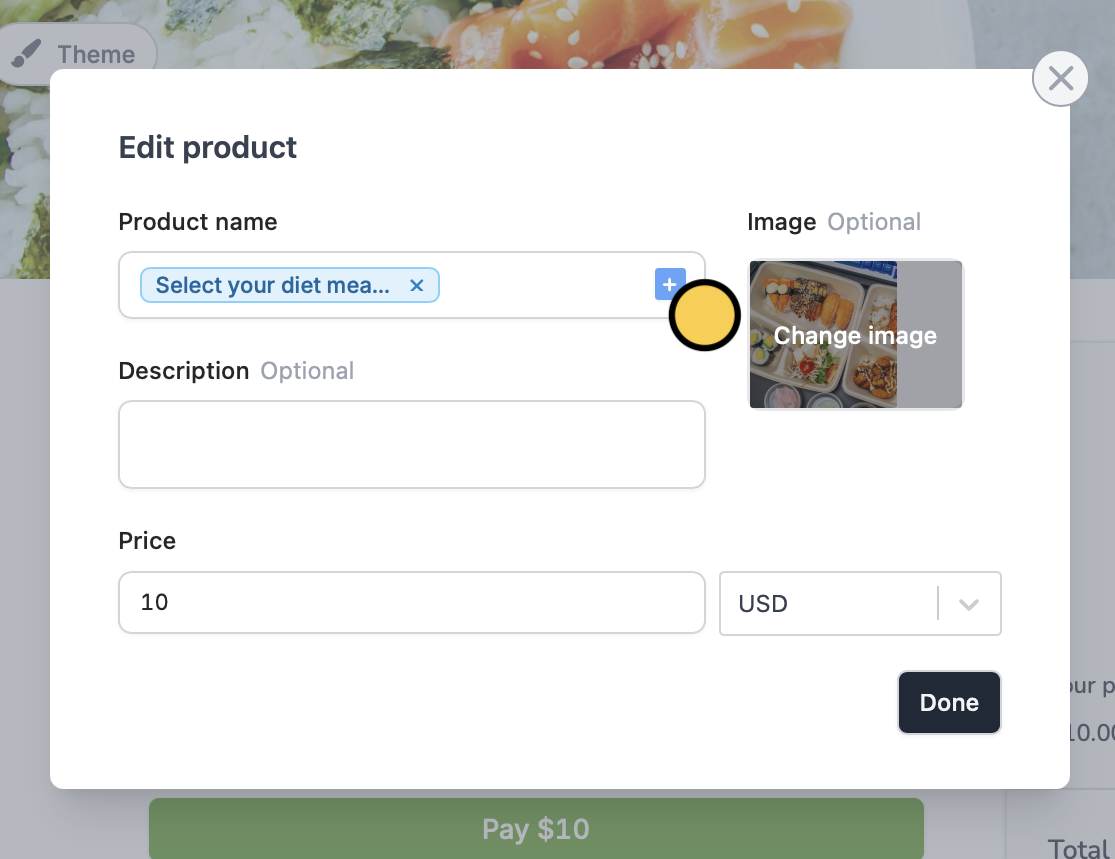
Click
Edit product
, and fill in the details as you see fit.![notion image](/_next/image?url=https%3A%2F%2Fwww.notion.so%2Fimage%2Fhttps%253A%252F%252Fprod-files-secure.s3.us-west-2.amazonaws.com%252F2a7ed980-5add-4b51-82ab-889415f57134%252Fc53ed53a-d0e3-4f34-a370-8fc2aa934185%252FScreenshot_2024-06-21_at_4.36.17_PM.png%3Ftable%3Dblock%26id%3D2d6985aa-f512-4b72-ba20-cd3fa0b32023%26cache%3Dv2&w=3840&q=75)
You can also click the blue
+
icon to reference a selection field in your form where you asked customers to pick a product. ![notion image](/_next/image?url=https%3A%2F%2Fwww.notion.so%2Fimage%2Fhttps%253A%252F%252Fprod-files-secure.s3.us-west-2.amazonaws.com%252F2a7ed980-5add-4b51-82ab-889415f57134%252F660bffe8-2ac2-4cf9-9caa-603a089903a1%252FScreenshot_2024-06-21_at_4.23.04_PM.png%3Ftable%3Dblock%26id%3D87be5a55-b305-4fec-8df9-51221e3ce16c%26cache%3Dv2&w=3840&q=75)
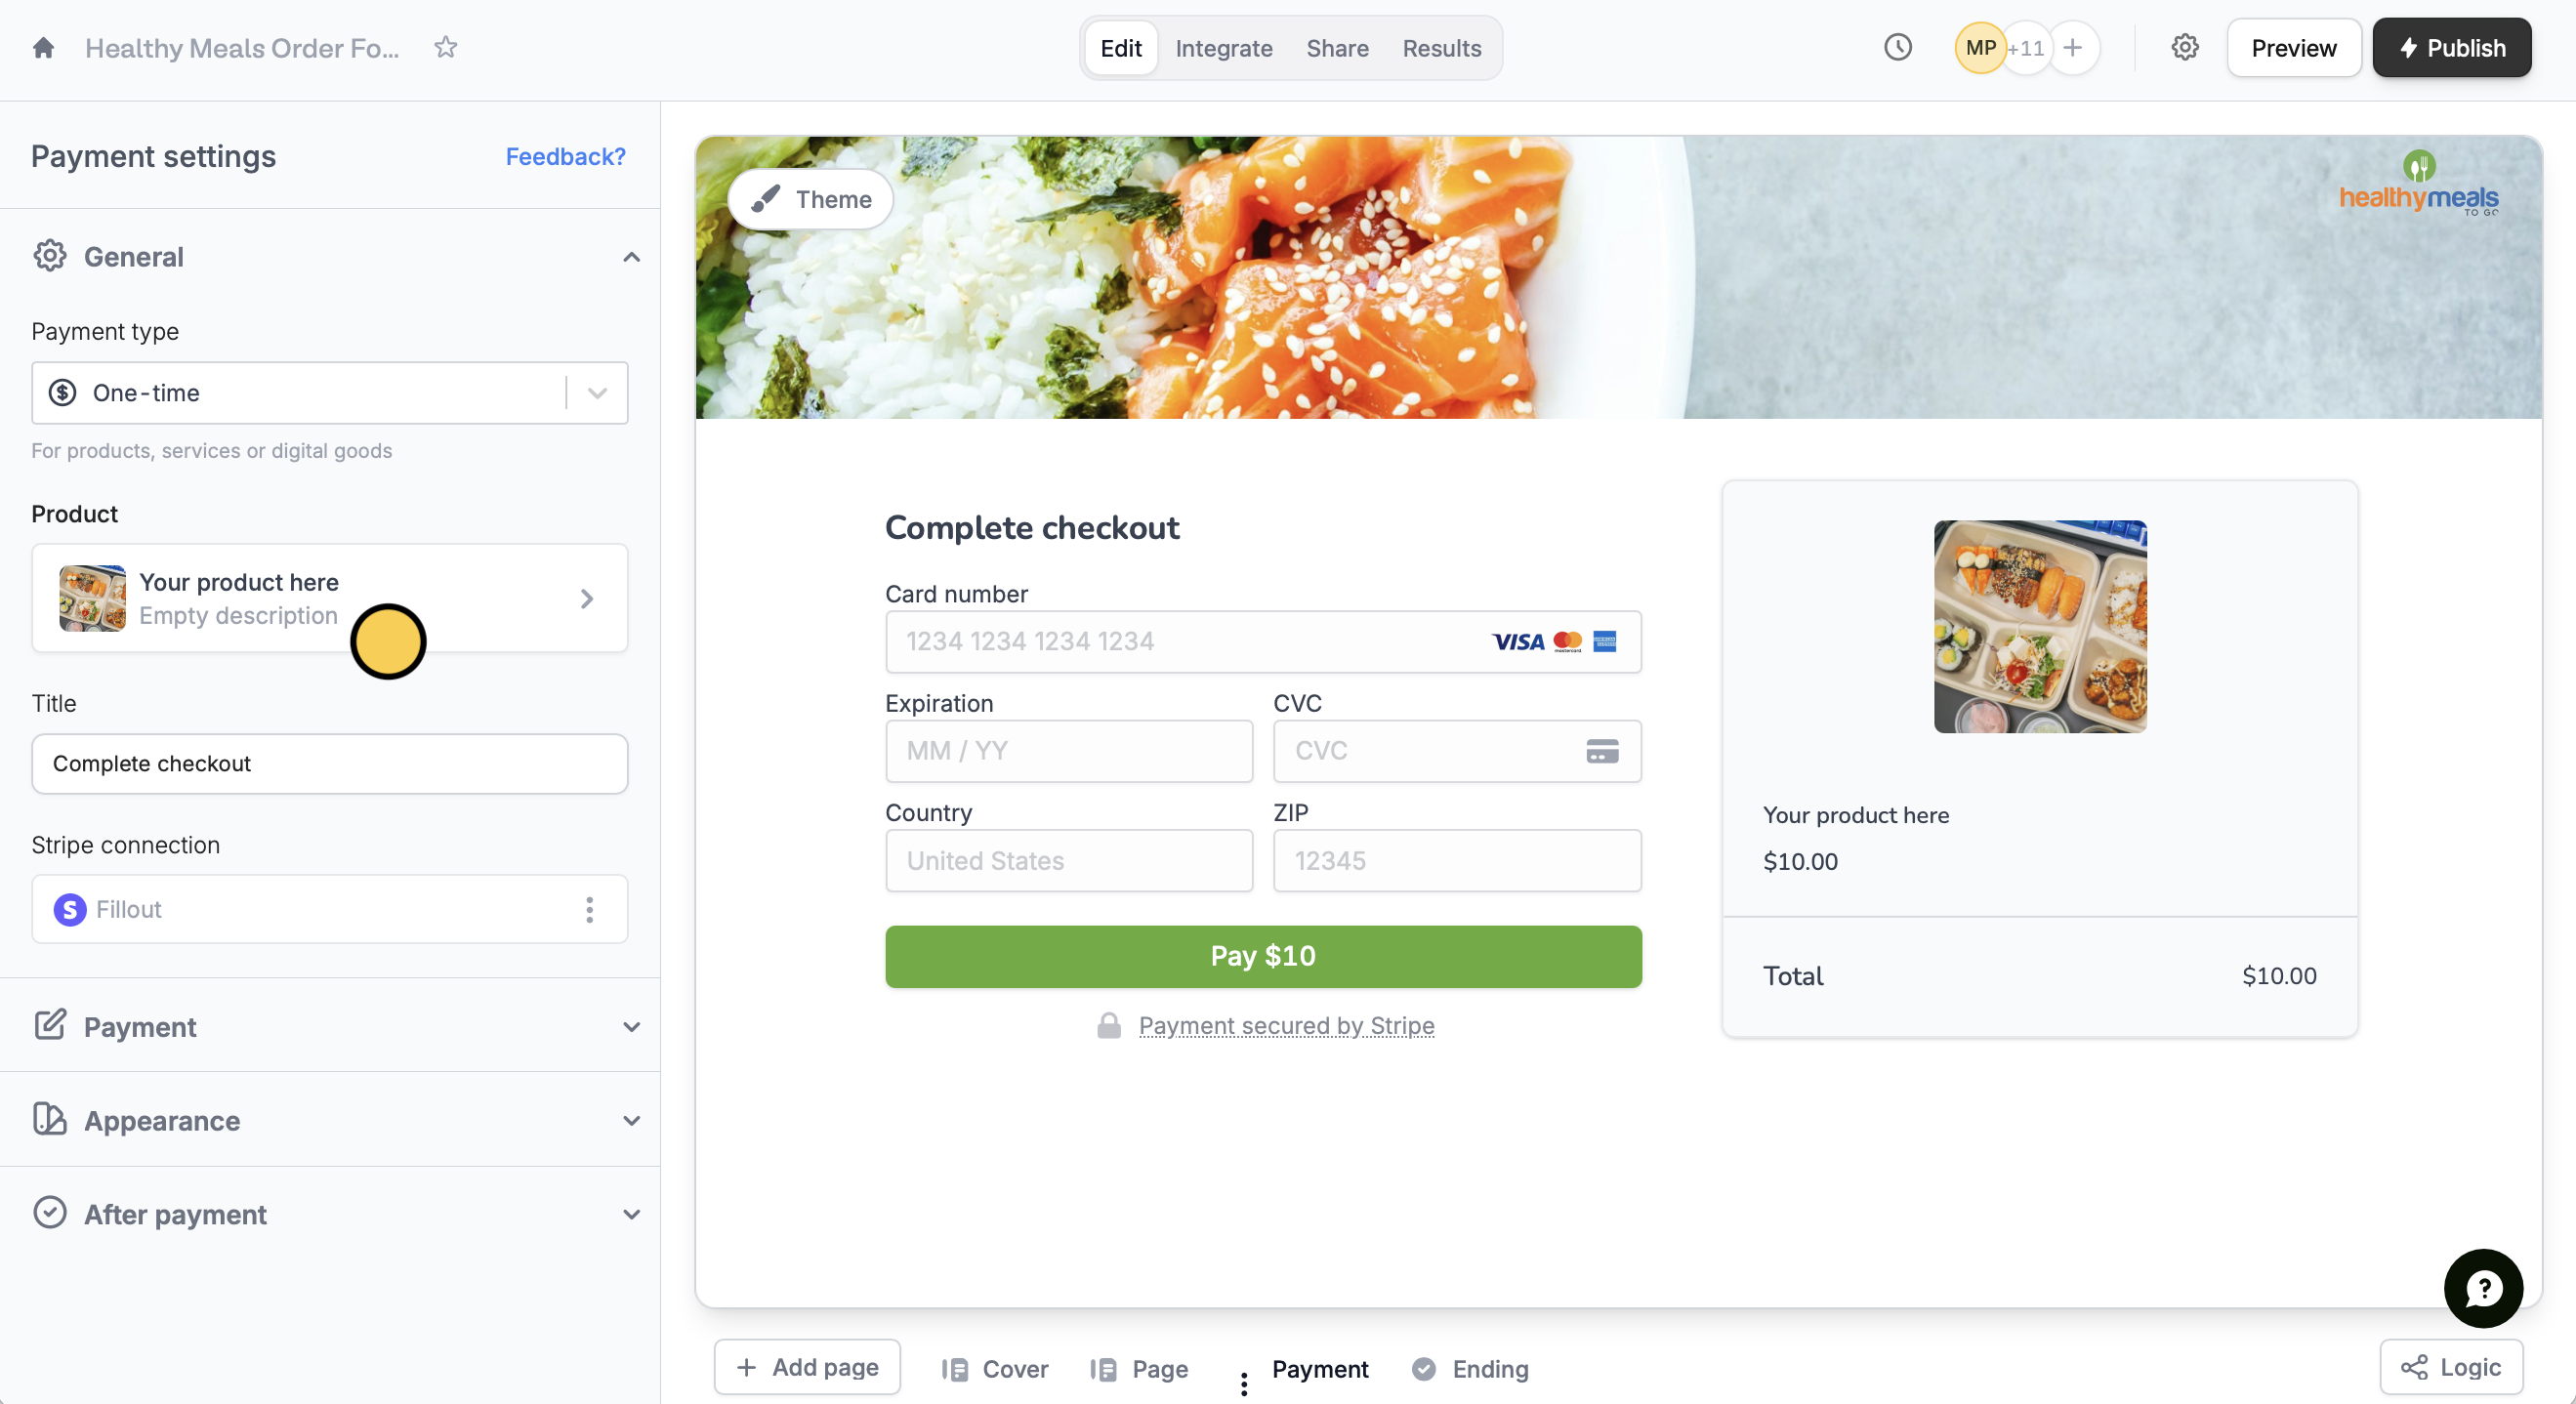
3. Update payment settings
Switch payment type, add discount codes, collect email, pre-fill fields, choose payment methods, and more through the left-hand panel settings. Check this article to learn more.
![notion image](/_next/image?url=https%3A%2F%2Fwww.notion.so%2Fimage%2Fhttps%253A%252F%252Fprod-files-secure.s3.us-west-2.amazonaws.com%252F2a7ed980-5add-4b51-82ab-889415f57134%252Fb5a9b0ab-ad1c-4086-a1f3-c9e05e803f31%252FScreenshot_2024-06-21_at_4.23.33_PM.png%3Ftable%3Dblock%26id%3D87a341ac-c285-419f-bc38-b0803635655d%26cache%3Dv2&w=1920&q=75)
Tip: You can toggle the test mode switch on the upper right side of your Stripe account to preview the payment form without needing to make a payment.
4. Connect the form to an Airtable
Go to Integrations in the top menu and click
Airtable
. Next, connect to your Airtable account and choose a base and table.![notion image](/_next/image?url=https%3A%2F%2Fwww.notion.so%2Fimage%2Fhttps%253A%252F%252Fprod-files-secure.s3.us-west-2.amazonaws.com%252F2a7ed980-5add-4b51-82ab-889415f57134%252F569f9dc6-1842-402c-9280-050a9df116f1%252FScreenshot_2024-06-21_at_4.23.47_PM.png%3Ftable%3Dblock%26id%3Da61baeaf-6b4e-4851-83f1-2fc84a721442%26cache%3Dv2&w=3840&q=75)
5. Map Airtable columns to form payment fields
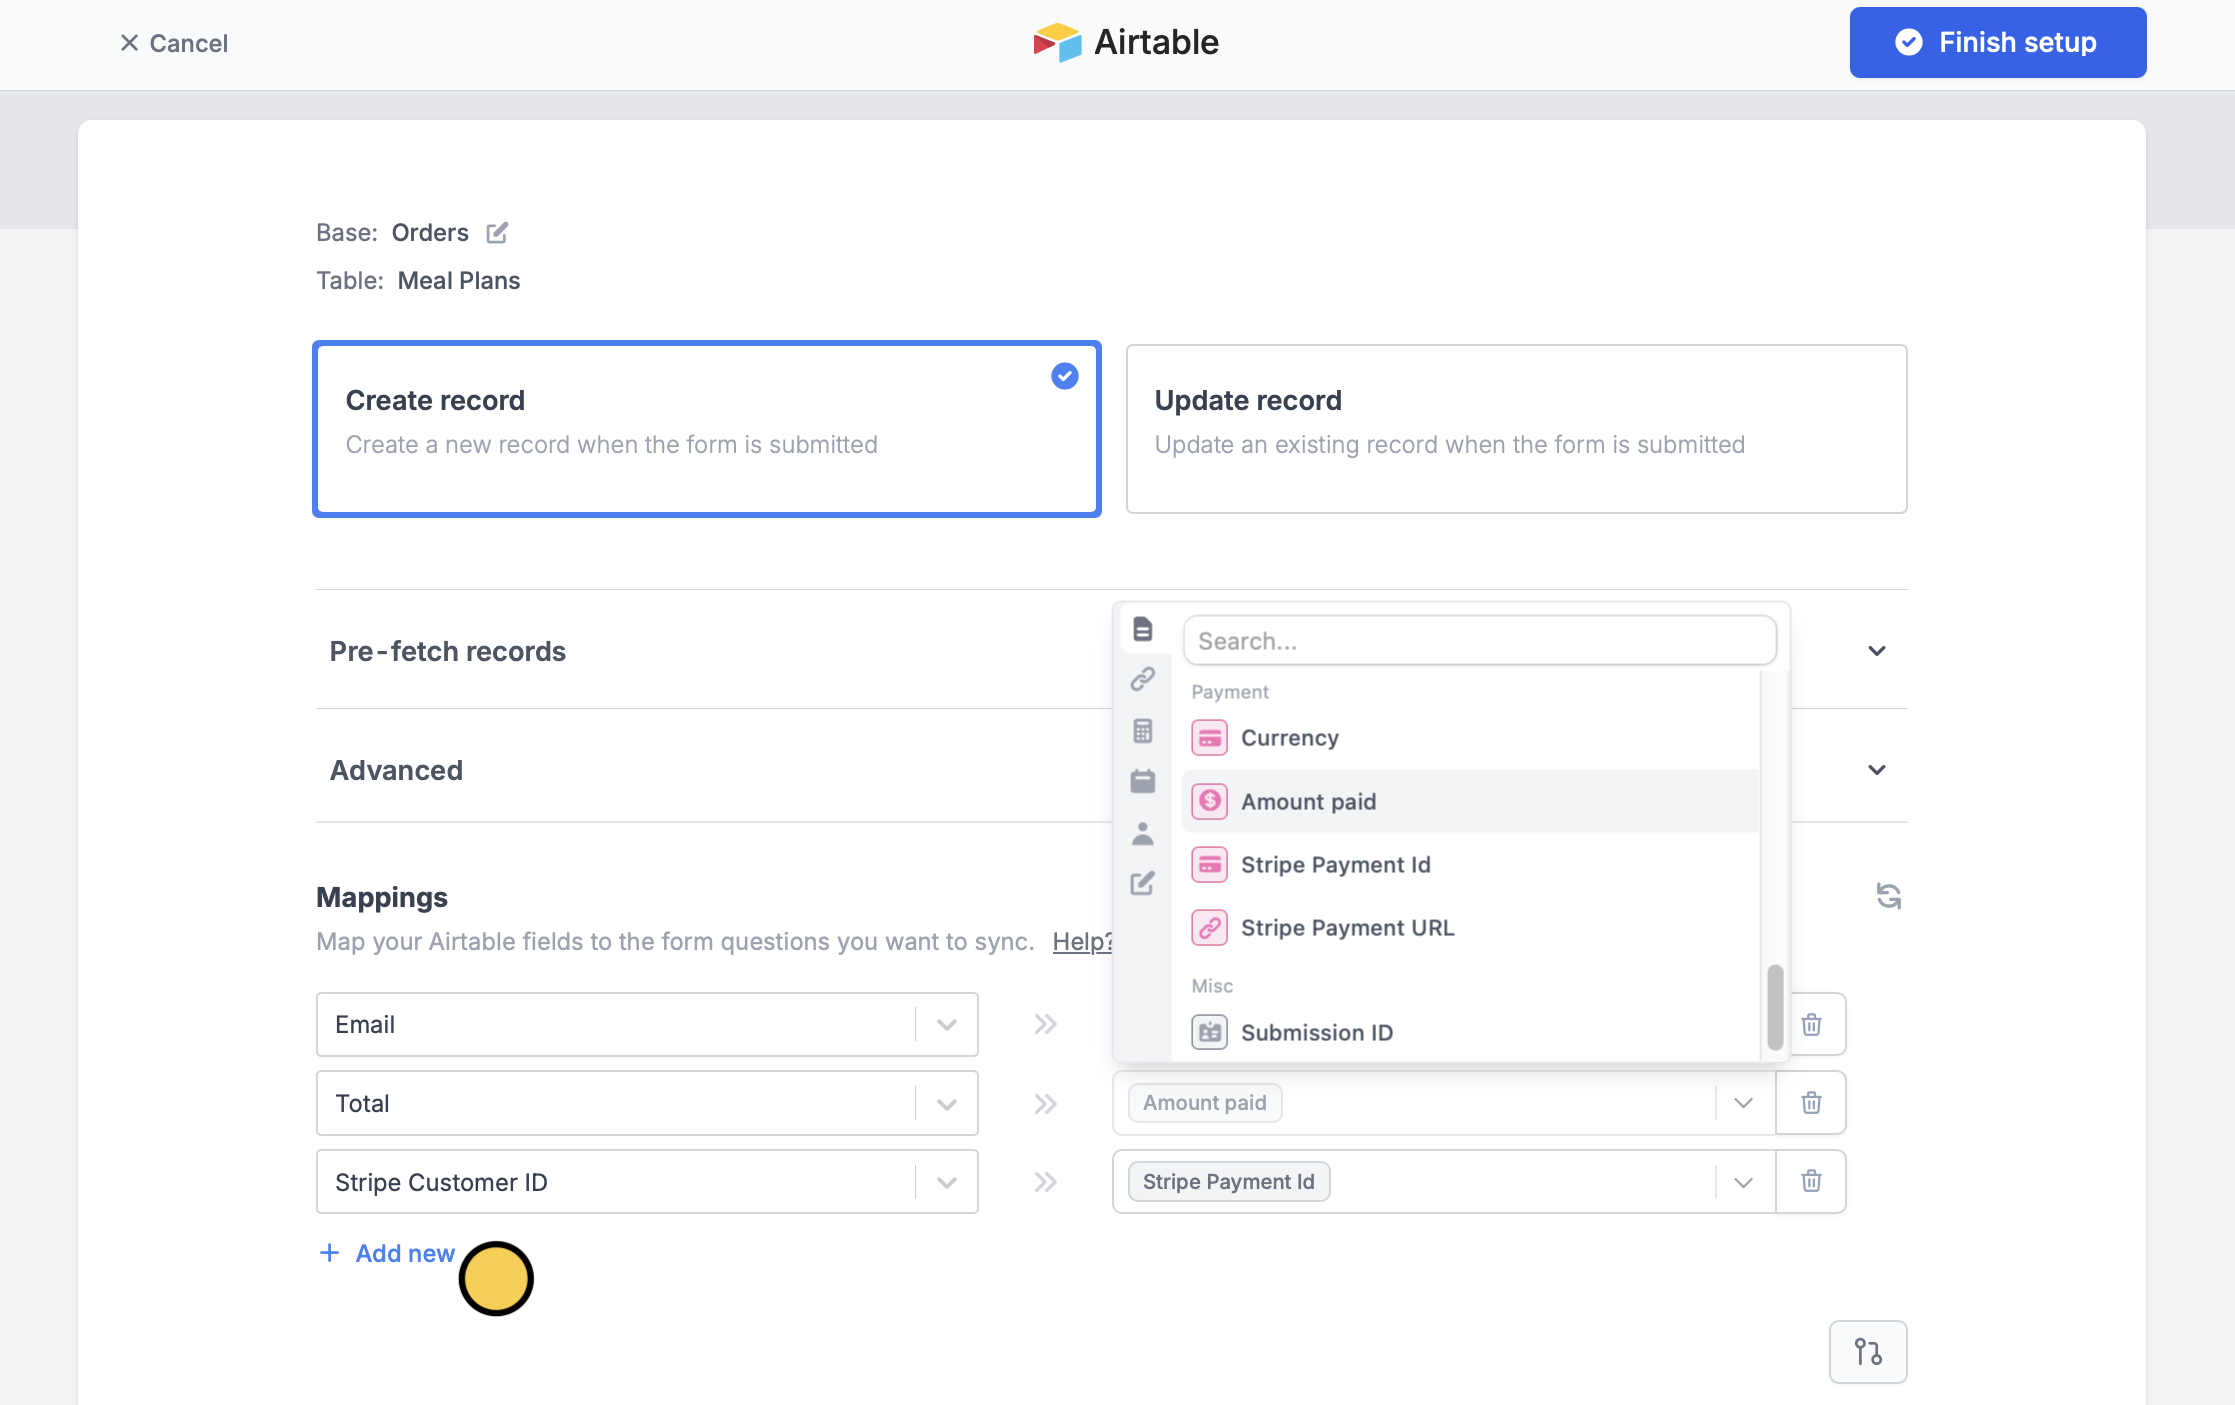
Under Mappings, click
+ Add new
. Then, click Pick reference
to check the payment fields. Go to your Airtable base, and create one column per payment field.![notion image](/_next/image?url=https%3A%2F%2Fwww.notion.so%2Fimage%2Fhttps%253A%252F%252Fprod-files-secure.s3.us-west-2.amazonaws.com%252F2a7ed980-5add-4b51-82ab-889415f57134%252F2f32a28b-93a6-4bac-a7a4-7d496d95f947%252FScreenshot_2024-06-21_at_4.29.33_PM.png%3Ftable%3Dblock%26id%3De12c7500-97f5-48ac-93a9-877cf6112234%26cache%3Dv2&w=3840&q=75)
Click
↺
or the refresh icon. Then reference your new Airtable columns to their corresponding payment field in Fillout.![notion image](/_next/image?url=https%3A%2F%2Fwww.notion.so%2Fimage%2Fhttps%253A%252F%252Fprod-files-secure.s3.us-west-2.amazonaws.com%252F2a7ed980-5add-4b51-82ab-889415f57134%252F9600bbd2-997d-4f2f-84b4-260c0053e379%252FScreenshot_2024-06-21_at_4.32.38_PM.png%3Ftable%3Dblock%26id%3Db0b3bf28-9def-49fb-9118-67f6606068b5%26cache%3Dv2&w=3840&q=75)
6. Publish and share your form
That’s it! Click
Publish
and share the link or embed it on your website. You’ll now get a new row filled out every time someone completes a purchase.