Overview
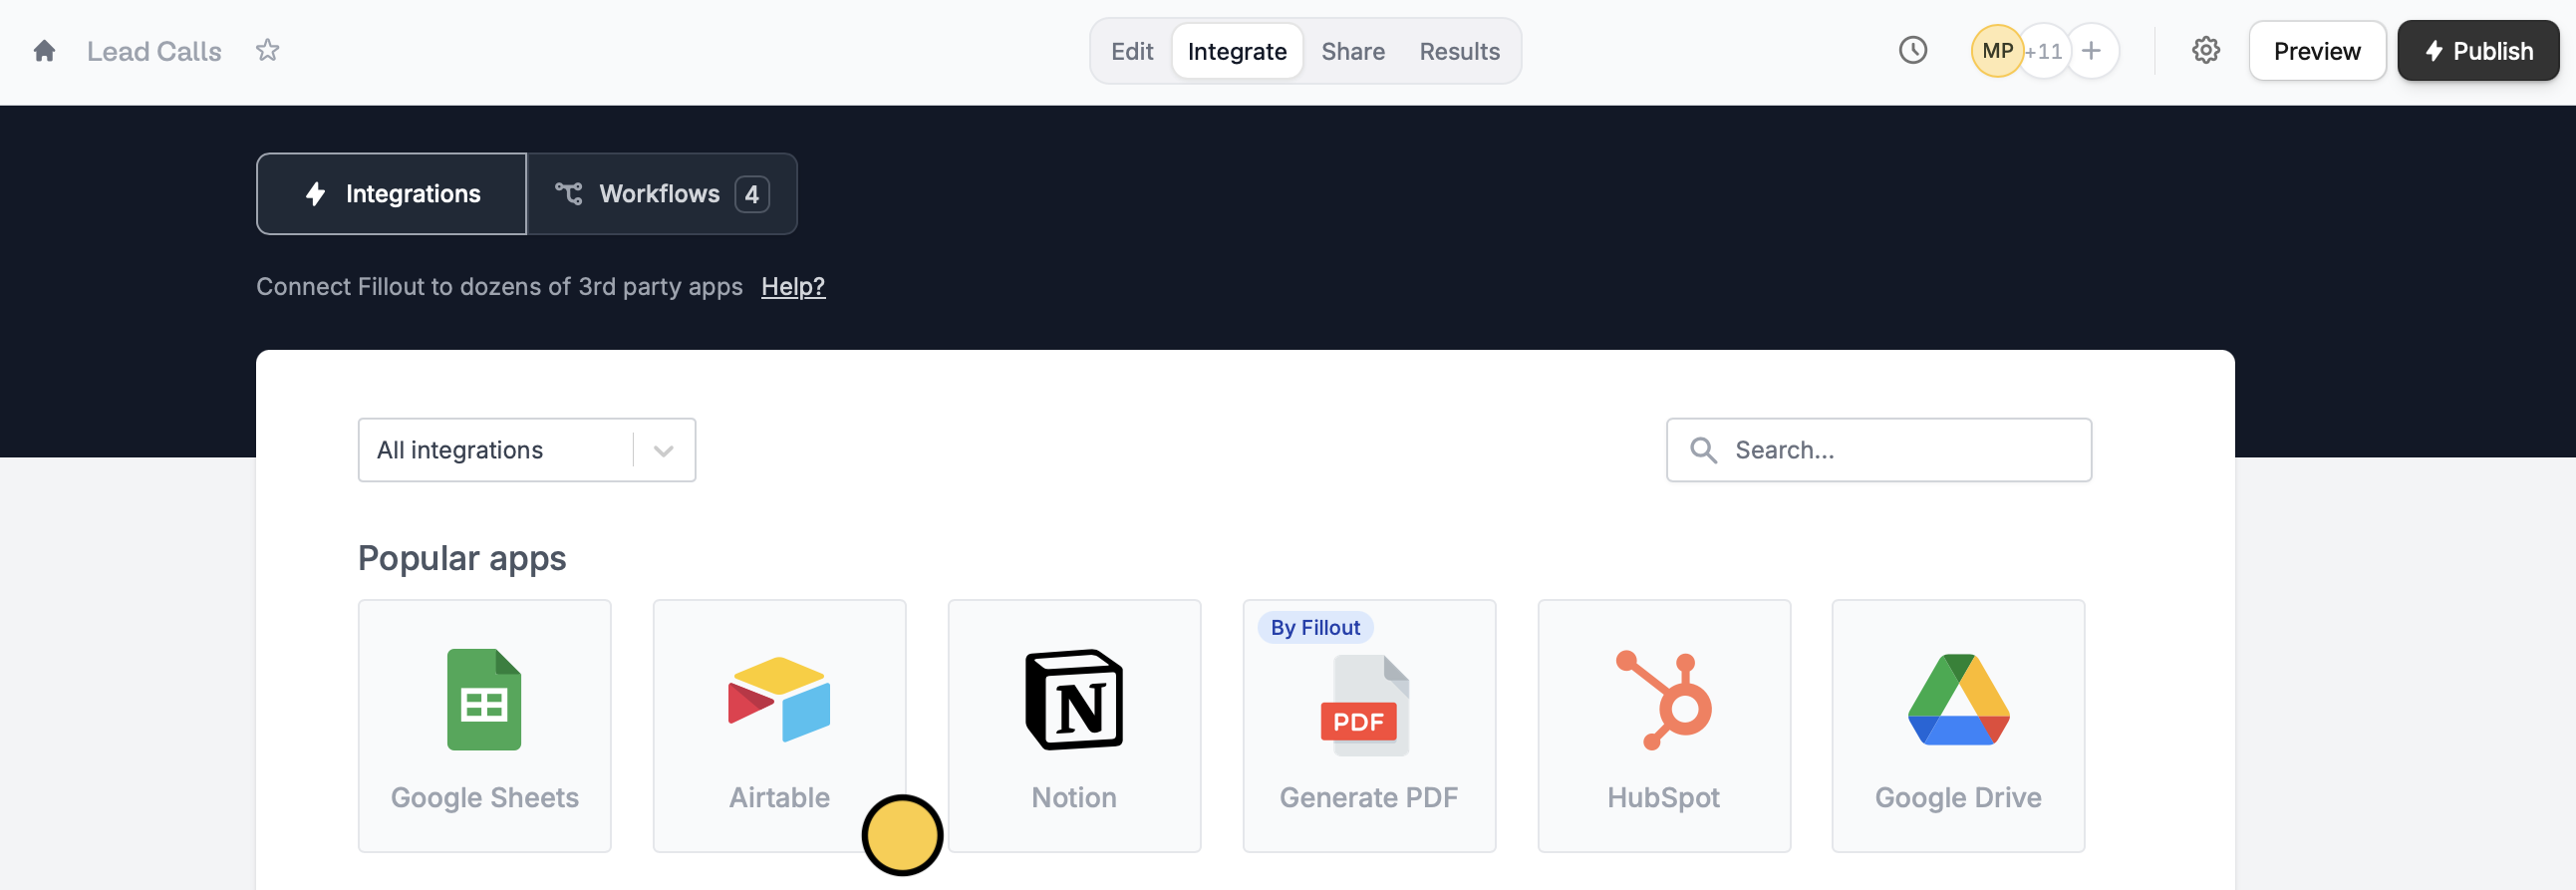
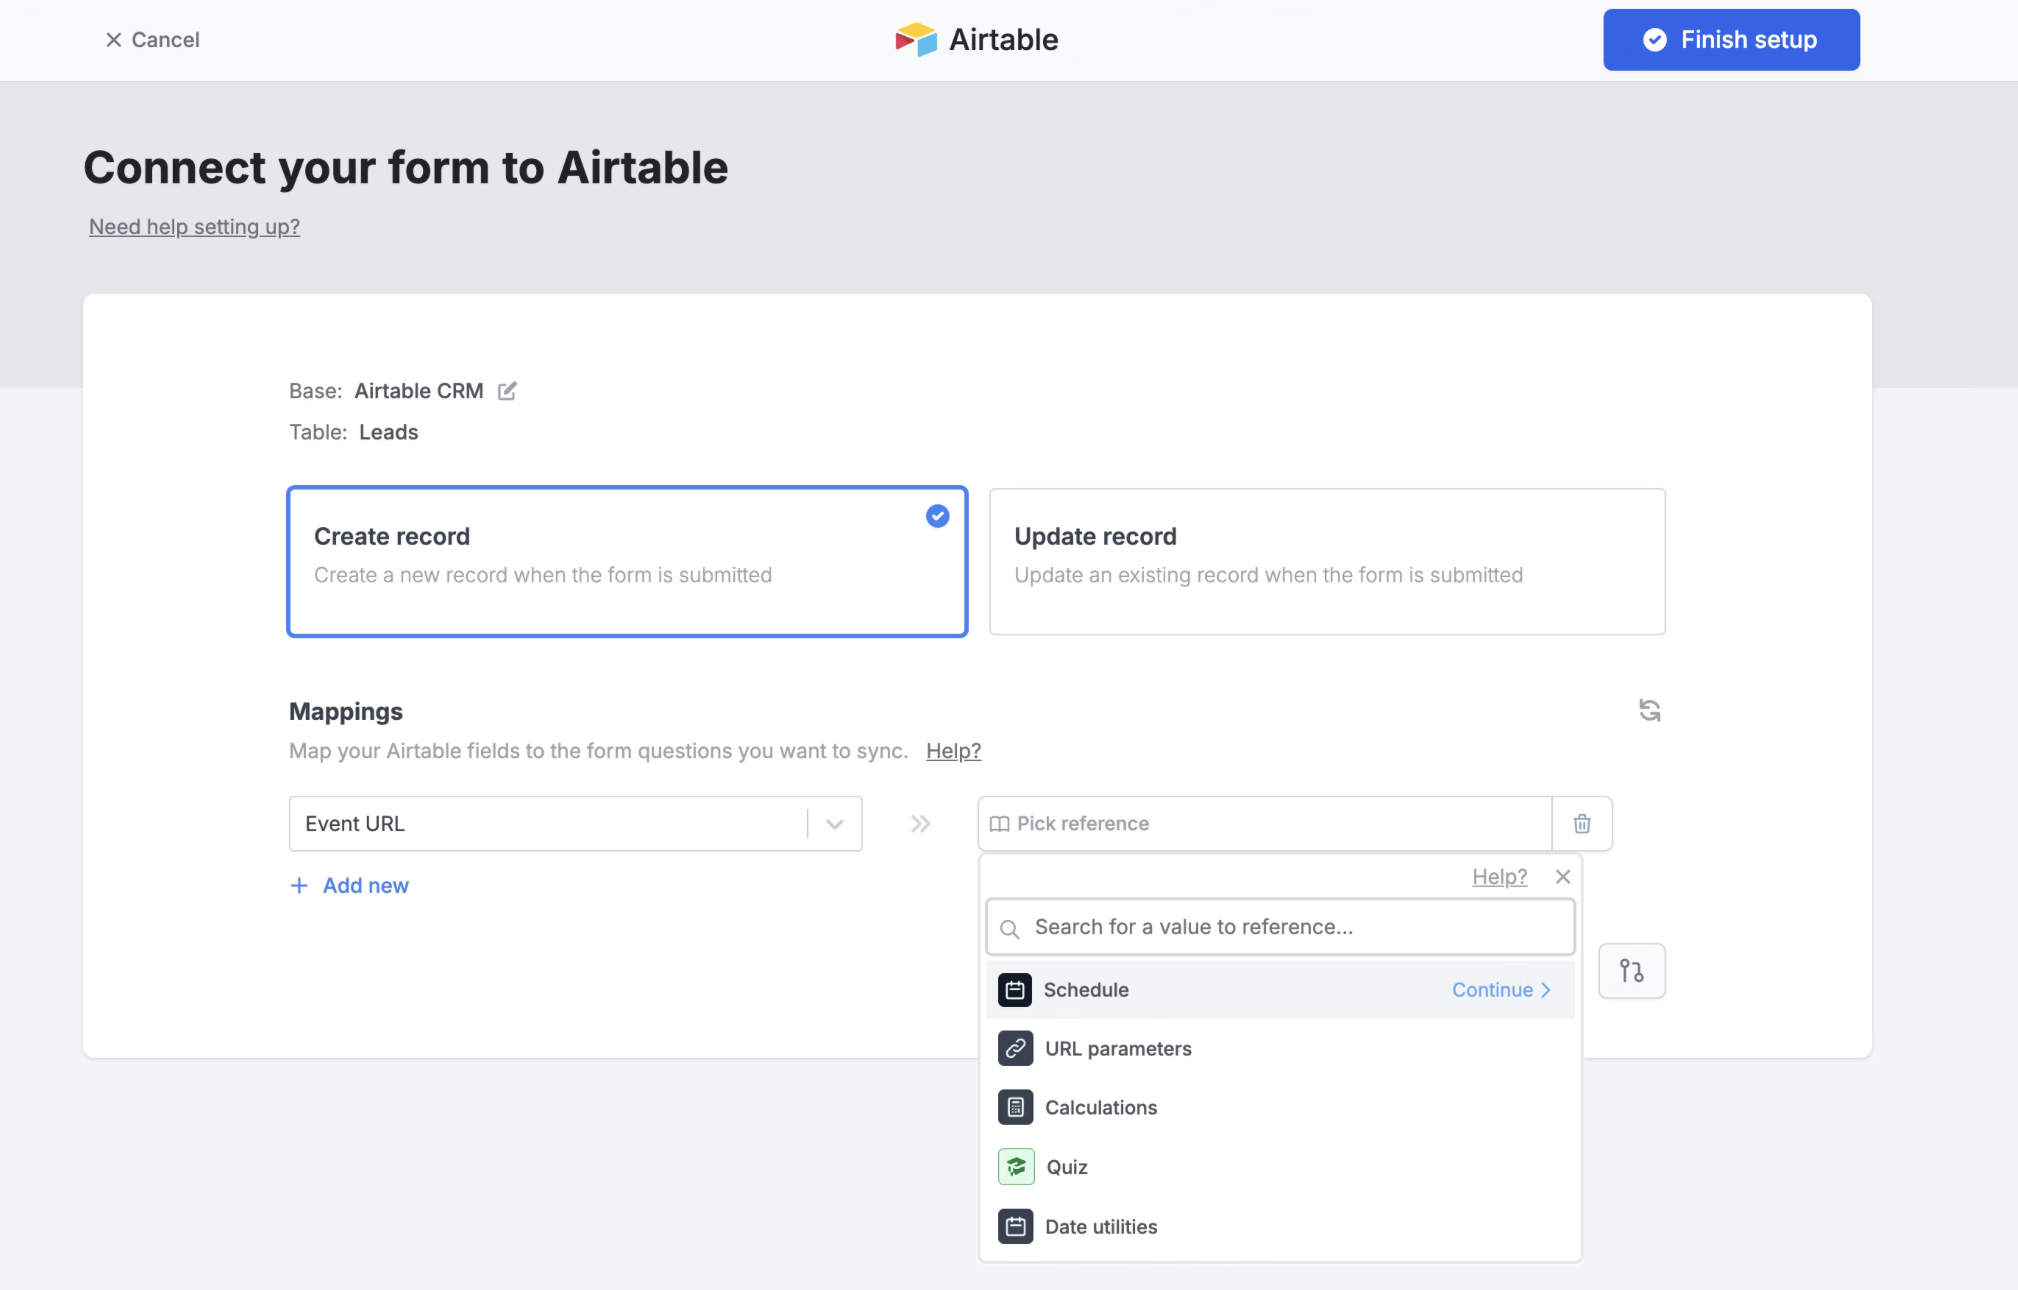
Create a free scheduling form that streamlines appointment booking process and sends all event details directly toAirtable. This guide explains how to set up a scheduling form, connect it to Google Calendar and integrate it with your Airtable bases.
How to set up
Create a free Scheduling Form
Create a Scheduling Form or add a scheduling page to an existing Fillout form. You’ll be prompted to connect your Google or Outlook Calendar and optionally connect Zoom, Teams, or Google Meet, as a meeting location.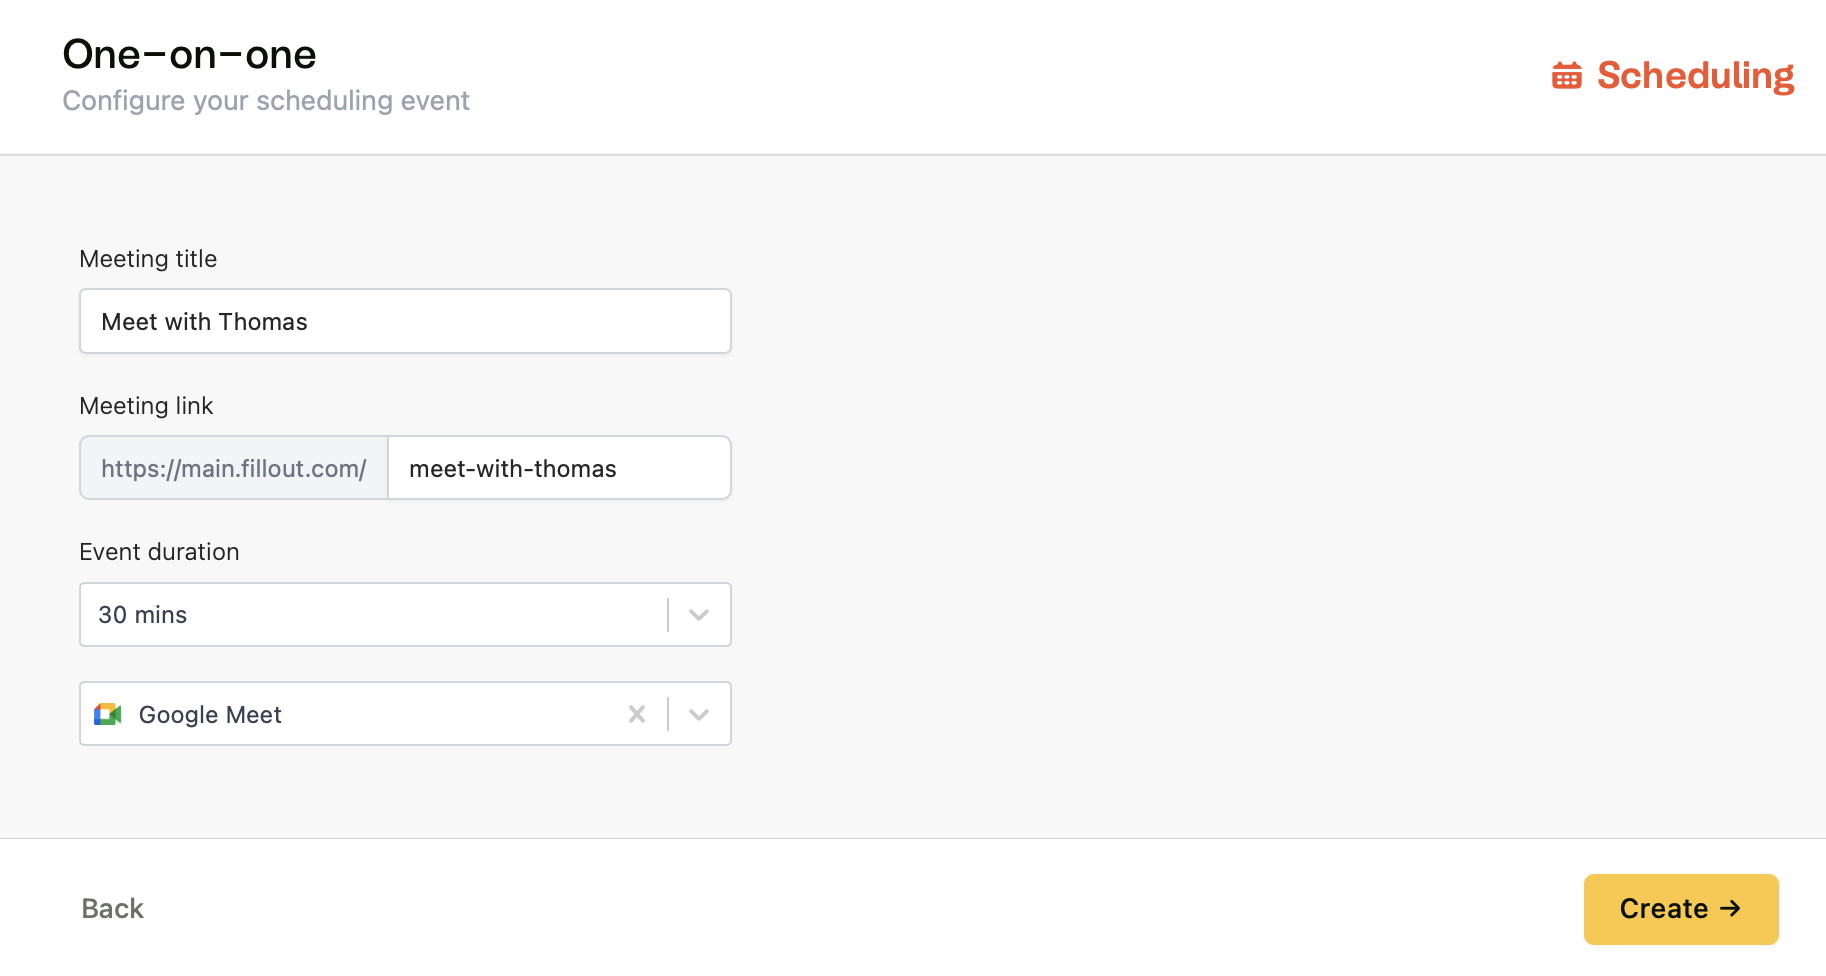
Related articles
Scheduling Form
Make a scheduling form with Fillout Scheduling for free.
Create an Airtable form
Use a form to create or update Airtable bases.
Set your availability
Specify your available hours and add multiple availabilities.